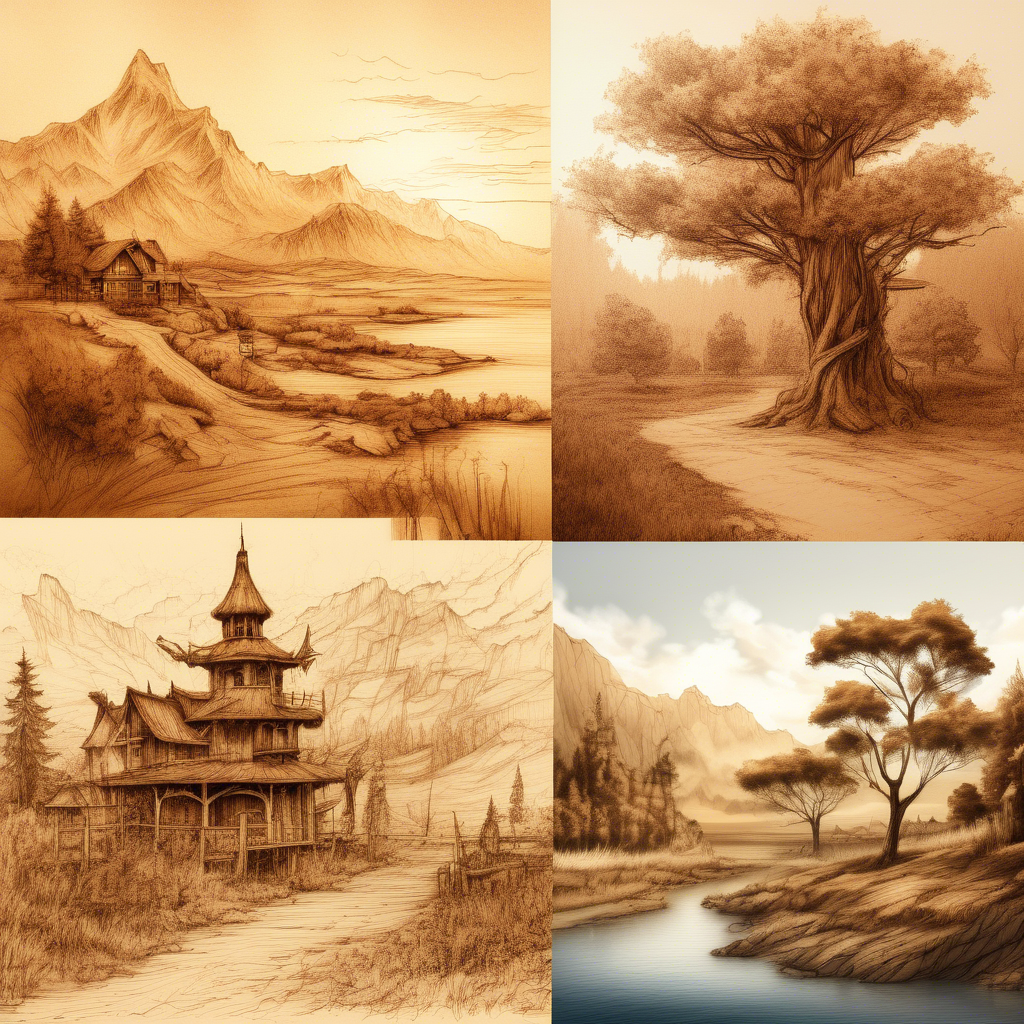
Top 5 Pyrography Techniques for Landscapes
For artists looking to enhance their pyrography skills, particularly when it comes to capturing the beauty of landscapes, mastering specific techniques is crucial. Here are five essential pyrography techniques that can elevate your landscape artwork, making it both intricate and visually stunning.
Understanding the Basics of Pyrography
Before diving into specific techniques, it’s important to understand the fundamental tools of pyrography. You’ll need a pyrography pen, different tips, and a suitable wooden surface. Each technique harnesses the capabilities of these tools differently, allowing you to create a diverse range of textures and effects within your landscape pieces.
1. Shading Techniques
Shading plays a vital role in creating depth and dimension in landscape pyrography. Utilize the following shading techniques for stunning effects:
- Cross-Hatching: This involves drawing parallel lines in multiple directions. Cross-hatching adds intricate detail and depth, simulating shadows and highlights in your landscape.
- Stippling: By applying small dots, you create a soft, gradual shading effect. This technique works brilliantly for elements like trees and clouds, giving them a natural appearance.
2. Texturing Techniques
Adding texture to your landscape can significantly enhance its realism. Here are two effective methods:
- Wood Grain Simulation: Emulate the texture of various natural elements by mimicking wood grain patterns. Using a fine tip, you can create various effects that resemble the rough texture of tree bark or the smoothness of water.
- Burning Lines: For elements like mountains or hills, try using long, sweeping strokes. This technique creates a sense of motion and is great for representing flowing landscapes.
3. Utilizing Contrast
Effective use of contrast will make your landscapes pop. Here’s how to create contrasting elements:
- Dark vs. Light: By intentionally contrasting dark burned areas with lighter, unburned wood, you create a striking visual effect. Use this technique when depicting night skies or dramatic lighting in your artwork.
- Layering: Burn multiple layers on top of one another to deepen shadows. This allows you to achieve rich, textured areas like dense forests or rocky terrains.
4. Color
While pyrography is traditionally a monochromatic medium, incorporating color can breathe life into your landscapes. Consider these methods for adding color:
- Wood Stains: After you complete your pyrography work, use wood stains to add subtle hues. This can enhance the wood’s natural beauty while adding a layer of color that complements the burned elements.
- Colored Pencils: A layer of colored pencil on your pyrography can introduce vibrant details. This technique works especially well for flowers or foliage, giving them an extra pop of life.
5. Layering Technique for Depth
Layering is a powerful technique that can transform your landscapes. It involves burning elements in layers to create a well-defined sense of depth:
- Foreground, Midground, Background: Burn different elements based on their distance from the viewer. For instance, sharper, more defined burn marks can be used for foreground objects, while softer, more faded burns work well for background elements. This technique effectively leads the viewer’s eye through the artwork.
- Atmospheric Perspective: Create a sense of distance by using lighter burns for elements further away, mimicking how landscapes appear in the distance due to atmospheric conditions.
Exploring these five pyrography techniques will not only improve your landscape art but also enhance your overall skills in this fascinating medium. Don’t be afraid to experiment with these methods and develop your unique style, blending your creativity with these essential techniques to create breathtaking pyrographic landscapes. Happy burning!
The Importance of Texture in Landscape Pyrography
Texture plays a crucial role in enhancing the beauty and depth of landscape pyrography. By creating intricate and tactile surfaces, artists can evoke movement, emotion, and realism in their woodburned creations. As pyrography relies on the interplay of light and shadow, employing various textural techniques allows artists to bring landscapes to life.
One of the most effective methods for adding texture is through shading techniques. This involves using different burn depths and patterns to simulate elements like trees, mountains, or skies. By varying the pressure and speed of the pyrography tool, artists can create soft gradients and hard contrasts. This adds dimensionality to objects and draws the viewer’s eye, thus enriching the overall composition. For example, a series of light strokes can produce a soft cloud effect, while heavier, more deliberate lines can render the ruggedness of a rocky cliff.
Another important approach to enhance texture is layering. Layering involves building multiple burn levels on top of one another. Each layer contributes to the overall texture while also creating richness in color and detail. This technique is especially potent when representing foliage in a dense forest scene. By layering various shades of green, yellow, and brown, artists can create a sense of depth and perspective that invites viewers to explore the artwork more closely.
In addition to simple shading and layering, stippling can also elevate texture in landscape pyrography. This technique involves making small dots or marks to create gradients and textures. It can mimic the appearance of sand on a beach, the roughness of tree bark, or the delicate nuances of a flowing river. Stippling is an excellent choice for artists looking to add intricate details that come alive with closer inspection, thus captivating the audience and inviting them to examine the nuances of the work.
Texture can also be enhanced through the use of various pyrography tools. Different tips on the pyrography pen can yield different effects. For instance, a shader tip is perfect for creating broad surfaces with soft transitions, while a fine-point tip excels at achieving sharp lines and details. Experimenting with these tools allows the artist to discover which combinations create the most satisfying textures for different elements in their landscape. Using a variety of tips can help break the monotony and make the artwork feel multidimensional.
The positioning and perspective of the elements in landscape pyrography greatly influence the perception of texture as well. Foreground details, for instance, can be heavily textured to draw attention, while giving the background a softer touch allows the composition to maintain a sense of depth. This balance prevents the artwork from feeling flat, enhancing the viewer’s experience by guiding their eyes through the piece. Merging these techniques—shading, layering, stippling, tool variation, and deliberate composition—creates a complete textural landscape that feels dynamic and engaging.
- Shading: Use varying burn depths to create dimensional effects.
- Layering: Build multiple burn levels for richness and depth.
- Stippling: Apply small dots for intricate textures and details.
- Tool Variation: Experiment with different pyrography tips for diverse textures.
- Composition: Balance foreground and background to enhance depth perception.
Color also plays an essential role in how texture is perceived. Although pyrography traditionally utilizes wood’s natural colors, adding a wash of color through techniques like acrylics or watercolor can enhance texture effectively. When colors are applied, they interact with the burnt surfaces, highlighting the textural elements. The interplay between texture and color invites the viewer to explore the artwork and experience it in more depth.
Understanding how light interacts with texture is fundamental. Textured areas will reflect light differently depending on their shape and orientation. Knowing how to manipulate this interplay allows artists to guide viewers’ attention and create focal points within the artwork. For instance, a textured sunlit meadow can draw the eye and evoke feelings of warmth and tranquility.
In landscape pyrography, texture serves as a bridge between the viewer and the artwork. It invites connection and engagement, offering a tactile experience that transforms a simple image into a story. Mastering these techniques can elevate an artist’s work, making their landscapes not just seen, but felt. Embracing texture in creation ultimately enriches the art form, fostering appreciation for the beauty of nature captured in wood.
Color Theory and Its Influence on Pyrography Art
Color theory plays a significant role in the realm of pyrography, influencing how artists portray their subjects and evoke emotions. Understanding how colors interact can elevate the quality of pyrographic works, making them more engaging and visually appealing.
Pyrography, or wood burning, involves creating designs by burning marks onto a surface, usually wood. While the primary medium is monochromatic, integrating color can transform a simple piece into a stunning visual narrative. Here’s a breakdown of essential aspects of color theory that can enhance pyrography art.
Understanding Color Basics
Colors can be categorized into three basic types that any pyrography artist should know:
- Primary Colors: Red, blue, and yellow are considered primary colors. They cannot be formed by mixing other colors and serve as the foundation for all other colors.
- Secondary Colors: These are formed by mixing two primary colors. For instance, red and yellow create orange, blue and yellow make green, while red and blue produce purple.
- Tertiary Colors: These result from mixing a primary color with a secondary color, such as red-orange or blue-green.
Grasping these basics will help artists mix colors effectively and understand color relationships, which are crucial in pyrography.
The Color Wheel and Its Application
The color wheel is a visual representation of colors arranged according to their relationships. It serves as a fantastic tool for pyrographers to choose harmonious color schemes. By understanding the color wheel, artists can select colors that complement each other.
- Complementary Colors: Colors opposite each other on the wheel, like blue and orange, create contrast and draw attention.
- Analogous Colors: These are colors next to each other, such as blue, blue-green, and green, which provide a serene and cohesive look.
- Triadic Colors: This involves using three colors evenly spaced on the wheel, such as red, yellow, and blue, to create a vibrant composition.
Utilizing these color combinations in pyrography can enhance depth and dimension, making the artwork more compelling.
The Role of Warm and Cool Colors
Another essential aspect of color theory in pyrography is the distinction between warm and cool colors:
- Warm Colors: Reds, oranges, and yellows evoke energy and warmth, often grabbing attention and creating a sense of excitement.
- Cool Colors: Blues, greens, and purples are calming and soothing, inducing feelings of tranquility and peace.
When creating landscape pieces, for example, the choice between warm and cool colors can dramatically alter the mood and message of the artwork.
Impact of Color on Mood and Emotion
Colors can evoke specific emotions and set the tone for a piece of art. Pyrographers can harness this power by thoughtfully selecting colors to reflect the desired emotional landscape:
- Red: Passion, love, and energy.
- Blue: Calmness, sadness, and serenity.
- Yellow: Happiness and optimism.
- Green: Nature, growth, and balance.
- Purple: Luxury, creativity, and mystery.
These colors into pyrographic works can significantly influence the viewer’s emotional response.
Experimentation with Color in Pyrography
Ultimately, the best way to understand and utilize color theory in pyrography is through experimentation. Every artist has a unique style, so trying different combinations, techniques, and materials can lead to stunning results. For those eager to expand their skills:
- Start with small samples, testing various color applications.
- Experiment with layering colors or using different burning techniques to achieve varied effects.
- Study the works of other artists to see how they apply color successfully.
By delving into color theory and its impact on pyrography, artists can bring their visions to life in more vibrant and expressive ways, making their creations stand out in both beauty and emotional resonance.
Essential Tools for Landscape Pyrography: A Beginner’s Guide
For those embarking on the artistic journey of landscape pyrography, having the right tools is essential to your success and enjoyment. Pyrography, the art of decorating wood or other materials with burn marks from a heated object, offers a beautiful way to depict natural scenes. Understanding the essential tools not only prepares you for the task at hand but also enhances your creative process. Here’s a guide to help beginners get started with landscape pyrography.
Pyrography Pen
Your primary tool will be the pyrography pen, which comes in various styles and features. A versatile pen allows you to alter the tip’s temperature for different effects. It may help to look for a pen that comes with interchangeable tips, letting you experiment and find the ones best suited for your artistic style. Here are a few types to consider:
- Standard Pen: Ideal for basic line work and shading.
- Detailed Tip: Great for intricate designs and fine details.
- Shading Tip: Perfect for creating depth and texture in landscapes.
Wood Burning Tips
The tips of your pyrography pen are crucial for achieving various effects. Selecting the right tip can transform your landscape art. Consider investing in a range of tips suitable for different aspects of landscape foliage, textures, and atmospheric elements:
- Ball Tip: Useful for dots and highlights.
- Flat Tip: Works well for broad strokes and shading.
- Shader Tip: Ideal for soft gradients and shadowing effects.
Wood Selection
Your choice of wood plays a massive role in the outcome of your pyrography. Here are some popular wood types for landscape pyrography:
- Basswood: Smooth and easy to work with, great for beginners.
- Birch: Offers a fine grain, providing a beautiful finish.
- Pine: Affordable and readily available, providing a rustic look.
Each wood type absorbs heat differently, affecting how well your design shows up, so it’s essential to experiment with various options to find what works for you.
Safety Gear
Safety is paramount when working with heated tools. Ensure you have these safety essentials:
- Heat-Resistant Gloves: Protect your hands from burns.
- Safety Glasses: Shield your eyes from smoke and particles.
- Mask: Wearing a mask can help avoid inhaling smoke from burning wood.
Taking precautions allows you to focus on your art without worrying about injuries or health hazards.
Surface Preparation Tools
Preparing your wood surface is a crucial step before you begin burning. A clean and finely sanded surface will help achieve the best results. Keep these tools on hand:
- Sanding Blocks: Use varying grits to achieve a smooth finish.
- Pencil: Lightly sketch your design before burning to guide your work.
- Cloth: Wipe dust and debris away for a clean surface.
Additional Supplies
While the primary tools are essential, some additional supplies can enhance your pyrography experience:
- Transfer Paper: Use this to transfer designs onto your workpiece easily.
- Finish Sealants: Apply these to protect your finished piece and enhance colors.
- Wood Stains or Finishers: These can add depth and vibrancy after completing your artwork.
By gathering these essential tools, you’re setting the stage for incredible artistic creations. Landscape pyrography requires patience and practice, and having the right equipment is crucial to developing your skills. As you create breathtaking scenes, remember to take your time, enjoy the process, and let your imagination blend naturally with your materials.
How to Choose the Right Wood for Pyrography Landscapes
Choosing the right wood for pyrography landscapes is crucial for achieving stunning results. The type of wood not only affects the ease of burning but also influences the overall appearance of your artwork. Here’s a comprehensive guide to help you navigate your options effectively.
Consider the Wood Grain
The grain of the wood plays a significant role in pyrography. A pronounced grain can enhance the texture of your landscape, adding depth and character to your piece. Here are some wood types to consider based on their grain:
- Basswood: Known for its fine, even grain, it’s perfect for beginners. Basswood provides a smooth surface that holds detail effectively without burning too deeply.
- Pine: This wood features a more pronounced grain, which can add a rustic charm to your landscapes. However, the softer sections may absorb heat differently, so care is needed.
- Birch: Birch offers a smoother surface and is relatively easy to burn. The grain is subtle, allowing for delicate designs that enhance the overall effect of your landscape.
- Mahogany: Rich in color, mahogany can make landscapes stand out. Its interlocking grain creates beautiful patterns, but it may require more advanced techniques to master.
Evaluate the Wood’s Hardness
Hardness is another essential factor to consider. Softer woods burn easily but can also scorch quickly, while harder woods provide greater durability and detail retention. Remember:
- Softer Woods: Easier to burn, ideal for quick sketches or for those just starting out.
- Harder Woods: Require more pressure and time to burn, but they offer a lasting finish with deeper impressions.
Check for Contaminants
Before you start working on your pyrography landscape, check that your wood is free from contaminants. Residues from varnishes, oils, or even new finishes can interfere with the burning process. Always opt for untreated or unfinished pieces. If you’re buying pre-cut wood, inquire about its treatment.
Understand Wood Thickness
The thickness of the wood can drastically influence your pyrography experience. Thinner pieces are easier to handle and more forgiving for beginners, while thicker boards allow for more intricate designs and longevity. When selecting your wood, consider:
- Thin Wood (1/8″ to 1/4″): Great for practice and smaller projects. It heats up quickly, which can be an advantage.
- Medium Wood (1/4″ to 1/2″): Offers a balance between ease of use and depth of design. Perfect for most landscape artworks.
- Thick Wood (1/2″ and above): Ideal for larger pieces but requires more skill and patience due to longer heating times.
Consider the Finish
The finish of the wood surface will both alter the appearance of your pyrography and impact the burning technique. Smoothly sanded pieces allow for clean, crisp designs. Here’s what to keep in mind:
- Untreated or Natural Finish: This is the best choice for pyrography, providing a true representation of the burn color and texture.
- Pre-Sanded or Smooth Finish: While this can be convenient, it’s important to ensure there are no additional coatings that might interfere with the burning process.
Environmentally Friendly Options
Consider sustainability in your choice of wood. Look for environmentally friendly sources, such as reclaimed wood or certified sustainable options. This approach not only supports eco-friendly practices but often provides unique textures and colors that can enhance your pyrography landscapes.
By carefully selecting the right wood, you set the foundation for your pyrography landscapes. Each wood type, grain, and finish can dramatically influence the final piece. Armed with this information, you’ll be better prepared to make choices that elevate your art to the next level, allowing your creative vision to truly shine.
Conclusion
Creating breathtaking landscapes through pyrography is both an art and a skill that evolves with practice, making it an exciting journey for enthusiasts at all levels. As we’ve explored the top five pyrography techniques specifically tailored for landscapes, it becomes clear how these methods can elevate your work into captivating pieces of art. Each technique not only highlights your creativity but also enhances the visual appeal of your artwork by effectively capturing the essence of nature.
The importance of texture in landscape pyrography cannot be overstated. Different textures can evoke various emotions and sensations, drawing viewers into the scene. Whether you’re depicting a serene lake or a rugged mountain range, mastering texture will allow you to breathe life into your woodburning pieces. Techniques such as cross-hatching, stippling, and shading create depth, enabling your artwork to resonate more significantly with those who behold it. varied textures helps the viewer engage with your piece on a deeper level, transforming a simple illustration into an immersive experience.
Color theory plays a crucial role in pyrography as well. Although pyrography primarily involves monochromatic designs, understanding color theory allows artists to choose complementary hues when adding color to their work. This knowledge transforms a basic landscape into a vibrant masterpiece. While you might burn designs in shades of brown or black, the consideration of color can create focal points and harmonize your composition. By skillfully utilizing color combinations, you can evoke feelings ranging from tranquility to excitement, guiding the viewer’s emotional experience.
For beginners stepping into the world of landscape pyrography, familiarizing yourself with essential tools makes the process smoother and more enjoyable. From choosing the right pyrography pen to identifying various tips that produce distinct effects, having the right equipment is vital. A woodburning pen with adjustable temperature settings allows for greater versatility, enabling you to experiment with different techniques. Don’t forget to invest in high-quality wood like basswood or birch, which holds up remarkably well during the burning process and stands the test of time beautifully.
Choosing the right wood for your landscape pyrography profoundly influences your final product. Each type of wood bears unique characteristics, affecting how the pyrographic art appears. Softer woods such as pine or basswood allow for easier burning and detailed designs, while harder woods may require more pressure and could produce a bolder finish. By understanding the implications of your wood choice, you can tailor your approach according to the desired outcome. Always remember to test your pen on scrap pieces of the wood you intend to use; this will help you familiarize yourself with its burning properties and allow you to visualize how your artwork will ultimately turn out.
As you continue to explore and refine your pyrography skills, keep pushing the boundaries of creativity within your landscape compositions. Without a doubt, each artist’s journey is unique, filled with personal discoveries. Embrace mistakes as opportunities to learn and grow while cultivating your distinct artistic voice. With time, patience, and perseverance, you will not only master the techniques but also develop your signature style that beautifully expresses your interpretation of the natural world.
Ultimately, whether you’re focusing on technique, tools, or the choice of wood, every aspect plays a role in your artistic journey. The combination of texture, understanding color theory, and having the right tools at your disposal enhances your ability to create stunning landscapes that captivate audiences. So gather your materials, set aside some dedicated time for exploration, and let your creativity flow. Each stroke of the pyrography pen is a step toward producing dynamic, intricate landscapes that celebrate the breathtaking beauty of nature while showcasing your unique artistry. With dedication and passion, you can transform simple pieces of wood into striking landscapes that leave a lasting impression on viewers. Enjoy every moment of this creative adventure, and remember that the possibilities are as vast as the landscapes you aim to depict.