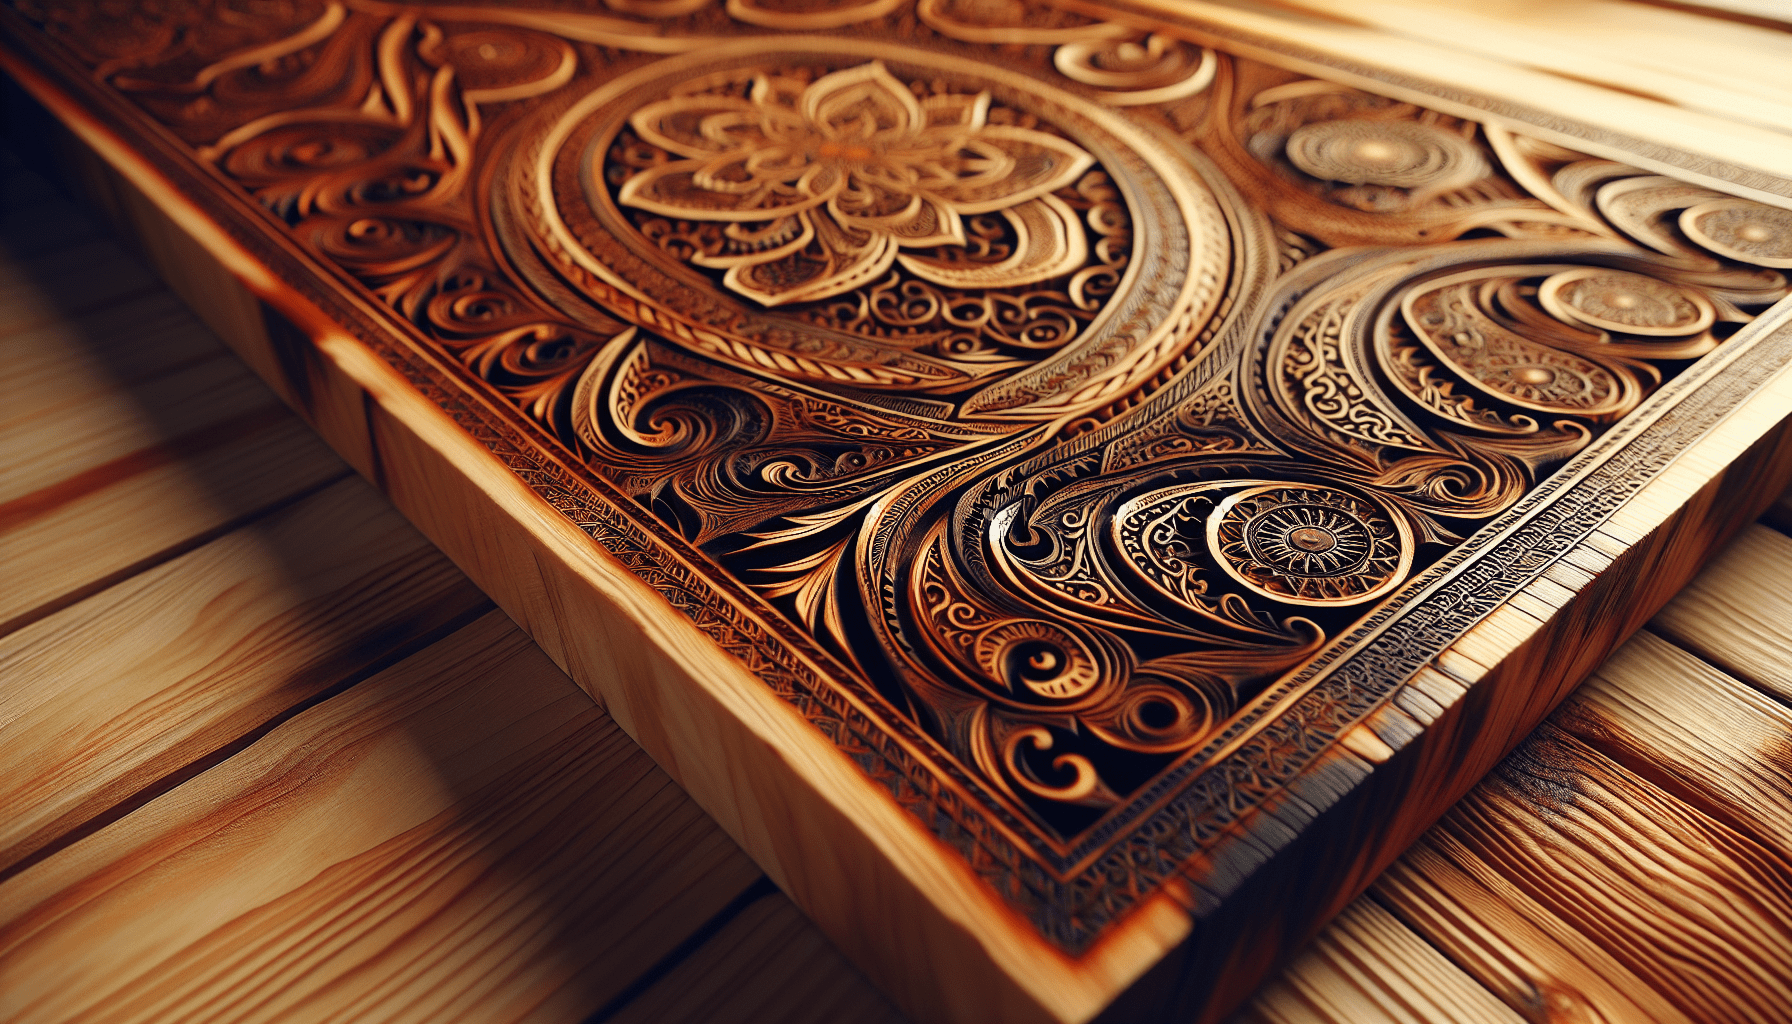
I recently explored a fascinating woodcraft technique known as “pyrography,” which involves decorating wood by burning designs into its surface. This age-old method, often referred to as “woodburning,” allows for intricate and beautiful patterns that can range from simple line art to highly detailed images. Using a heated metal tool, I found myself engrossed in the careful process of transforming plain wood into a vibrant canvas of art and expression. The smell of the burning wood, the feel of the tool in my hand, and the gradual emergence of a unique design made this an incredibly rewarding creative outlet. Have you ever wondered what’s behind the rustic charm of that wooden plaque on your neighbor’s wall or the intricate design on your friend’s handmade cutting board? No, it’s not magic. It’s a technique called pyrography, also known as wood burning. And guess what? It’s not as intimidating as it sounds. Let’s dive right into the fascinating world of decorating wood by burning.

The Magic Behind Pyrography
Pyrography is quite literally the art of burning designs into wood. Derived from the Greek words “pur” (fire) and “graphos” (writing), it’s like drawing, but with fire. Imagine holding a pen that’s heated at the tip, capable of burning wood to create beautiful patterns and shapes. Amazing, right?
A Brief History of Pyrography
This technique isn’t exactly new. In fact, it dates back to ancient civilizations. The Egyptians, for instance, used magnifying glasses to concentrate sunlight on a specific spot to burn wood. Go ahead, picture Cleopatra demanding a custom-made burnt wood throne. Okay, maybe not, but the practice has been around for centuries.
The Tools of the Trade
Let’s be real here. If the word “pyrography” hadn’t already impressed your friends at your last dinner party, the tools we use certainly will. Here’s a quick rundown:
| Tool | Description |
|---|---|
| Pyrography Pen | Think of it like a soldering iron. It has a metal tip that heats up and burns the wood. |
| Tips and Nibs | These are interchangeable parts on the pen. They come in various shapes and sizes for different effects. |
| Patterns and Stencils | While freehand sketching is cool, these templates can help if you’re anything like me – more of a tracing artist than a creator from scratch. |
Types of Wood for Pyrography
But wait, not all wood is created equal. Some types of wood are better suited for pyrography than others. Let’s talk wood for a moment.
- Soft Woods: These are generally easier to burn but watch out for the grain, as it can be quite unpredictable. Examples include pine and cedar.
- Hard Woods: They offer a smooth and consistent burn but require a little more effort and patience. Examples include oak and maple.
Each type of wood reacts differently to the heat, offering unique textures and shades.
Getting Started with Pyrography
So, you’ve decided to give pyrography a go. Congratulations! You’re about to embark on a journey that’s as rewarding as the final product. Let me walk you through the basics so you can get started without any hiccups.
Safety First
Before we get into the fun stuff, let’s talk safety. After all, we’re dealing with fire here.
- Ventilate: Always work in a well-ventilated space. Burning wood produces smoke, and the last thing you want is to cough your way through your first masterpiece.
- Protect Yourself: Wear a mask and safety glasses. Trust me, it’s worth it.
- Fire Safety: Keep a fire extinguisher or a bucket of water nearby. Better safe than sorry.
Setting Up Your Workspace
I’d suggest setting up a designated pyrography station. Mostly because you don’t want to move around with a hot pen that can burn not just wood, but your beloved carpet too.
Your First Burn
Okay, we’ve covered the basics. You’ve got your pen and you’re ready to go. Use a piece of scrap wood to practice. Get a feel for how the pen glides across the wood and how different pressures affect the burn.
Techniques and Tricks to Master Pyrography
Now that you’re no longer a pyrography newbie, it’s time to master some techniques. Here’s where things start getting really interesting.
Basic Techniques
- Dragging: This involves dragging the hot tip of the pen along the wood surface. Experiment with the speed; a slower drag will produce a darker burn.
- Dabbing: This is where you dab the heated tip onto the wood to create dots. Vary the pressure to produce different shades.
- Shading: Different techniques such as cross-hatching and stippling can add depth to your designs.
Advanced Techniques
When you’re comfortable with the basics, you can move on to more complex designs. Here’s where you can let your artistic instincts shine.
- 3D Effects: Achieve depth by varying the darkness and lightness of your burn marks.
- Texture Addition: Use different nibs to add texture. For instance, a wire nib can produce a different mark than a solid one.
Common Pyrography Designs and Styles
What’s the best part about learning a new skill? Showing off, of course! But before you jump ahead, it might be useful to decide what kind of designs you want to try out. Here’s some inspiration:
Nature-Inspired Designs
Floral patterns, leaves, animals – the natural world offers endless inspiration for pyrography. You could mimic the bark of a tree, or maybe etch out a serene landscape.
Geometric Patterns
Perfect for those who love symmetry and order. Think mandalas, spirals, and grids. The precision required can be quite meditative.
Custom Text and Quotes
Got a favorite quote or a witty one-liner? Burn it into a piece of wood for a truly unique decor item that sparks conversation and maybe a chuckle or two.

Pyrography As a Form of Decor
Maybe you’re thinking, “This sounds fun, but what can I actually do with it?” Great question. The possibilities are almost endless, but let’s break down a few ideas that can really spruce up your living space.
Home Decor
- Wall Art: Picture frames, plaques, or signs with inspirational quotes can add a personal touch to any room.
- Coasters and Trivets: Custom-made kitchen accessories that are not only functional but also a conversation starter.
Gifts
- Personalized Gifts: Think nameplates, custom cutting boards, or a special message on a wooden heart.
- Keepsakes: Family heirlooms, wedding gifts, or even pet portraits. Truly one-of-a-kind items that carry sentimental value.
Furniture Accents
Revamp old furniture by adding burn designs. Imagine a simple wooden table with intricate tribal designs burnt into its surface.
Troubleshooting Common Issues
Alright, now that we’re comfortably deep into this subject, we have to discuss some of the not-so-glamorous moments in pyrography. Because let’s face it, not everything goes according to plan.
Uneven Burns
This usually happens because of inconsistent pressure or speed. The key here is practice. Use scrap wood to perfect your technique before moving on to your project piece.
Smoke and Soot
It’s not unusual to notice a bit of smoke or soot when burning wood. Ensure your working area is well-ventilated. If it persists, you might need to clean your pen’s tip.
Design Mistakes
Oops! You messed up. It’s not the end of the world. Light sandpaper can erase minor errors. For major goofs, embrace the “wabi-sabi” philosophy – there’s beauty in imperfection, after all.
Caring for Your Pyrography Artwork
You’ve put in the effort, and now you have a beautiful piece of wood art that you’d like to preserve. Here’s how you can ensure it stands the test of time.
Sealing and Finishing
A wood sealer can protect your artwork from wear and tear. Spray or brush on a clear sealant once your design is complete and the wood has cooled.
Maintenance
Keep your wood art away from direct sunlight and damp areas to prevent any fading or warping. Dust it lightly with a cloth to keep it looking fresh.
Where to Learn More
Once you get a taste for pyrography, you’ll probably want to dive even deeper. Luckily, we live in a time where knowledge is at our fingertips.
Online Communities
Join forums or social media groups to exchange tips, tricks, and inspiration. Websites like Reddit and specialized Facebook groups can be a great resource.
Workshops and Classes
Learning from a skilled instructor can level up your skills. Check local craft stores or community colleges for any upcoming classes or workshops.
Books and Tutorials
There are numerous books and online tutorials focusing on different aspects of pyrography. Grab a book, make a cup of tea, and get reading.
Wrapping Up
Who knew that playing with fire could be this safe and incredibly rewarding? Pyrography offers a creative outlet that turns plain pieces of wood into stunning works of art. Now, the next time someone asks how that ornate wooden piece on your wall was made, you can smile confidently and say, “Oh, that’s pyrography – the art of decorating wood by burning.”
Doesn’t that sound like a conversation starter?