What’s the proper name for wood burning? If you’ve ever found yourself staring at a beautifully detailed piece of artwork carved into a wooden board and wondered what on earth that kind of craft is called, you’re not alone. I’ve been there too. Maybe you were afraid to ask, thinking everyone else already knew. Spoiler alert: not everyone does. So, let’s talk about it and finally get this puzzle piece fit snugly into our knowledge puzzle.
Understanding Pyrography
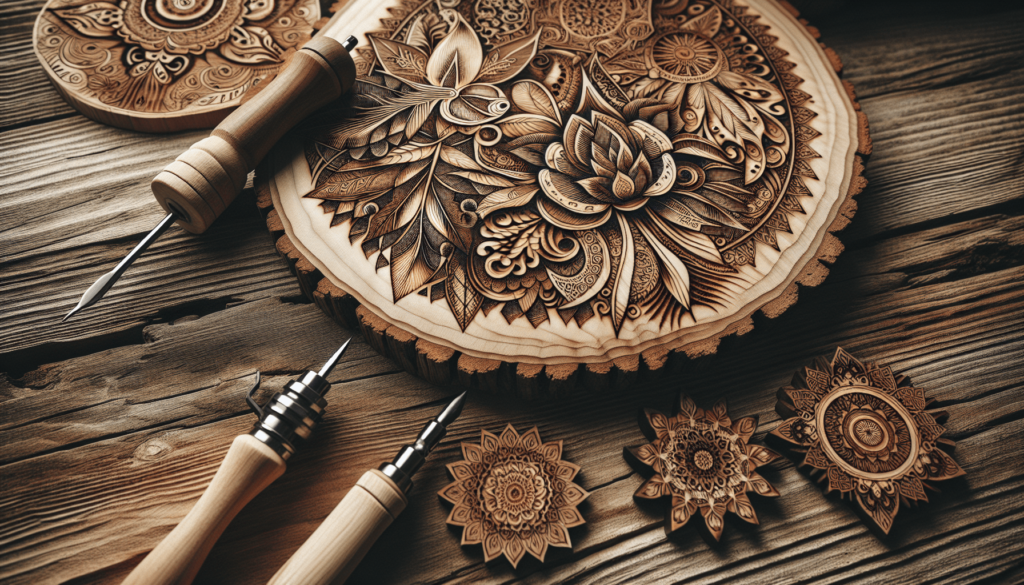
First things first, the name for the art of wood burning is “pyrography.” It sounds fancy, doesn’t it? Don’t let the highfalutin word intimidate you. Essentially, it’s the artistic practice of decorating wood or other materials with burn marks resulting from controlled application of a heated object like a poker. It’s both an art and a skill, and the precision some artists achieve is downright astonishing.
Etymology of the Word
Why is it called pyrography? Well, the term comes from Greek. “Pyro” means fire, and “graphos” means writing. Put them together, and you get “writing with fire.” When you think of it this way, not only does it sound cooler, but it also makes perfect sense, doesn’t it? You’re essentially using heat to write or draw on a surface.
The History of Pyrography
Now, knowing the name is one thing. Understanding its roots adds a whole new layer of appreciation. This ancient art form has been around for centuries, possibly dating as far back as the Egyptians and other early cultures. They didn’t have the nifty electric tools modern pyrographists use today. They’d heat metal rods in a fire and painfully etch their designs into wood or leather. Think about it—a caveman with a smoldering stick scribbling his version of a masterpiece onto a slab of mammoth tusk. Okay, maybe not that far back, but close enough.
From Antiquity to Modern Times
Even though we’re all about modern conveniences today, the principle behind pyrography has changed very little. The methods might have evolved, but the central idea remains the same. Ancient civilizations used basic tools they had at their disposal, whereas today, we have more sophisticated equipment like electric pyrography pens with various temperature settings and interchangeable tips. It’s like going from using a quill and ink to having a state-of-the-art, battery-operated fountain pen.

Tools of the Trade
Speaking of tools, let’s get into what you’ll need if you want to try your hand at pyrography. Assuming you’re interested—and why wouldn’t you be?—you’ll find that getting started is relatively straightforward. The tools aren’t overly expensive or hard to find.
Basic Pyrography Tools
Here’s a list of some fundamental tools you’ll need:
| Tool | Description |
|---|---|
| Pyrography Pen | The primary tool, used to burn designs into wood. |
| Interchangeable Tips | Various shapes for different effects. |
| Sandpaper | Smooths out the wood before burning. |
| Pencil | Sketch your design before burning. |
| Carbon Paper | Transfers designs onto wood. |
The pyrography pen is your main instrument. You can think of it as the paintbrush for your wooden canvas. Modern pens usually come with adjustable temperature controls, which is a godsend. It allows you to switch between light or dark burns and gives you more control over shading and detailing. Some pens even have interchangeable tips, meaning you can vary the thickness and style of the lines you’re burning, much like you would switch between different paintbrushes or pencils in traditional art.
Additional Supplies
Like any creative endeavor, there are a few extras that can make your life easier. You might want to have:
| Supply | Usefulness |
|---|---|
| Safety Glasses | To protect your eyes from smoke and debris. |
| Fan | Helps to blow away smoke while you’re working. |
| Gloves | Protects your hands from heat if you’re clumsy like me! |
Safety glasses and gloves might sound overkill, but trust me, dealing with small amounts of smoke and heat is part of the process. And a fan? Yes, please. Not only does it reduce the smoke around you, but it also helps you see your work clearly without the misty haze.
Techniques and Styles
“Okay, you’ve got the tools, but what do you actually do with them?” Good question. Like any form of art, pyrography has various styles and techniques. You can go for something as simple as lettering or intricate enough to make the Mona Lisa look like a doodle.
Basic Techniques
Let’s start with the basics before jumping into expert territory.
Dark and Light Burns
The foundational technique involves manipulating the pen’s temperature to create dark and light burns. The hotter the pen, the darker the burn. Mastering this allows you to add more depth and dimension to your work.
Lines and Dots
Simple line work is where most beginners start. Once you’ve got a grip on that, you can explore stippling, which involves creating patterns with dots instead of lines. Each dot requires a steady hand and a lot of patience, but the outcome is worth the effort.
Advanced Styles
Once you feel comfortable with the basics, you can move on to more advanced techniques.
Shading
Shading with a pyrography pen is similar to shading with a pencil. The idea is to create gradients and depth by varying the pressure and speed of your strokes. This skill is what transforms flat, two-dimensional pieces into more lifelike works of art.
Texturing
Want your tree bark to look rough? Your animal fur to look soft? Texturing is all about creating effects that mimic real-life surfaces. It involves using different tips and varying the heat to achieve the desired texture.

Pyrography and Other Mediums
Just when you thought you had a handle on wood burning, let me throw a curveball at you. Pyrography isn’t strictly for wood. Oh no, this versatile art form extends beyond wooden surfaces.
Leather Pyrography
Leather is another popular medium for pyrography. The principles are the same, but the outcome can be vastly different due to the texture and nature of leather. Leather tends to burn more quickly, which means you need to use lower temperatures and quicker strokes compared to wood.
Paper and Other Materials
Yes, you read that right—paper pyrography is also a thing. It’s a bit trickier because paper burns (and catches fire) much more easily. Artists who take on this challenge usually use specially treated, thicker papers designed for pyrography.
| Medium | Characteristics and Challenges |
|---|---|
| Leather | Burns quickly; needs lower temperature. |
| Paper | Highly flammable; requires very low temperatures. |
| Gourds | Curved surface can be challenging but offers unique results. |
It’s not just about wood and leather. Artists have also experimented with materials like gourds and even bones. Each medium has its specific set of challenges and rewards. And honestly, isn’t that part of the fun? Trying something new, possibly scorching it, but eventually creating something utterly unique?
Practical Uses of Pyrography
You might be thinking, “This all sounds great, but what am I supposed to do with pyrography besides hanging art pieces on my wall?” Well, I’m glad you asked. Pyrography offers plenty of practical uses.
Home Decor
Customized wooden signs, personalized coasters, and decorated wooden furniture can add a unique touch to your living space. Imagine the pride in showing off a beautiful wooden table centerpiece that you decorated yourself.
Gifts
The personalized nature of pyrography makes it an excellent medium for thoughtful gifts. Customized cutting boards, jewelry boxes, and keychains become keepsakes when personalized with someone’s name, special dates, or meaningful designs.
Professional Opportunities
Believe it or not, pyrography can also have professional applications. Some artists sell their works online or at craft fairs. Others offer custom services for home decor or even commission pieces for clients. While it may start as a hobby, it can grow into a small business or side hustle.
Getting Started with Pyrography
So you’re convinced and ready to start burning some wood—where do you begin? Luckily, getting started with pyrography is relatively straightforward, and there are plenty of resources to help you along the way.
Choosing Your First Project
Don’t aim to recreate the Sistine Chapel on your first try. Instead, start with something simple yet rewarding. Think basic shapes or even your initials. The goal is to get comfortable with your tools and understand how they react with the wood.
Finding Resources
YouTube is chock-full of tutorials that can guide you step-by-step through your first project. Books on pyrography—though less interactive—are also valuable resources. Websites dedicated to wood burning often offer free patterns and templates to help you practice.
Practice Makes Perfect
Like any art form, mastery comes with practice. Don’t get discouraged if your first few attempts are less than museum-worthy. Each mistake is a stepping stone on your journey to becoming a pyrography ace.
Advanced Tips and Tricks
Once you’re comfortable and have a few projects under your belt, it’s time to elevate your craft with some advanced tips and tricks.
Temperature Control
Fine-tuning your temperature settings can make a world of difference. Sometimes you need to go beyond the preset settings and manually adjust to achieve finer details.
Interchangeable Tips
Investing in a set of interchangeable tips can provide more versatility in your projects. Tips shaped like calligraphy pens, round or angled tips can be used for different effects.
Surface Preparation
Make sure to prepare your wooden surface meticulously. Sand it down smoothly to ensure that your pyrography pen glides as effortlessly as possible. A well-prepared surface can make a significant difference in the overall quality of your work.
Pyrography Communities and Networking
Believe it or not, there’s an entire community of people who share your newfound passion for burning wood—minus the marshmallows and campfires. Joining such communities can be unbelievably beneficial.
Online Forums and Social Media
Websites like Reddit, Facebook, and Instagram have dedicated groups where pyrographers from around the globe share their tips, tricks, and work. It’s like having access to an oven that can always bake your creative ideas to perfection.
Local Craft Groups
Many local art societies and craft groups also have sections dedicated to pyrography. These can be great for hands-on learning and real-time feedback. Plus, isn’t it more fun to work alongside someone than to be a lone wolf in your creative endeavors?
Conclusion
So, now you know the name for wood burning: pyrography. It’s an ancient, versatile art form that spans from the simple to the complex, the practical to the purely artistic. Whether you’re looking to beautify your home, create thoughtful gifts, or even build a small business, pyrography offers endless possibilities. And the best part? It’s accessible. All you need are some basic tools, a bit of wood, or another burnable surface, and the willingness to practice. Before you know it, you’ll be writing with fire and creating works of art that are unmistakably your own.

