Tips for Woodburning on Different Grain Patterns
Woodburning, also known as pyrography, is an art form that beautifully combines creativity with technical skill. When working with different grain patterns, it’s essential to adapt your techniques to achieve the best results. Here are some practical tips to help you navigate woodburning on various grain types.
Understanding Grain Patterns
Wood has unique grain patterns that can significantly affect how your designs turn out. Each type of wood has its own distinctive characteristics.
- Softwoods: Woods such as pine and cedar have lighter grain patterns and are easier to burn but may also burn unevenly.
- Hardwoods: Woods like maple, oak, and cherry often have tighter grains, making them more challenging but rewarding when properly executed.
- Exotic woods: These can have stunning patterns and colors, but they may require specific tools or techniques due to their unique properties.
Choosing the Right Tools
Your choice of tools plays a critical role in how well you can work with different grain patterns. Here are some tools to consider:
- Pyrography pen: Opt for a pen with adjustable temperature settings to accommodate varying wood densities.
- Tips and nibs: Different shapes (e.g., shaders, writing tips) allow for more versatility in your designs.
- Workspace: A well-lit and comfortable workspace enhances your ability to see the fine details in wood grain.
Techniques for Various Grain Patterns
When it comes to woodburning, adapting your technique is key to enhancing the natural beauty of the wood.
1. For Softwoods
Softwoods generally have a more open grain, making them easier to burn.
- Use less pressure on the pen to avoid deep burns.
- Experiment with different speeds; a slower pace can create more intricate designs.
- Consider using shading techniques to enhance depth without overwhelming the grain’s natural look.
2. For Hardwoods
Working with hardwoods can be more challenging but offers stunning results.
- Begin with a higher temperature setting to penetrate the dense grain effectively.
- Utilize a lighter touch on details, adjusting pressure as needed.
- Create contrast by incorporating both burning and unburned areas; this often highlights the grain beautifully.
3. For Exotic Woods
Exotic woods often come with unique patterns and colors, which can add a layer of complexity to your work.
- Test small areas first to see how the wood reacts to heat; some may darken more than others.
- Consider the color of the wood; lighter grains may require more delicate line work to stand out.
- Match your technique to the wood’s artistry—take advantage of its patterns to enhance your design.
Maintaining Your Equipment
Keeping your woodburning tools in good condition is vital for successful projects. Here are some tips for maintenance:
- Clean tips frequently with a soft cloth to remove burnt residue that can accumulate and affect performance.
- Store your pen and tips in a dry place to avoid rust or damage.
- Regularly check the temperature settings to ensure they are working accurately, as inconsistent heating can lead to poor results.
Finishing Techniques
After you’ve completed your woodburning project, consider these finishing techniques to enhance your piece:
- Sealing: Apply a wood finish or sealer to protect the artwork and bring out the colors in the grain.
- Framing: A well-chosen frame can set off your piece and emphasize the beauty of the wood’s natural patterns.
- Display: Choose locations where light will highlight the grain and burn patterns to showcase your work.
Mastering woodburning on different grain patterns takes practice, but your efforts will yield stunning pieces that reflect the beauty of nature. By understanding the properties of different woods, selecting the right tools, and applying the appropriate techniques, you can create intricate designs that truly shine.
Understanding the Impact of Wood Type on Woodburning Techniques
When diving into the world of woodburning, also known as pyrography, one of the most crucial factors to consider is the type of wood you are using. Each wood type presents its unique characteristics that can significantly influence your technique, the visual impact of your art, and the longevity of the finished piece. By understanding these characteristics, artists can select the right wood for their projects, leading to better results and enhanced creativity.
Understanding Grain Patterns
The grain pattern of wood affects how it reacts to heat during the woodburning process. Every piece of wood has a grain that can be tight, open, straight, or interlocked. These patterns influence the way the wood absorbs heat and creates different shades.
- Tight Grains: Woods like maple and cherry have tight grains that burn evenly. This consistency allows for detailed work and fine lines, making them favorites among detail-oriented artists.
- Open Grains: Tropically sourced woods like oak and mahogany feature more open grains. They can absorb heat differently, which might lead to uneven burning. Artists should adapt their technique, using lower settings or applying lighter pressure to prevent scorching.
- Interlocked Grains: Woods such as walnut can present challenges due to their interlocked grain patterns. The variation in grain density can produce unexpected burning effects. A steady hand and experience are essential to mastering this type of wood.
Color Considerations
Different types of wood also come with a diverse palette of colors and hues. This variance has an impact on the final appearance of your woodburned artwork. Woods like birch and pine offer pale canvases that burn to a light brown or golden shade, while darker woods like ebony produce rich, deep tones, resulting in more dramatic contrasts.
Choosing Wood Based on Project Goals
Understanding the color and grain pattern helps in selecting the appropriate wood for specific artistic intentions. Here are some considerations:
- For intricate designs: Select woods with tight grains, such as boxwood or butternut. These allow for precise detailing without unintended fuzziness.
- For contrast: Use a combination of light and dark woods to enhance visual appeal. Light woods can be burnt to darker shades, creating a striking contrast against the natural color of dark woods.
- For texture: Consider using a wood with interesting grain patterns. When burnt, they can provide added depth and texture to your artwork, making it visually compelling.
Wood Preparation and Safety
Preparation is essential to achieve optimal results in woodburning. Always ensure that the wood is well-treated and free of any chemical preservatives. These substances can release harmful fumes when heated. Sourcing high-quality, untreated wood is recommended for safe practice.
Additionally, it’s important to sand the surface smoothly before starting your woodburning project. Sanding removes any imperfections and allows for better adherence of heat, leading to cleaner burn lines and shading. Start with a medium-grit sandpaper and finish with fine-grit for a smooth finish.
Experimenting with Techniques
Once you’ve chosen your wood type and prepared your surface, it’s time to explore different woodburning techniques. Experimenting is key to mastering the unique characteristics of each wood type.
- Line Work: Use finer tips for delicate line work on tightly grained woods.
- Shading: Create gradients by varying pressure and speed. This works effectively on woods with an open grain pattern.
- Texturing: Implement different tools and techniques such as stippling or zigzag patterns. Texturing can give pieces distinct personality, especially on woods like cedar.
Understanding the impact of wood type on woodburning techniques is essential for any artist aiming to create compelling works. By selecting appropriate woods, knowing how to adapt your techniques, and experimenting with different methods, you can produce beautiful, high-quality woodburned art. Remember, the journey is just as important as the destination, so enjoy the process and embrace the unique challenges each wood type presents.
Common Mistakes to Avoid in Woodburning Projects
Woodburning, also known as pyrography, is a delightful art form that lets you create stunning designs on wooden surfaces. However, even the most experienced woodburners can sometimes make errors that detract from their artistic vision. Here are some common mistakes to avoid to ensure that your woodburning projects turn out beautifully.
Neglecting Surface Preparation
Before you start burning, prepare your wooden surface. Failing to sand the wood properly can result in uneven burning and an undesirable finish. Always start with a smooth, clean surface. If you’re using a new piece of wood, take time to sand it down with fine-grit sandpaper to remove any rough spots or imperfections.
Using Inappropriate Wood Type
Not all woods are created equal, especially when it comes to pyrography. Some woods burn better than others. Softwoods like pine or basswood are ideal, as they offer a smoother surface for burning. Hardwoods, such as oak or walnut, may produce uneven results due to their grain patterns. Take time to select a wood type suitable for your skill level and project needs.
Overheating the Tool
Many beginners may think that the hotter the tool, the better the burn. This misconception can lead to scorched wood. It’s important to find the right temperature settings for your pyrography pen. Start at a lower temperature and gradually increase it if needed. This way, you’ll have more control over the depth and detail of your burn.
Skipping the Design Outline
Jumping straight into burning without an outline can lead to mistakes. Always create a design template first. You can lightly sketch your design onto the wood using a pencil or transfer paper. This guide helps you stay on track and gives you direction while burning, minimizing the chances of unwanted mistakes.
Ignoring Grain Patterns
Wood has unique grain patterns that can enhance or complicate your burning. Ignoring them might seem harmless, but it can result in uneven lines or textures. Understand how different grain patterns react to heat. Test your wood by making small practice burns to see how the grain affects your design.
Inadequate Practice
Like any other art form, woodburning requires practice. Don’t jump into a large project without honing your skills first. Spend some time on smaller projects to understand how to manipulate the tool and create different textures. This practice will help you develop confidence and improve your technique.
Not Using Enough Contrast
One common mistake is not considering contrast in your designs. A well-defined burn requires contrasting tones to bring your artwork to life. Mixing dark and light areas creates depth and visual interest. When planning your design, think about how to use varying burn depths and shading techniques to enhance the overall look.
Failing to Clean the Tools
Dirty pyrography tips can compromise the quality of your work. Residue buildup can lead to inconsistent burns and damage to the wood. Make sure to periodically clean your burning tips with a brass wire brush or damp cloth during and after your projects. Maintaining clean tools will ensure crisp and clear lines.
Rushing the Process
Woodburning is an art that requires patience. Beginners often rush their work, causing mistakes and dissatisfaction. Take your time to observe how the wood reacts as you burn. This patient approach allows for better results and shows the true beauty of the medium.
Neglecting Finishing Techniques
After you’ve completed your woodburning project, skipping the finishing touches can be a major oversight. Applying a protective finish not only enhances the piece’s appearance but also safeguards it from wear and tear. Use varnish or sealant suitable for wood to provide that additional layer of protection.
By being aware of these common mistakes and taking proactive steps to avoid them, you’ll enhance the quality of your woodburning projects. Remember, every artist learns from their experiences. Embrace the learning process, and soon you’ll be creating woodburning masterpieces with confidence!
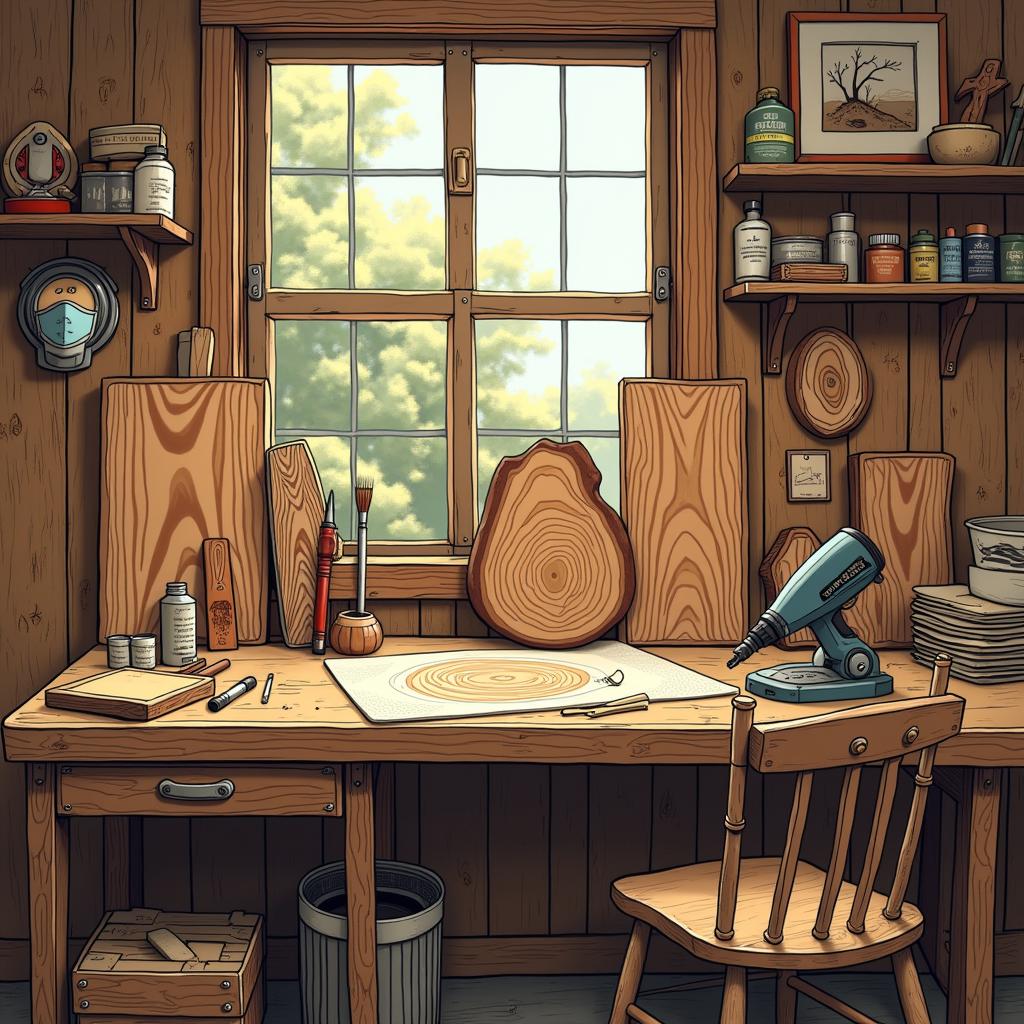
Tools and Equipment Essential for Effective Woodburning
Embarking on the journey of woodburning can be immensely rewarding, but having the right tools and equipment is essential for producing stunning art. Whether you’re a novice or an experienced burner, choosing the appropriate instruments can greatly enhance your craft.
Woodburning Pen or Pyrography Tool
The primary tool for anyone interested in woodburning is a reliable pyrography pen. These pens are equipped with interchangeable tips that allow for varying designs and intricacies. When selecting a pen, consider the following features:
- Temperature Control: Look for a tool with adjustable temperature settings. This will enable you to work with various wood types and grain patterns, ensuring optimal results.
- Comfort Grip: A pen that feels comfortable in your hand will allow for longer periods of use without fatigue.
- Tip Variety: Ensure your pen comes with various shapes of tips, from fine points for detailed work to broad tips for shading or filling in larger areas.
Quality Wood Selection
Your choice of wood deeply influences the outcome of your woodburning projects. Different types of wood have varying grain patterns, densities, and colors. Ideal choices include:
- Pine: Affordable and widely available, pine is easy to burn on, but be cautious of its resin, which can affect your design.
- Birch: Known for its smooth surface, birch absorbs the burn beautifully, allowing for precise detailing.
- Maple: This hardwood is excellent for intricate designs due to its fine grain.
Wood Finish and Preparation Supplies
Before you begin woodburning, it’s crucial to prepare the surface. A well-prepared surface ensures clean lines and better adhesion of design. Here are the essentials:
- Sanding Paper: Use fine-grit sandpaper to smooth the wood surface. This not only enhances the appearance but also aids in achieving cleaner burns.
- Wood Conditioner: Application of a wood conditioner can help even out the absorption of the burn and provide a more consistent finished look.
Protective Gear
Safety ought to be a top priority when engaging in woodburning. Essential protective gear includes:
- Dust Mask: Wearing a dust mask protects against fine particles generated during the sanding process.
- Safety Glasses: Protect your eyes from possible wood splinters and errant burns.
- Heat-Resistant Gloves: These are crucial if you’re handling hot tools or wood pieces immediately after burning.
Workspace Essentials
A dedicated workspace can streamline your woodburning process. Consider setting up the following:
- Well-Lit Area: Good visibility is key to quality woodburning. Natural light is ideal, but supplemental lamps can help in low-light environments.
- Cutting Mat: Place your wood on a protective mat to avoid damaging surfaces beneath.
- Storage Containers: Organize your tools and materials with designated containers. This minimizes clutter and ensures you have everything readily available.
Optional Decorative Tools
As you become more proficient, consider investing in decorative tools that can enhance your woodburning projects:
- Stencils and Templates: Great for beginners trying to create specific designs and patterns.
- Coloring Supplies: Alcohol inks or wood stains can add beautiful finishing touches to your artwork.
- Markers or Pencils: For sketching out designs on the wood before burning.
Equipping yourself with quality tools and materials can redefine your woodburning experience. Each item, from the pyrography pen to the protective gear, plays a vital role in ensuring that your artistic vision translates seamlessly onto wood. The right setup not only nurtures creativity but also promotes safety and efficiency in every project.
Enhancing Your Woodburning Art with Color and Stains
Woodburning, also known as pyrography, is a captivating art form that allows artists to create stunning designs on wood. While the intricate details of your burn are undeniably important, incorporating color and stains can take your artwork to the next level. Understanding how to use colors and stains effectively can add depth and vibrancy to your woodburning pieces, enhancing both the aesthetic quality and emotional impact of your art.
Exploring Different Types of Stains
Choosing the right stain is crucial for achieving the desired effect in your woodburning projects. Here are several types of stains you might consider:
- Water-based Stains: These stains are easy to clean up and have low odor. They penetrate wood without raising the grain, making them ideal for fine details.
- Oil-based Stains: Known for their rich colors and durability, oil-based stains can take longer to dry but provide a deep finish that truly enhances the grain of the wood.
- Gel Stains: Gel stains are thicker and perfect for vertical surfaces. They sit on top of the wood, offering more control over where the color goes.
- Transparent Stains: These allow the natural beauty of the wood grain to show through while adding a hint of color.
Choosing Colors that Complement Your Design
When selecting colors for your woodburning art, it’s essential to consider the overall theme and mood you wish to convey. Here are some effective ways to choose complementary colors:
- Color Wheel: Utilize a color wheel to identify complementary colors. Colors opposite each other, such as blue and orange, make for striking contrasts.
- Emotional Impact: Think about the emotions each color evokes. For instance, blues and greens can exude calmness, while reds and yellows tend to be more energizing.
- Natural Inspiration: Draw inspiration from nature. Look at how colors appear in flora and fauna, and use that as a guide for your palette.
Applying Color Effectively
Once you’ve selected stains and colors, the next important step is how to apply them. Here are some techniques that can enhance your woodburning art:
- Brush Techniques: Use fine brushes to apply stains with precision, allowing you to focus on specific areas or details of your woodburning.
- Sponging: A sponge can create soft, blended effects that work beautifully in larger areas, providing an ethereal quality to your pieces.
- Spraying: An airbrush or spray system can give a smooth and even coat of color, enabling you to achieve gradients or uniform layers.
Protecting Your Artwork
After adding color to your woodburning, it’s essential to protect your artwork for longevity. Consider the following options:
- Varnish: Apply a clear varnish to shield your work from moisture and scratches. Look for matte or satin finishes to maintain the natural look.
- Wax Finish: Wax can provide a natural look while protecting the surface. Just reapply periodically to maintain its protective barrier.
Final Thoughts on Combining Color and Woodburning
Color and stains into your woodburning projects can significantly elevate your artwork. By understanding different types of stains, choosing complementary colors, applying them patiently, and ensuring protection, you create pieces that are not just visually stunning but are also durable. Whether you’re a novice or an experienced artist, these tips will help you explore the full potential of your creative expression in pyrography. Your journey to becoming a master woodburning artist can truly blossom with a splash of color!
Conclusion
Woodburning, also known as pyrography, is an art form that allows you to transform ordinary pieces of wood into stunning works of art. Successfully accomplishing this requires an understanding of several critical aspects, particularly different grain patterns, the wood type being used, potential pitfalls to avoid, the tools necessary for effective burning, and techniques to enhance your art with color and stains.
One of the most significant takeaways from the discussion is the importance of recognizing how different grain patterns influence your woodburning techniques. Each type of wood has a unique texture and grain structure that interacts differently with pyrografic tools, affecting how the burner glides over the surface. For instance, hardwoods like oak usually have a more pronounced grain than softwoods like pine, influencing the depth and texture of your burn marks. By experimenting with various woods, you’ll soon find that adjusting your approach based on grain patterns can yield striking results.
Equally crucial is understanding the impact of wood type on your woodburning endeavors. Each wood type reacts uniquely, often influenced by its density, moisture content, and chemical makeup. Woods high in resin, such as pine, can produce large amounts of smoke and may not burn evenly. Conversely, hardwoods might require more heat to establish a deep burn. Understanding these characteristics not only enhances your results but also saves you from the discouragement of unexpected challenges.
Avoiding common mistakes in woodburning is another vital component of achieving superior results. Beginners often misjudge their burning temperature, leading to scorch marks or shallow lines. Mastering the right temperature settings based on your wood type and desired effects will help you achieve a cleaner finish. Additionally, many novice artists overlook regular maintenance of their tools, neglecting to sharpen tips or clean the burner. This can cause frustration and inconsistencies in the burning process. Taking the time to properly care for your equipment can dramatically improve your overall experience.
As you hone your skills, it’s essential to equip yourself with the right tools and equipment. While many starting woodburners might be satisfied with basic models, investing in adjustable-temperature burners and a variety of tips will vastly expand your capabilities. This flexibility allows for various textures and intricacies in your design. Don’t forget safety gear, either. Protective gloves and proper ventilation can ensure a safe, enjoyable environment while you work.
Enhancing your woodburning art with color and stains is a great way to elevate your pieces. Once you’ve established your burned designs, the next step is to consider how color can complement your work. Water-based stains and paints can add dimension and vibrancy to your pieces, while also allowing the wood grain to show through. Experimenting with layering colors and adjusting the transparency can yield various artistic effects that truly make your pieces pop. Combine this with your burnt designs, and you create a visually stunning contrast that draws attention to your artistry.
Mastering woodburning is truly a journey filled with discovery and personal expression. Each piece you create offers an opportunity to refine your techniques, explore various grain patterns, and learn from mistakes. The combination of understanding different wood types, avoiding common pitfalls, utilizing the right tools, and incorporating colors can empower you to create not only beautiful art but pieces that resonate with your unique vision. As you progress in your woodburning journey, remember that practice is key.
With time and experience, you’ll find your style, preferences, and distinctive approach to the woodburning craft. Celebrate each success along the way, give yourself permission to experiment, and most importantly, enjoy the process! The world of woodburning is rich with creative expression, ensuring every project brings with it new insights and rewarding moments. Embrace your artistic journey fully, and allow each burn to reveal the beautiful potential that lies within the wood you carve. The art of woodburning transcends mere technique; it invites you to forge a connection between your imagination and the natural beauty of wood. Whether you are a beginner or an experienced artist, there’s always more to learn, explore, and showcase in your woodburning endeavors.