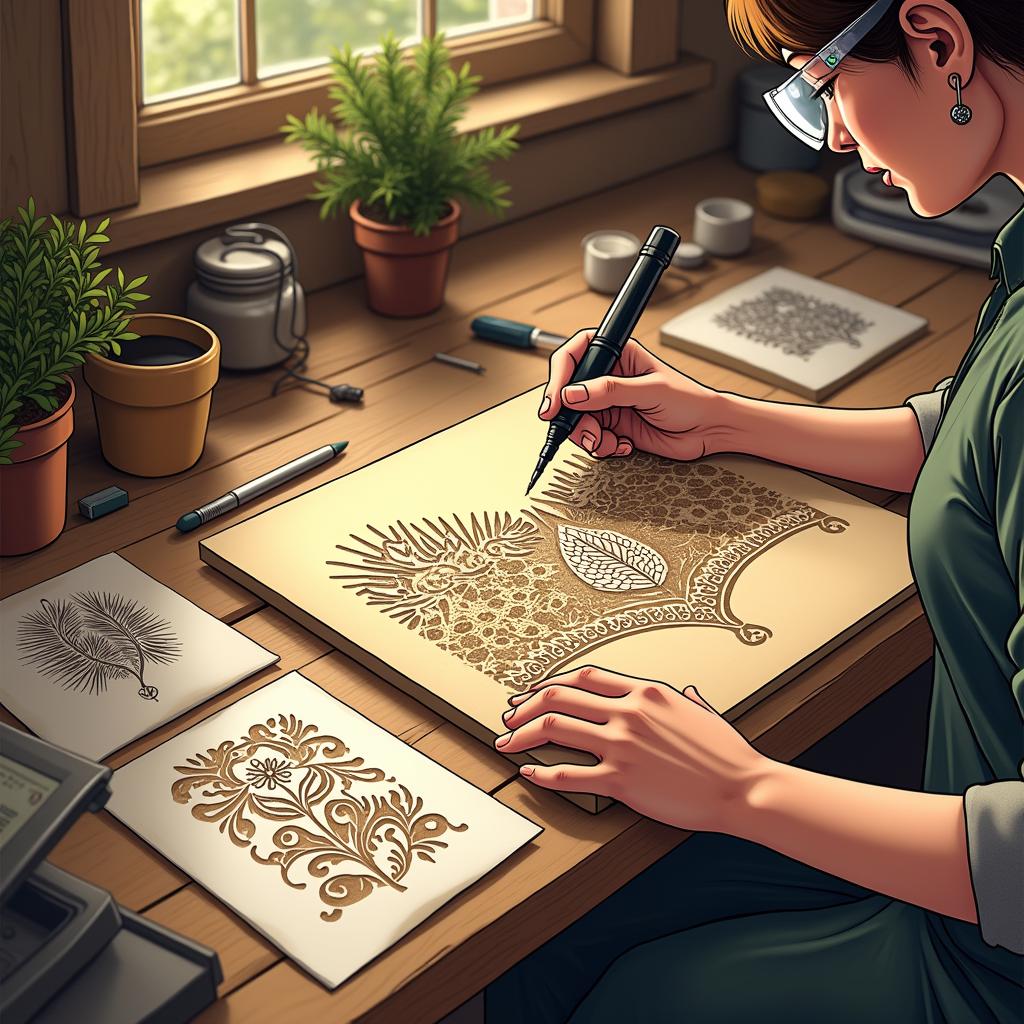
Techniques for Effectively Using Stencils in Pyrography Projects
Using stencils in pyrography projects can elevate your artistry, allowing for unique designs and smoother application of intricate patterns. Here are some techniques that can help you effectively incorporate stencils into your pyrography method.
Understanding Stencils
Before diving into the actual pyrography, you’ll want to understand what stencils are and how they can be integrated into your work. Stencils can be made from various materials such as plastic, metal, or even cardstock. The key is to choose a stencil that fits with the medium you are using in your pyrography project.
Choosing the Right Stencil
Selecting the appropriate stencil is crucial for achieving the desired effect. Here are a few factors to consider:
- Complexity: Consider the intricacy of the design. More detailed stencils can be challenging and may require a steady hand.
- Material: Choose a stencil material that can withstand the heat from your pyrography tool.
- Size: Ensure that the stencil size complements your project’s dimensions.
Preparing Your Workspace
A well-prepared workspace can significantly impact your pyrography results. Follow these steps for preparation:
- Clear the Area: Ensure your workspace is clean and organized to prevent distractions.
- Gather Materials: Have your pyrography tool, stencil, wood or leather surface, and a pencil or marker for alignment ready.
- Protective Gear: Wear gloves and goggles to safeguard yourself from heat and particles.
Attaching the Stencil
Secure the stencil to your wood or leather substrate before burning. Without a solid hold, it can shift while you’re working. Here are some attachment options:
- Painter’s Tape: This allows for easy removal without damaging the surface.
- Adhesive Spray: Choose a repositionable spray to avoid leaving residue.
- Weights: Place small weights around the edges to keep the stencil in place.
Transferring the Image
Once your stencil is secure, it’s time to transfer the design onto your project surface. You can do this in various ways:
- Tracing: Lightly trace the design with a pencil to mark your starting points.
- Carbon Paper: Place carbon paper between the stencil and substrate to imprint the design directly.
Burning the Design
After transferring the stencil design, adjust the temperature settings on your pyrography tool based on the type of wood or leather used. It’s essential to start with the smaller details before moving to larger sections.
- Small Tips: Utilize fine tips for intricate areas of the stencil.
- Consistent Pressure: Maintain even pressure to achieve uniformity in your burns.
Adding Depth and Texture
Stencils can also serve as a base for adding depth and texture. After completing the initial design, consider the following:
- Shading: Vary the burn depth around edges to create shadow effects.
- Texture Techniques: Use different tips or techniques (like stippling or cross-hatching) to enhance the design.
Cleaning Up the Edges
After you finish burning, take a moment to clean up any rough or burnt edges. You can use sandpaper to smooth out imperfections without disturbing your design.
Final Touches
Once you’ve completed your pyrography project, consider applying a protective finish. This might include varnish for wooden surfaces or a leather conditioner for leather. Not only will this preserve your work, but it will also enhance the colors and contrast in your design.
Using stencils in pyrography opens up a world of possibilities for both beginners and seasoned artists. By selecting appropriate stencils, taking care when transferring designs, and applying various burning techniques, you’ll create stunning pieces that reflect your creativity and skill. Remember to enjoy the process and let your artistic vision shine through every project you undertake!
Choosing the Right Materials for Pyrography and Stenciling
Choosing the right materials for pyrography and stenciling can significantly impact the quality of your artwork. Understanding the characteristics of various surfaces and mediums is crucial to achieving the best results. Here’s a detailed look at the essentials you need to know.
Understanding the Surface Material
The first step in any pyrography project is selecting the right surface. Various materials react differently to heat, so consider the following options:
- Wood: This is the most common surface for pyrography. Birch, pine, and maple are popular due to their fine grain and light color, which allows for better visibility of the pyrography marks.
- Leather: Ideal for more durable projects like belts or bags, leather requires specific techniques due to its fibers. Vegetable-tanned leather is preferable as it provides better results than chrome-tanned leather.
- Paper: While not typical for pyrography, heavy cardstock can work for practice or smaller projects. Be aware that paper is more prone to burning quickly, so adjustments to your tool’s heat setting may be necessary.
- Cork: Cork sheets offer a unique texture and are easy to burn on. They can create interesting patterns but may be less durable than wood or leather.
Choosing Your Stencils
Stencils play an essential role in creating precise designs in your pyrography projects. Here are a few tips for selecting the right stencils:
- Material: Many stencils come in plastic or mylar. Choose a durable, heat-resistant material to withstand the high temperatures of pyrography.
- Design Complexity: For beginners, select simpler, bold designs. More complex stencils can often confuse the burning process and result in mistakes.
- Size: Ensure your stencil fits the intended project. A small stencil on a large surface can create awkward compositions.
Types of Pyrography Tools
Your choice of tools is just as important as your materials. Different pyrography pens and tips can provide varying results. Here’s a quick guide:
- Pens: There are two main types: solid-point and variable temperature pens. Solid-point pens produce consistent heat but offer less control than variable temperature pens.
- Tips: Various tips, such as shaders, lettering, and flow tips, allow for different textures and patterns. Choosing the right tip is essential for the effect you want to achieve.
Preparing Your Workspace
An organized workspace can make a significant difference in the ease and enjoyment of your pyrography projects. Consider the following:
- Ventilation: Working with pyrography produces smoke; ensure your workspace is well-ventilated to avoid inhaling harmful fumes.
- Lighting: Good lighting is crucial for detail work. A bright, focused light can help you see your designs clearly as you work.
- Safety Gear: Wear safety glasses and consider a mask to protect yourself from any debris or fumes.
Stenciling Techniques
When using stencils in pyrography, applying the design correctly is vital to achieving the desired look:
- Securing the Stencil: Use tape to secure the stencil to your surface to prevent movement while burning.
- Testing Heat Settings: Before starting on your final piece, do a test burn on a scrap piece to adjust your tool’s heat settings. Different materials will require different temperatures.
- Careful Application: Take your time when burning through the stencil, moving smoothly along the lines. If your pen is too hot, it can burn beyond the intended pattern, leading to messy results.
Selecting the right materials and tools is a significant step in your pyrography journey. By understanding your options and preparing carefully, you can create beautiful, lasting works of art that reflect your unique style and skills.
Creative Ideas for Pyrography Art Using Stencils
If you’re looking to elevate your pyrography projects, using stencils can be a game-changer. Stencils not only provide intricate designs but also make it easier to achieve consistent results. Whether you’re a beginner or a seasoned pyrographer, stencils can enhance creativity and simplify the process of transferring ideas onto wood or other materials.
Choosing the Right Stencils
Selecting the right stencils is crucial for achieving the desired effect in your artwork. Here are some popular options:
- Nature Themes: Leaves, flowers, and animal silhouettes are excellent for conveying natural beauty.
- Geometric Shapes: Triangles, circles, and patterns can add a modern touch to your designs.
- Inspirational Quotes: Personalized text can make your art more meaningful, catering to personal or gift-worthy projects.
- Fantasy and Mythical Creatures: Dragons, fairies, and other fantastical elements can create an enchanting ambiance.
Preparing Your Workspace
Before diving into your project, prepare your workspace to ensure a smooth experience. Here’s how:
- Gather Tools: Have your pyrography pen, stencils, wood pieces, and any additional materials ready to go.
- Protect Your Surface: Use a cutting mat or an old newspaper to protect your work surface from burns.
- Sufficient Lighting: Good lighting helps you see details more clearly, especially when using intricate stencils.
Transferring Stencil Designs
Once you have chosen your stencil design, it’s time to transfer it to your workspace. Here are the steps you should follow:
- Secure the Stencil: Use painter’s tape to hold the stencil in place on the wood to avoid any slipping during the burning process.
- Trace with a Pencil: Lightly trace the stencil design with a pencil if you want to have a reference for your pyrography work.
- Check Alignment: Make sure the stencil is aligned properly before you start burning, as adjustments can be difficult afterward.
Burning Techniques with Stencils
Using different burning techniques can add depth and texture to your artwork. Consider these approaches:
- Linear Burning: For fine details, use a fine-point tip on your pyrography pen for precise lines.
- Shading: Use a medium or broad tip to apply shading for a more realistic look, particularly on nature-themed projects.
- Contrast:**: Experiment with varying levels of pressure to create light and dark areas within the design.
Experimenting with Your Style
Don’t hesitate to modify existing stencil designs or create your own. This approach helps you develop a unique style and keeps your pyrography projects fresh. Try combining different stencils or mixing elements from various designs to create something truly one-of-a-kind.
Finishing Touches
After completing your pyrography project, consider these finishing techniques to enhance its appeal:
- Sealing: Apply a clear sealant to protect your artwork from scratches and fading over time.
- Staining: A wood stain can add richness to the wood color, complementing your pyrography work.
- Framing: Consider framing your finished piece for display, which can also protect it from damage.
Project Ideas for Inspiration
If you’re still looking for fresh ideas, try these projects:
- Home Decor: Create wooden coasters or wall art with stencils that reflect your personality.
- Gift Items: Make custom keepsake boxes or picture frames for loved ones.
- Seasonal Crafts: Design holiday-themed decorations using stencils for a festive touch.
Stencils into your pyrography projects can simplify the process of creating detailed designs while boosting your artistic freedom. With thoughtful planning, unique designs, and various techniques, you can elevate your pyrography skills to new heights. So, grab your tools and let your creativity flow!
Common Mistakes to Avoid When Using Stencils in Pyrography
Using stencils in pyrography can greatly enhance your designs, offering precision and consistency. However, many artists, both beginner and experienced, often make common mistakes that can impact the quality of their work. Understanding these pitfalls will help you achieve better results in your pyrography projects.
Choosing the Wrong Material
One of the key mistakes is selecting inappropriate stencil material. Not all materials work well with pyrography. If you use cardboard or thin plastic stencils, they may burn or warp under the heat. Opt for heat-resistant materials like mylar or thick cardstock. These sturdier options can withstand the pyrography tool’s heat without deforming, ensuring a clear and crisp design.
Neglecting to Secure Your Stencil
Another common error is failing to properly secure the stencil while you work. If your stencil moves during the burning process, it can ruin the design. To prevent this, use tape or weights to hold the stencil in place. This simple step will ensure that your pattern remains tight and intact, providing you with a sharper, more professional look.
Not Testing the Pyrography Tool on Scrap Material
It’s crucial to avoid jumping straight into your project without testing your pyrography tool. Each tool may have different settings and heat levels. Always conduct a test burn on a piece of scrap wood. This practice not only helps you determine the right temperature but also gives you a chance to adjust your technique. Proper preparation saves time and materials in the long run.
Ignoring the Importance of Adequate Ventilation
When engaging in pyrography, you can’t afford to overlook safety. Many beginners forget to work in a well-ventilated area. Burning wood can release harmful fumes, which can be toxic if inhaled. Always ensure you have proper ventilation, either by working near an open window or using exhaust fans. Your health is essential, so take this precaution seriously.
Overworking Your Design
One of the artistic mistakes people often make is overworking their designs. When you continuously go over the same section, it can lead to burn marks or a sloppy appearance. Instead, focus on controlling your speed and pressure from the beginning. If you need to tweak a small part of your design, it’s better to make light adjustments rather than repeatedly passing over the same area.
Failing to Consider the Wood Grain
Understanding how wood grain affects your stencil work is vital. If you neglect to consider the direction and texture of the wood grain, your design may not come out as expected. Always align your stencil to complement the grain rather than opposing it. This small consideration can dramatically enhance the overall look of your pyrography project.
Using the Wrong Size Stencil
Selecting an inappropriate stencil size can lead to several issues. Too large a stencil may lose fine details when transferred onto your wood piece. Conversely, if the stencil is too small, you might struggle to fill in your design adequately. Always choose a stencil that fits well with the surface you’re working on. Scaling the design appropriately ensures each element of the pattern can be crisply defined.
Neglecting to Allow for Drying Time
If you use additional materials alongside your wood, such as paints or finishes, many artists overlook the need for adequate drying time. Rushing through this step can compromise the adhesion and durability of your final project. Allow all elements to dry fully, ensuring your design is polished and long-lasting before you display or use it.
Not Paying Attention to Lighting
Good lighting is key to successful pyrography. Working in poorly lit spaces can lead to mistakes, making it difficult to see whether you’re following your stencil accurately. Always set up your workspace in well-lit conditions. Consider using adjustable lamps to focus light on your project, ensuring you can clearly see every detail as you work.
In Summary
By avoiding these common mistakes, you can significantly improve your pyrography projects. From choosing the right materials to ensuring you have good lighting, each step is crucial for achieving beautiful results with stencils. As you refine your skills, be mindful of these pitfalls, and you’ll find that your artworks stand out for their quality and precision. Embrace the process and enjoy creating stunning pyrography designs!
Tips for Customizing Stencils to Enhance Your Pyrography Artwork
Customizing stencils for pyrography can significantly enhance your artwork, transforming ordinary projects into stunning pieces that showcase your unique style. By personalizing stencils, you not only improve the aesthetics of your work but also explore new creative avenues. Here are several tips that will help you effectively customize stencils for your pyrography artwork.
Select the Right Material for Your Stencils
Choosing the right stencil material is crucial for achieving a clean burn. Here are some popular materials to consider:
- Mylar: Durable and easy to clean, Mylar can handle high temperatures and is reusable.
- Stencil Film: This clear material allows you to see your project while burning and is designed specifically for stencil use.
- Cardstock: While not reusable, thick cardstock is a cost-effective option for one-time use. Just ensure to cover it promptly with a protective layer to prevent any burning.
Create Custom Designs
When it comes to personalization, starting from scratch can be both exciting and daunting. Here are some strategies to create custom designs:
- Sketch Your Ideas: Start with simple sketches or doodles. You can refine your ideas as you go along, which helps in creating a unique stencil.
- Use Graphic Design Software: For more complex designs, consider using software like Adobe Illustrator or free alternatives like Inkscape. These programs allow you to create intricate patterns that can be printed and cut out.
- Repurpose Existing Stencils: Look for patterns you already have and modify them. You could add or remove elements to fit your vision better.
Adjust the Size of Your Stencils
Getting the size right is essential for a successful pyrography project. Here’s how you can adjust stencil sizes:
- Scaling Up or Down: Use your printer’s settings to resize digital designs. Make sure the adjustments maintain the proportions to avoid distortion.
- Trial and Error: Print a few test copies at different sizes before settling on the final dimensions. This step saves time and materials later on.
Test Different Techniques
Every pyrographer has a unique style, and experimenting with stencil techniques can lead to delightful outcomes. Here are a few to consider:
- Multi-layer Stenciling: Create multiple layers of stencils to add depth. Burn the base layer, let it cool, and then proceed with additional layers.
- Shading with Stencils: Use stencils to create shading effects by varying the burn time and temperature. This complexity can add a professional touch to your artwork.
- Textured Effects: Experiment with burning through different textures by using stencil materials with various designs, such as lace or floral patterns.
Incorporate Color
While pyrography is known for its warm browns and rich textures, adding color can rejuvenate your work. Consider the following:
- Colored Pencils: After burning your design, apply colored pencils to specific areas for a popping effect.
- Acrylics: Use acrylic paints to fill in certain spaces on your burned stencil if you’re looking for a more vibrant finish.
Seal Your Artwork
Once you finish your pyrography project, sealing it properly protects your work and enhances its longevity. Follow these sealing tips:
- Select a Suitable Finish: Choose a finish like polyurethane or polyurethane varnish, designed for wood. Ensure it works well with your specific wood type.
- Apply Multiple Coats: For durability, apply at least two to three coats, allowing each layer to dry completely before applying the next.
By customizing and utilizing stencils in your pyrography projects, you can take your artistry to the next level. Whether you’re a beginner or an experienced pyrographer, the above strategies will not only inspire your creations but guide you toward achieving a distinctive look in your artwork. Start experimenting with these tips and watch your pyrography skills flourish as you add your personal touch to each piece.
Conclusion
Using stencils in your pyrography projects opens up a world of creativity and precision that can elevate your woodburning art to new heights. By mastering various techniques, you can incorporate stencils seamlessly into your work, ensuring sharp designs with intricate details that would be challenging to achieve freehand. To start off, consider the selection of the right stencils for your project; they should complement your overall vision and adapt to the wood’s surface. Whether you’re using commercially made stencils or creating your own, tailoring your designs empowers you to express your unique artistic flair.
Material choice significantly impacts both the ease of application and the final result. Selecting the right wood type can make a remarkable difference. Softer woods like basswood or birch provide a smooth background that responds well to pyrography, allowing stencils to lay nicely and produce even patterns. Moreover, consider the tools you use for stenciling and burning. High-quality pyrography pens with adjustable heat settings allow for better control, especially when working with precise stencil outlines. When paired with the right materials, these tools can enhance your productivity while reducing the likelihood of errors.
The creative possibilities when combining pyrography with stenciling are endless. You can design stunning wall art, personalized gifts, or decorative items that showcase intricate patterns and motifs. Think about popular themes such as nature, geometric designs, or even quotes that can be beautifully rendered using stencils. Seasonal projects, like holiday-themed decorations, are also fantastic ideas to explore, as they provide a chance to tailor patterns to specific celebrations. By playing with these themes and ideas, you’re not limited to one style or genre; stencils provide a gateway to experimenting with various designs and visual effects.
While stencils can greatly enhance your artwork, it’s important to be aware of common mistakes beginners might make. One frequent misstep is applying too much pressure while burning through the stencil, which can cause distortion of the design. Additionally, using paint or markers that are not suited for the wood type can lead to uneven lines and smudges, which detract from the overall aesthetic. Ensuring your workspace is clean and organized also helps in avoiding accidental overlaps and misalignments when using multiple layers of stencils, a situation that can quickly turn your artwork from fabulous to frustrating.
Customizing stencils is another strategy that can elevate your pyrography projects even further. By modifying existing designs or creating your own, you can infuse your personality into your artwork. Personalization not only enhances the uniqueness of your creations but also allows you to experiment with styles that aren’t widely available. Embrace the opportunity to sketch, cut, or even layer multiple stencils for added depth and interest in your designs. These small tweaks can transform an ordinary piece into a breathtaking showpiece.
As you embark on your pyrography journey, remember that practice and patience are your greatest allies. Each project teaches you something new, whether it be how to refine your technique, select the right materials, or navigate through the intricacies of an advanced design. Don’t shy away from mistakes; they are valuable lessons that enhance your skills over time. Engage with other pyrography enthusiasts, share your experiences, and soak up inspiration from others. Communities, both online and offline, can provide a wealth of knowledge, tips, and support.
Ultimately, the fusion of stencils and pyrography creates an engaging and versatile medium that invites endless exploration and self-expression. Shaping your skills in these areas can truly unlock your creative potential. Whether you’re a beginner embarking on your pyrography journey or an experienced artisan looking to refine your skillset, experimenting with stencils can introduce fresh dynamics into your projects. With the right techniques, materials, and creative insight, your work can resonate with both you and your audience, telling stories that celebrate your artistry.