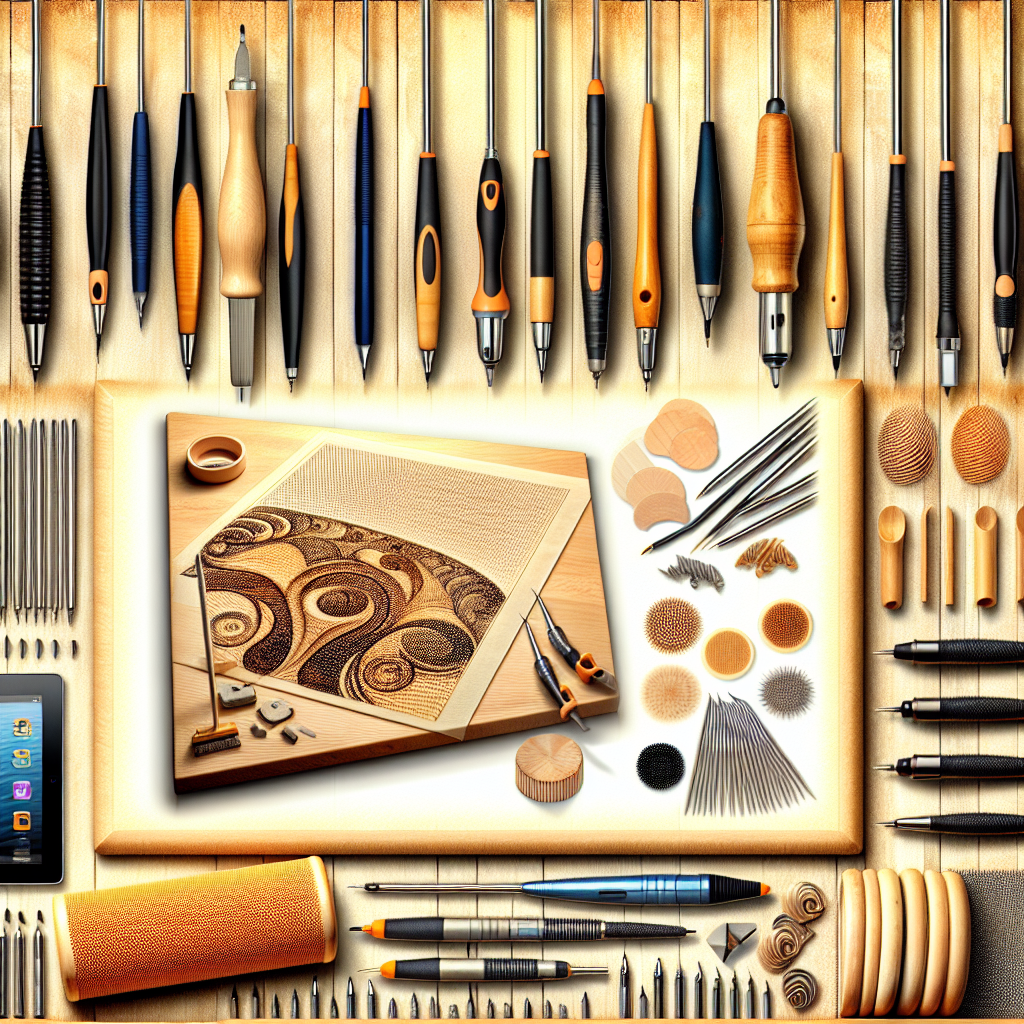
Specialty Tools That Transform Your Pyrography Creations
Pyrography is an engaging art form that allows you to intricately design and create stunning imagery on various surfaces using heat. While the basic woodburning tool is essential for beginners, specialty tools can elevate your pyrography to new heights, offering precise results and expanding your creative potential. Here, we explore several specialty tools that can transform your pyrography creations, making them more detailed and vibrant.
Detailing Pens
Detailing pens are smaller and fine-tipped, allowing for intricate designs that larger tools can’t achieve. These pens are particularly useful for adding fine lines, textures, and subtle shading. Using a detailing pen can significantly enhance the intricacy of your work, bringing forth features that add depth to simple designs. They are perfect for creating delicate patterns in floral motifs or incorporating tiny details in portraits.
Shading Points
Shading is crucial in pyrography, as it can dramatically change the mood and depth of your artwork. Shading points come in various shapes, allowing you to experiment with different techniques to achieve realistic textures. A rounded shader creates soft transitions, while a favorite spoon shader helps produce broader strokes. By incorporating these tools, you can establish contrast and dimension, resulting in visually striking pieces.
Temperature Control Tools
Temperature regulation influences the outcome of your pyrography. Specialty tools with adjustable heat settings enable you to work with various materials and achieve the desired effects consistently. For instance, using a tool with a digital display allows for precise control, ensuring that you can maintain the right temperature for your project, minimizing the risk of burning or charring your work.
Wood Finishing Tools
Once your pyrography masterpiece is complete, the finishing touches can make a world of difference. Wood finishing tools, such as sanders and sealers, enhance the durability and appearance of your artwork. A fine-grit sander smooths the wood surface, ensuring your design stands out. Applying a sealer afterward protects your work from moisture and wear while improving the wood’s grain, heightening the overall aesthetic appeal.
Stencil and Template Tools
For artists who want to incorporate precise patterns into their pyrography, stencil and template tools are invaluable. These tools enable you to reproduce intricate designs without the hassle of freehanding every element. You can use them to create consistent shapes in repetitive designs, ensuring that your work maintains a polished and professional look.
Spare Tips and Accessories
Having a variety of tips is essential for any pyrography artist. Spare tips, including flat, pointed, and curved designs, allow you to switch between various styles quickly. Additionally, accessories such as cleaning brushes and sponges help maintain your tools, ensuring that they perform optimally. Regular maintenance of these tools prolongs their lifespan and improves the quality of your pyrography, as clean tips deliver sharper lines and clearer patterns.
Workspace Optimization Tools
A well-organized workspace can significantly impact your pyrography experience. Consider investing in a heat-resistant mat to keep your surfaces safe. A wooden or metal stand can hold your tools in an accessible position. Clipboards or easels can secure your work in place, helping you maintain steady hands during intricate designs. By creating an efficient workspace, you allow yourself to focus solely on your art.
Exploring Digital Tools
The digital world offers countless resources for pyrography artists. Software applications can help create designs digitally, allowing you to visualize ideas before burning them onto wood. Additionally, online communities provide inspiration, techniques, and feedback from fellow artists, fostering a supportive environment that promotes growth and skill enhancement.
To summarize, integrating specialty tools into your pyrography endeavors can provide you with the versatility and precision needed to create outstanding artwork. By experimenting with detailing pens, shading points, temperature control systems, and additional accessories, you can take your craftsmanship to the next level. Remember, the right tools can make all the difference, enabling you to unleash your creativity and enhance your unique style in the captivating world of pyrography.
Mastering Techniques with Advanced Pyrography Equipment
For many artists, pyrography offers a unique blend of creativity and precision, allowing them to bring wood surfaces to life through intricate designs and vivid imagery. As you embark on mastering techniques within this captivating art form, leveraging advanced pyrography equipment can significantly enhance your skills, enabling you to achieve results that inspire and captivate. Below are some insights and strategies to help you level up your pyrography game with specialty tools.
Investing in High-Quality Pyrography Pens
One of the most crucial tools in pyrography is the pen itself. High-quality pyrography pens provide better control, comfort, and precision. Here are some features to consider:
- Adjustable Temperature: Look for pens that allow you to control the temperature settings. This feature impacts the depth and darkness of your burns, which is critical for creating shadow effects.
- Multiple Tips: Choose pens that accommodate various tips for different styles. From fine point tips for detailed work to shading tips for broader strokes, versatility is essential.
- Ergonomic Design: A comfortable grip can prevent fatigue during long projects, making it easier to focus on your artwork.
Utilizing Specialty Tips for Diverse Effects
Specialty tips can transform your pyrography work from basic to breathtaking. Experiment with different tip shapes to gain mastery over your technique:
- Shading Tips: These help create smooth transitions and gradients in shading, giving your artwork depth.
- Writing Tips: Perfect for adding intricate text or signatures without losing detail.
- Texture Tips: Use these to create patterns resembling wood grain or fabric, enhancing the tactile quality of your pieces.
Exploring Temperature Control Techniques
Mastering temperature control is vital in pyrography. Depending on how you adjust your pen’s temperature, you can achieve different effects. Here are techniques to explore:
- Layering: Start with a lower temperature to lay down base colors and gradually increase it for deeper tones, creating an intricate layered effect.
- Heat Syncing: Allow the tip to absorb heat over time; this technique helps in producing rich, dark burns without applying excessive pressure.
- Swift Movements: Maintaining a consistent speed while working can affect the burn depth. Familiarize yourself with slow and swift strokes to see how they impact your artwork.
Digital Tools
As the art of pyrography evolves, so do the tools available to artists. digital tools can help you refine and prepare your designs before transferring them to wood:
- Design Software: Use programs like Adobe Illustrator or free alternatives like Inkscape to create designs that can be printed onto your wood surface.
- Digital Stencils: Generate digital stencils for precise guidelines, which can streamline your drawing process.
- Online Tutorials: Take advantage of online platforms offering tutorials by expert pyrographers. Video demonstrations can be particularly helpful in visualizing techniques.
Experimenting with Non-Traditional Media
While wood is the typical medium for pyrography, don’t hesitate to experiment with different surfaces, such as:
- Bamboo: This option provides an interesting texture and color varied from traditional wood types.
- Leather: Pyrography on leather opens new avenues for creating customized items, from wallets to bookmarks.
- Paper: Thicker types of paper can also be used for practicing designs before committing them to wood.
Advancing your pyrography skills takes practice, creativity, and the right equipment. By investing in specialty tools, mastering techniques with advanced pens, and exploring various media, you’ll elevate your artistic abilities and produce work that resonates with your audience. Pyrography is an exciting journey, and using the right tools will undoubtedly help you make your mark in the world of art.
The Role of Quality Wood and Materials in Pyrography
When diving into the world of pyrography, often referred to as wood burning, the choice of materials goes a long way in determining the final outcome of your artwork. The quality of the wood and other materials not only influences the design’s intricacy but also its longevity and visual appeal. Understanding the significance of using quality wood can elevate your pyrographic creations from simple projects to stunning masterpieces.
Choosing the right type of wood is paramount for any pyrographer. Different woods react to heat in various ways, producing diverse effects from vibrant contrasts to subtle shading. Here’s a look at some of the popular wood types for pyrography and their characteristics:
- Basswood: This soft, light-colored wood is a favorite among pyrographers. Its fine grain allows for intricate detailing, and it burns evenly, making it easy to achieve clean lines and smooth shading.
- Pine: Known for its accessibility and affordability, pine features a more pronounced grain. While this can add character to your work, it also requires more skill to manage the burning process effectively.
- Birch: This hardwood is slightly more challenging to work with but yields excellent results. Birch maintains its color beautifully when burned, allowing for impressive contrast.
- Maple: As a harder wood, maple can be a bit tough on tools but is valued for its fine grain and durability. It can showcase the rich browns and blacks that come from the pyrography process.
- Walnut: If you’re after rich, dark tones, walnut is a superb choice. Its dark color provides a striking backdrop for lighter burns, making it ideal for sophisticated designs.
The grain pattern of wood is also an essential aspect to consider. A consistent grain allows for smoother burning, while a more knotty or varied grain can create unexpected texture and charm. However, it might introduce challenges in reaching desired details. Ultimately, the choice of wood should align with your creative vision.
Another critical component in pyrography is the choice of tools and materials. The right pyrography pen or tool can influence your ability to manipulate the wood effectively. Here are a few materials and tools that can enhance your pyrography experience:
- Pyrography Pen: Investing in a high-quality pyrography pen is crucial. Look for one with adjustable temperature settings for better control over your burning techniques.
- Tips and Nibs: Different tips create various effects. Flat tips are great for shading, while fine tips help with intricate details. Having a range of tips allows for more versatility in designs.
- Wood Finish: A good finish not only protects the wood but also enhances its visual appeal. Products like oils or varnish can add depth to the color and highlight your pyrography.
- Sandpaper: Smooth, unfinished wood is essential for a clean burning experience. Fine-grit sandpaper can help prepare the surface before starting your project.
Environment can also influence your pyrography projects. Humidity and exposure to elements can affect wood’s performance, causing warping or cracking. Storing your wood in a climate-controlled environment can help maintain its quality over time.
Furthermore, before committing to a project, it’s wise to practice on scrap pieces. This allows you to gauge how different woods respond to burning and refine your technique without risking a larger piece. Test patterns can also provide insight into how colors and shades will appear after finishing touches.
In the realm of pyrography, the materials you choose can significantly impact the quality and aesthetic of your art. Quality wood combined with the right tools will enable you to express your creativity and produce pieces that truly stand out. As you continue to refine your skills and explore various woods, you’ll discover unique styles that resonate with your artistic identity.
This journey into the subtleties of wood selection and tool usage not only enhances your skills but also deepens your appreciation for the art of pyrography. By prioritizing quality materials, you’re setting a solid foundation for creating captivating artworks that leave lasting impressions.
Integrating Design Elements: How Tools Enhance Artistic Vision
In the realm of art, integrating design elements is not merely an aesthetic choice; it’s a way to convey emotions and messages. The tools artists use significantly enhance their artistic vision, allowing for a range of expressions and creativity. Whether you’re working in a traditional medium or experimenting with digital platforms, understanding how to use your tools effectively can elevate your artwork to new heights.
Understanding the Role of Tools in Art
Tools are extensions of an artist’s abilities. They serve as the bridge between vision and execution. The right tools can provide precision, texture, and depth, all of which amplify the design elements within a piece. Here’s a look at how various tools can enhance artistic expression:
- Pens and Brushes: The choice of pen or brush can alter the entire feel of a piece. For example, a fine-tip pen enables intricate detailing, while a broad brush can create sweeping, dynamic strokes.
- Colors and Mediums: Different colors evoke different emotions. Using a palette that resonates with your subject matter can significantly enhance the narrative of your artwork. Similarly, mediums like acrylics, watercolors, and oils have unique properties that influence how colors blend.
- Digital Tools: In the digital realm, software like Adobe Illustrator or Procreate allows for experimentation without the constraints of traditional mediums. The ability to undo mistakes or layer images offers unprecedented freedom in artistic expression.
Techniques to Elevate Your Art
Integrating design elements effectively demands more than just the right tools; it requires a strategic approach. Here are some techniques artists can use:
1. Layering Techniques
Layering involves building up surfaces with various colors, patterns, or textures to create depth. Tools like palette knives or sponges are excellent for adding texture, while digital tools offer options like layer masks for precision.
2. Contrast and Balance
Utilizing contrasting colors or shapes can draw the eye to focal points in your artwork. Tools such as color wheels help in selecting complementary or contrasting colors, enhancing the overall composition.
3. Line Quality
The quality of lines can greatly affect the overall feel of a piece. Varying line weights can suggest movement or emphasis. Combining tools like brush pens and fine-liners can provide versatility in line quality, enriching the final design.
Exploring Specialty Tools
Beyond the basics, specialty tools can further refine an artist’s vision. Here are some standout options:
- Texture Tools: For those working with paint or clay, specific tools can imprint unique textures, adding dimensionality to your artwork.
- Airbrushes: Airbrushing provides a soft, gradient finish that can evoke ethereal feelings in art, especially in portrait work.
- Digital Tablets: For digital artists, tablets with styluses allow for intuitive drawing, mimicking the feel of traditional media while offering the benefits of digital editing.
Maintaining Your Tools
Just as a musician must care for their instruments, artists must maintain their tools. Regular cleaning and storage can prolong the life of your tools and ensure consistent performance. For example, brushes should be cleaned after each use to prevent paint from hardening.
Innovating with Hybrid Techniques
In today’s creative landscape, many artists are embracing hybrid techniques, combining traditional methods with new technologies. For instance, starting a piece with pencil sketches before finishing it digitally allows for the best of both worlds. This approach facilitates a broader exploration of artistic vision.
Ultimately, integrating design elements through the use of specialized tools not only enhances an artist’s workflow but also encourages deeper exploration of creative ideas. By understanding how to utilize these tools effectively, artists can communicate their visions more clearly, making their work resonate with viewers on multiple levels. Embrace the tools at your disposal and watch as your artistic expression transforms into something extraordinary.
Maintenance Tips for Pyrography Tools: Keeping Your Gear in Top Shape
Ensuring your pyrography tools remain in excellent condition is crucial for delivering high-quality work. Proper maintenance not only extends the lifespan of your equipment but also enhances your overall experience. Here are some valuable maintenance tips to keep your pyrography gear in top shape.
Regular Cleaning
Cleaning your tools after each use is a fundamental practice. Residue from wood and burnt material can accumulate, negatively impacting performance. Here’s how to effectively clean your pyrography tools:
- Cool Down: Always let your tools cool down completely before attempting to clean them to avoid burns.
- Brush Off Debris: Use a soft brush or cloth to remove any dust or residue. A fine-bristle brush will work wonders for hard-to-reach areas.
- Use Cleaning Solutions: For stubborn residue, consider a gentle cleaning solution diluted with water. Apply it with a cloth, but make sure to avoid excess moisture near electrical components.
Tip Maintenance
The nibs or tips of your pyrography tools are where the magic happens. Keeping them in good condition is essential for precise work. Here are some specialized care tips:
- Temperature Control: Always operate your tools at the recommended temperatures. Overheating can warp or damage the tips.
- Replace Worn Tips: If you notice that your tips are getting dull or misshapen, it’s time to replace them. Don’t try to sharpen them, as this could compromise their effectiveness.
- Store Properly: When not in use, store your tips safely, either in a dedicated box or a protective pouch to prevent them from getting damaged.
Electronics and Power Supply Care
Electric pyrography tools require special attention to their electronics and power sources. Neglecting these aspects can lead to performance issues or hazards. Follow these steps for efficient maintenance:
- Inspect Cords: Regularly check the power cords and connections for any signs of wear or damage. Replace or repair any frayed cords immediately to ensure safety.
- Use Surge Protectors: Protect your tools from electrical surges by plugging them into surge protectors. This small investment can prevent significant damage.
- Regular Testing: Periodically test your tools to ensure they’re working correctly. Listen for unusual sounds and watch for fluctuating temperatures.
Temperature Control
Maintaining an ideal working temperature is vital for achieving the desired effects in pyrography. A temperature that’s too high can char your wood too quickly, while one that’s too low can lead to incomplete burns.
- Adjust Settings: Use the adjustable settings on your pyrography tool to achieve optimal performance based on the type of wood and design.
- Use Test Pieces: Always test your settings on a scrap piece of wood before committing to your main project. This will give you a feel for how different woods react.
Storage Solutions
Electronics, tips, and other equipment need to be stored safely to prevent damage. Here are some effective tips for storing your pyrography tools:
- Organized Storage: Use a workstation with compartments or tool organizers to keep everything in place. This will prevent wear and tear from unnecessary movement.
- Temperature-Controlled Environment: If possible, store your tools in a climate-controlled area. Excess humidity or heat can harm both wood and electrical components.
- Labeling: Label containers and compartments so that you can easily locate your tools, reducing the chances of accidental damage.
Routine Inspections
Regularly inspect your pyrography tools as part of your maintenance routine. This can help you catch potential issues before they turn into bigger problems. Pay attention to:
- Functional Testing: Regularly check that all parts are working correctly by turning them on and observing their performance.
- Visual Clarity: Look for any visible wear or damage, especially on the cord and tip components.
- Clean Connections: Ensure that all electrical connections are secure and clean, as dirt can impact performance.
By following these maintenance tips, you’ll keep your pyrography tools in optimal condition. This not only enhances your creations but also provides a safer and more enjoyable crafting experience. Regular upkeep can make a significant difference in the quality of your pyrography projects, so incorporate these practices into your routine!
Conclusion
Leveling up your pyrography game requires a blend of the right tools, techniques, and materials. By integrating specialty tools that are specifically designed to meet the unique needs of pyrography, you can significantly enhance your artistic creations. The right equipment not only elevates the aesthetics of your work but also empowers you to explore new horizons in your craft. As you’ve seen throughout this article, tools like adjustable woodburning pens, various tips, and even stencils can transform your artwork into something truly extraordinary.
Mastering advanced techniques is crucial for those looking to take their pyrography skills to the next level. With sophisticated pyrography equipment, you can experiment with different styles, textures, and effects. For instance, utilizing a shading tip can add depth to your pieces, while a fine-point tip allows for delicate line work. Moreover, electronic temperature control can help maintain consistent burn quality across your projects. The ability to automatically adjust the tool’s heat not only augments your technique but also boosts confidence as you delve into complex designs without fear of damaging your work.
You’ve also discovered the importance of choosing the right wood and materials for your pyrography projects. Quality wood significantly impacts the final outcome, affecting how colors blend, grain patterns emerge, and textures retain the burn’s intricacies. Hardwoods like maple or cherry are often ideal for intricate designs because they burn more evenly and provide a stable surface for detail. On the other hand, softer woods might be better suited for larger, looser designs, allowing your creative juices to flow free of frustration. Selecting the appropriate substrate lays a solid foundation for your artistry and directly influences the precision of your work.
Integrating design elements into your pyrography projects is another dimension to consider. Your tools can serve as a bridge between your artistic vision and the final execution. Tools that allow for various design intricacies enable you to think outside the box, pushing creative boundaries. You can incorporate layering techniques or use different wood pieces for a mixed media approach. By understanding how various tools impact your artistic vision, you’ll be better equipped to choose the right ones to convey your message. The ability to manipulate design elements creates a rich tapestry of artistic expression, allowing your personality and skill to shine through in everything you create.
Maintenance of your pyrography tools shouldn’t be overlooked, as this aspect is vital to ensuring longevity and optimum performance. Proper upkeep can prevent unsatisfactory results while prolonging the life of your equipment. Regularly cleaning your tips removes burnt residue, which can affect the quality of your work. Additionally, storing tools in a controlled environment protects them from moisture and temperature fluctuations that can cause damage. Keeping your tools in top shape can make the difference between a mediocre piece and an outstanding one.
By synthesizing these various components, you create pathways to not only improve but redefine your pyrography practice. When you invest time in learning how technical aspects like specialty tools and high-quality materials can improve your work, you empower yourself as an artist. The interplay of tools, techniques, and good maintenance can take your pyrography from simple designs to breathtaking works of art.
As you continue on your pyrography journey, remember that mastery comes with practice, and experimenting with new tools opens up exciting opportunities for growth. Whether you’re a seasoned artist or just starting, these strategies will point you toward elevating your work. Exploring advanced tools and techniques can help reveal a deeper understanding of the craft, and will genuinely enhance your creativity. You hold in your hands the power to create incredible art that tells your story. So go ahead, pick up those specialty tools, and let your imagination run wild—each stroke will captivate and inspire.