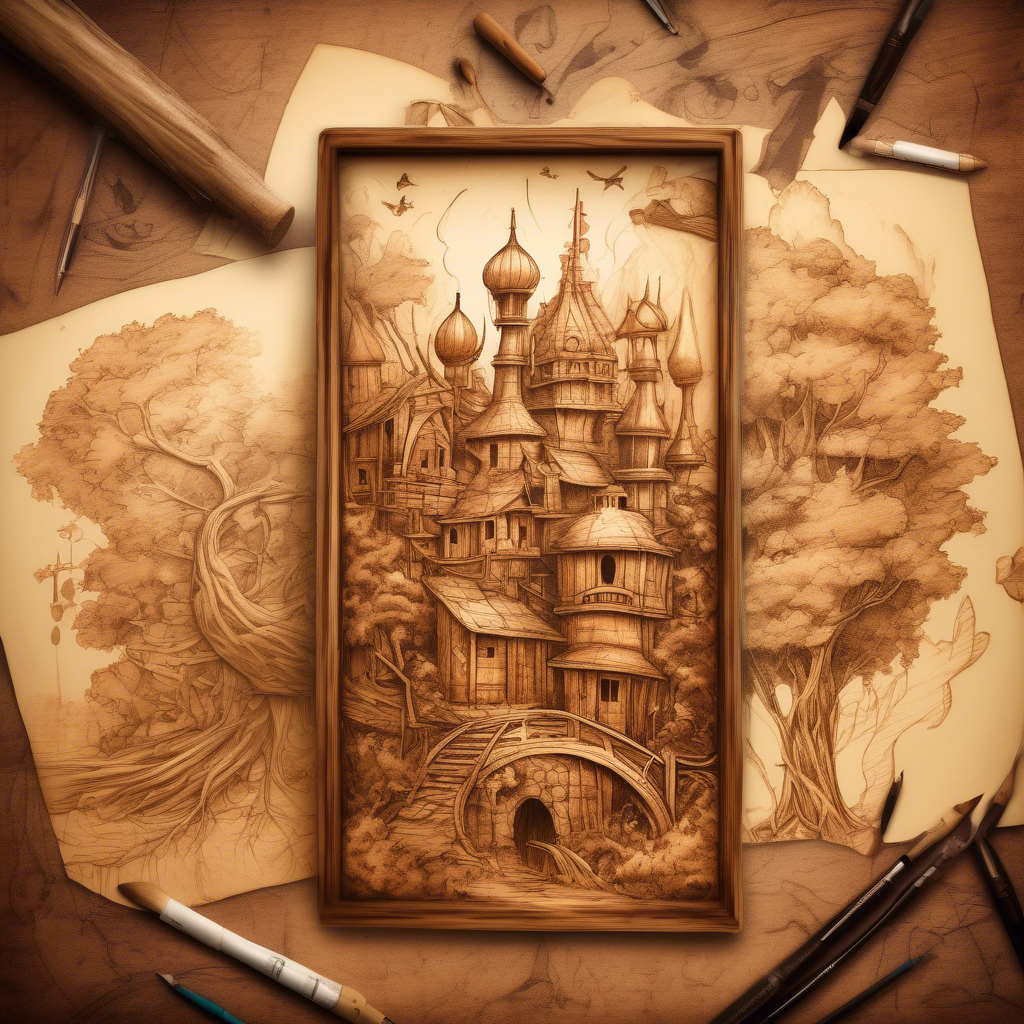
Techniques for Creating Depth and Dimension in Pyrography
Creating captivating pyrography art involves more than just burning a design onto wood; it’s about adding depth and dimension that can transform a flat piece into a visually stunning masterpiece. Here are effective techniques to enhance your pyrography projects, focusing on how you can bring your creations to life.
Understanding Light and Shadow
One of the primary methods to create depth in pyrography is the use of light and shadow. By understanding how light interacts with objects, you can simulate this effect in your art. Here are key considerations:
- Light Source: Decide where your light source is coming from. Establishing a light source will dictate where shadows fall. For example, if the light is coming from the left, the right side of your elements will naturally be darker.
- Contrast: Use varying degrees of burn depth to create a distinct contrast. Lighter areas can be achieved by gently burning, while darker areas require a more intense burn. This contrast will give your piece a three-dimensional look.
- Layering: Apply multiple layers of burning to specific areas to enhance the perception of depth. Start with lighter burns and gradually build up darker tones.
Utilizing Texture
Texture plays a significant role in conveying depth. Here are advanced methods to incorporate texture into your pyrography work:
- Grain Patterns: Incorporate the natural grain of the wood into your design. This not only adds realism but also enhances the three-dimensional effect. Use the grain lines as guidelines in your artwork.
- Burn Techniques: Experiment with different burning techniques such as stippling, shading, and cross-hatching. These techniques can simulate texture, giving the illusion of various surfaces.
- Height Variation: Add raised areas using a thicker tip or combine both burned and unburned wood to create a tactile surface. This visually increases depth perception and invites touch.
Color Integration
While traditional pyrography typically involves a monochromatic palette, adding color can enhance dimension significantly. Here’s how:
- Colored Pencils: After completing your pyrography, consider using colored pencils to add highlights or enhance shadows. This can give your piece a vibrant look and more depth.
- Stains and Dyes: Apply wood stains or dyes to different areas post-burning. Using darker stains in shadowed areas and lighter stains in highlights can amplify the dimensionality of your artwork.
- Layered Coloring: Similar to layering in burning, layering colors can create a rich, dimensional appearance. Be cautious with your approach to ensure that colors blend naturally rather than overpowering the burn marks.
Composition Techniques
The overall composition of your pyrography piece plays a crucial role in creating depth and dimension. Here are some techniques to consider:
- Overlapping Objects: Arrange elements in your design so that they appear to overlap. This not only enhances depth but also creates a natural flow in the artwork.
- Focal Points: Establish clear focal points in your work. Having a dominant area surrounded by less detailed regions can draw the viewer’s eye and create an illusion of depth.
- Foreground and Background: Differentiate between foreground and background elements. You can burn foreground items with more detail and leave the background softer or less detailed, enhancing the perception of distance.
Tool Selection and Technique
Using the right tools and methods is essential for creating depth in pyrography:
- Tips and Temperature: Utilize varied tips for different effects. A fine tip is excellent for detailed work, while broader tips can provide shading and texture. Adjust your tool temperature to control the burn depth effectively.
- Practice: Consistent practice with each technique will improve your skill in creating depth and dimension. Experiment with different styles to discover what works best for you.
By applying these techniques in your pyrography projects, you can elevate your art from flat surfaces to stunning pieces that captivate and engage your audience. Remember, creating depth and dimension in your work requires practice and a keen understanding of light, texture, and composition. So pick up your pyrography pen and start experimenting!
The Role of Contrast in Enhancing Pyrographic Art
Pyrography, the art of decorating wood or other materials with burn marks, relies heavily on the manipulation of contrast to create visually striking pieces. Mastering contrast is essential for any pyrography artist, transforming simple burn patterns into intricate images that convey depth, emotion, and movement. Understanding various aspects of contrast in pyrographic art can elevate your work to new heights.
Contrast can be classified into two main types: color contrast and tonal contrast. Both play a crucial role in enhancing the overall aesthetic of your pyrographic designs.
Understanding Color Contrast
Color contrast refers to the usage of different colors to create a distinct separation between elements in a design. While pyrography primarily involves burnt shades of brown and black, artists can incorporate other colors effectively:
- Colored finishes: Applying dyes or stains on the wood can produce vibrant hues that stand out against the darker burnt areas.
- Layering techniques: Combining transparent and opaque layers of color can enhance specific regions, allowing you to control the visual message of your artwork.
By strategically selecting colors that contrast with your base tones, you guide viewers’ eyes across the piece, emphasizing focal points and enhancing the overall impact of your artwork.
Exploring Tonal Contrast
Tonal contrast, often described as the difference between light and dark values, is vital in pyrography. This contrast creates the illusion of depth and form. Here are some ways to achieve tonal contrast:
- Varied burn depths: Adjusting the temperature and pressure of your pyrography tool alters the shade of burnt marks. Deep, black burns juxtaposed with lighter shades produce stunning contrasts.
- Shading techniques: Mastering different shading methods, such as stippling or cross-hatching, allows you to create a wider range of tonal values within your piece.
These techniques enable you to craft lifelike textures and add dimension to flat surfaces, effectively pulling viewers into your work.
The Emotional Impact of Contrast
Aside from the visual benefits, contrast in pyrographic art significantly affects the feelings evoked in viewers. High contrast images often create a sense of drama and intensity, while softer contrasts can convey serenity and subtlety.
Consider the emotions you want your artwork to express. For example:
- High contrast: This can result in bold artworks that command attention, often evoking strong emotional responses.
- Low contrast: Softer transitions might lead to calm, peaceful scenes that invite contemplation.
By employing contrast thoughtfully, you can enhance your artwork’s narrative and emotional resonance.
Practical Tips for Using Contrast in Pyrography
Implementing contrast effectively in your pyrographic art can be a game-changer. Here are some practical tips to help you get started:
- Plan your design: Before you begin burning, sketch your ideas and consider how contrast can enhance them. Pay attention to the balance between light and dark areas.
- Experiment: Don’t shy away from testing out different techniques and tools. Practice creates mastery, and finding what works for you is key.
- Seek feedback: Share your work with other pyrography enthusiasts or artists to receive constructive input on your use of contrast.
By following these tips, you’ll be well on your way to creating mesmerizing pyrographic art that harnesses the power of contrast.
Contrast in pyrography is not just an aesthetic choice but a fundamental element that enhances the overall impact of your work. Understanding how to manipulate both color and tonal contrast allows you to create art that is not only visually appealing but also rich in emotional depth. So pick up your pyrography tool and start experimenting with contrast to bring your artistic visions to life!
Exploring Textures: Using Tools to Add Dimension
Creating depth and dimension in pyrography is a fascinating journey, and mastering various tools can significantly enhance the textures in your artwork. By understanding how to use these tools effectively, you can add richness and complexity to your designs, making them more visually appealing and engaging. Here’s a closer look at how tools can help you explore textures in pyrography.
Understanding the Essential Tools
Your toolset is the foundation of your pyrographic creations. Here are some of the most common tools that can be used to create diverse textures:
- Wood Burning Pen: The primary tool for pyrography, available in various tip shapes.
- Wire Tips: These allow for intricate details and fine lines.
- Brush Tips: Ideal for shading and creating smooth transitions between tones.
- Stamping Tools: Useful for adding consistent patterns or textures across your piece.
- Heat Gun or Blower: Handy for manipulating the texture by applying heat selectively.
Creating Various Textures
Once you have the right tools, you can start exploring how to create different textures that bring depth to your pieces. Here are some techniques to consider:
Line Work
Using a fine-point wire tip, you can create intricate line work. Varying the pressure on the pen helps in producing thicker or thinner lines, adding a dynamic feel to the piece. Cross-hatching and stippling are effective methods that add depth through layering lines:
- Cross-Hatching: Overlaying perpendicular lines creates a shadow effect, giving the illusion of depth.
- Stippling: Small dots placed closely can mimic texture like skin or rough surfaces.
Shading Techniques
Shading is crucial for adding dimension. Utilize the brush tip of your wood-burning pen to create gradients. This can be achieved with:
- Blending: Gradually shifting between light and dark tones offers a smooth transition and a three-dimensional feel.
- Burning Patterns: Incorporate patterned shading, like spirals or waves, to suggest texture like water or clouds.
Utilizing Depth with Layers
Layering is an advanced technique that can dramatically transform your work. Begin with a base layer using a consistent burn to establish a foundation. Once dry, add additional layers, allowing each to stand out. Here’s how:
- Background and Foreground: Design with a clear foreground and background, creating a perception of space.
- Off-set Layers: Displace layers slightly to create a more organic appearance, as seen in foliage or landscapes.
Experimenting with Shapes and Patterns
Different shapes and patterns can evoke unique feelings and textures. Organic forms like leaves or flowers offer softer, rounded appearances. In contrast, geometric shapes can create a compact, uniform look. Experimenting with these forms can lead to unexpected results:
- Free-Form Patterns: Allow for creativity; no two patterns will be the same, enhancing uniqueness.
- Geometric Precision: Use templates for creating perfect lines and shapes, ideal for modern designs.
Final Touches with Tools
Never underestimate the power of finishing techniques. Once the burning process is complete, tools can further define textures:
- Sandpaper: Lightly sanding can create a smoother surface, softening harsh lines.
- Oils and Finishes: Apply oils or wood finishes to deepen colors and enhance texture, creating a rich, polished look.
Exploring textures in pyrography through various tools enriches your artwork. Understanding how to manipulate line work, shading, layering, and shapes is critical to creating stunning pieces. Embrace experimentation—you’ll discover your unique style and push the boundaries of this captivating art form.
Color Integration in Pyrography for Greater Visual Impact
When it comes to pyrography, the art of creating images with heat on wood or other materials, integrating color can breathe life into your designs and enhance their visual impact. While traditional pyrography relies heavily on various burn techniques to create depth, adding color opens up a new realm of creativity. Here are some effective methods for integrating color into your pyrographic work, allowing for a more pronounced and captivating final piece.
Understanding the Basics of Color Integration
Before diving into techniques, it’s essential to grasp the basics of color theory. Colors can evoke emotions and set the mood of your artwork. Familiarize yourself with the color wheel and how different colors interact with one another. Here’s a quick breakdown:
- Complementary Colors: These are opposite colors on the color wheel, which can create striking contrasts.
- Analogous Colors: These colors sit next to each other on the wheel, providing harmony.
- Triadic Colors: Using three colors that are evenly spaced on the wheel can create a vibrant palette.
Using color harmoniously will enhance the nuances of your pyrographic imagery, making it visually appealing and engaging.
Techniques for Adding Color
There are several ways to integrate color into pyrography without overpowering the woodburned design:
1. Stain and Dye
Wood stains and dyes can effectively enhance your pyrographic artworks. After completing your burning, apply a stain to add depth and a layer of color. Choose a shade that complements the burnt designs. Water-based stains penetrate the wood well and are easy to apply, but make sure to allow sufficient drying time.
2. Colored Pencils
Colored pencils are an excellent option for those seeking precision. After burning your design, you can enhance specific areas with colored pencils. They allow for fine detail work and can blend beautifully with the pyrography. Use a fixative once completed to preserve the colors from smudging.
3. Acrylic Paints
Acrylic paints offer a versatile medium for adding color. Choose high-quality paints for the best results. Sponges or brushes can be used to apply the paint over your burned areas. Make sure to thin the acrylic with water or a medium to ensure proper adhesion onto the surface. Always finish with a clear coat to protect your artwork from UV damage and ensure the longevity of the colors.
4. Pastels
Soft pastels or oil pastels can create striking colors in pyrography. Gently rub the pastel onto the surface and blend with your fingers or a blending tool. Remember to apply a fixative afterward to maintain the vivid colors.
Creating Layers with Color
Layering color creates a sense of depth and dimension in your artwork. Using different tones of the same color can give your design more life. Here are some tips to layer effectively:
- Start Light: Apply lighter colors first, then gradually add darker shades. This method prevents overpowering the design.
- Blend Seamlessly: Use a soft cloth or blending tool while the colors are still wet to blend areas together smoothly.
- Use Transparent Layers: Thin down your colors to create transparent layers. This allows the pyrography beneath to show through, enriching the artwork.
Preserving Color Integration
Once you’ve completed your pyrographic piece and integrated color, proper preservation is key. Use a clear, non-yellowing varnish to seal the work. This will protect the colors from fading and give your piece a polished appearance. Choose between matte or glossy finishes based on your preferred aesthetic.
Color into your pyrographic artwork opens up a world of possibilities. From basic stains to detailed painted layers, each technique can significantly elevate your designs. As you explore these methods, remember to embrace creativity and make your artwork your own. With the right approach, color integration can turn simple pyrographic works into extraordinary pieces of art.
Common Mistakes in Pyrography and How to Avoid Them
Many artists start their pyrography journeys with high hopes and enthusiasm, only to encounter frustrating setbacks. Identifying and addressing common mistakes can pave the way for a smoother and more successful experience. Here are some typical pitfalls and how to avoid them.
1. Lack of Preparation
One of the most common mistakes is diving into pyrography without sufficient preparation. Not organizing your materials or sketching your design can lead to mishaps.
- Solution: Invest time in planning your project. Use graph paper for detailed sketches and gather all necessary tools, including various wood types, a range of tips, and good quality safety gear.
2. Using Poor Quality Wood
Another frequent misstep is choosing the wrong type of wood. Certain woods can produce uneven results or even emit harmful fumes when burned.
- Solution: Opt for well-suited woods like basswood, birch, or maple. These woods have a fine grain, allowing for smoother burning and better detail. Always ensure the wood is untreated and free of chemicals.
3. Ignoring Heat Settings
Many beginners struggle with adjusting the heat settings of their pyrography tool. Using the wrong temperature can lead to burn marks or uneven lines.
- Solution: Test the temperature on a scrap piece of wood first. Familiarize yourself with your tool’s heat range. Lower temperatures work best for fine lines and lighter shading, while higher settings are suitable for deep burns and dark areas.
4. Neglecting to Practice
Pyrography is an intricate craft. New artists often underestimate the importance of practice and may rush into complex designs without honing their skills.
- Solution: Dedicate time to practice basic techniques like outlining, shading, and texturing. Create a series of small, simple designs to build your confidence before tackling larger projects.
5. Overly Complicated Designs
Many artists overload their projects with intricate details, forgetting that simplicity often holds greater appeal. Overcomplication can lead to frustration and discouragement.
- Solution: Start with simpler designs and gradually progress to more complex ones. Consider breaking down intricate ideas into manageable sections, allowing you to focus on detail without overwhelming yourself.
6. Insufficient Safety Measures
Reviewing safety protocols is crucial. Neglecting safety can lead to accidents or health issues, especially when working with hot tools.
- Solution: Always wear protective eyewear and consider a mask to avoid inhaling fumes. Work in a well-ventilated area and keep a fire extinguisher nearby for extra precautions.
7. Avoiding Mistakes
Many artists fear making mistakes, leading them to become overly cautious and tense during their work. This fear can stifle creativity and spontaneity.
- Solution: Embrace mistakes as learning opportunities. Each error can guide your understanding of texture, shading, and overall technique. Allow yourself room to experiment without the pressure of perfection.
8. Skipping the Finishing Touches
Last but not least, overlooking finishing techniques can diminish the final outcome. Many artists improperly seal or protect their work after spending hours on it.
- Solution: After your pyrography piece is complete, sand it lightly and apply a suitable finish. Use a clear wood finish or natural oil to enhance the wood’s natural beauty and protect against wear.
By recognizing these common pitfalls and actively seeking to avoid them, you can improve your pyrography skills. Each mistake you sidestep contributes to your growth as an artist, ultimately leading to more rewarding creations. Happy burning!
Conclusion
Creating depth and dimension in pyrography isn’t just about mastering the basics; it’s a journey that requires experimentation, practice, and an understanding of various techniques. Each method that we explored plays a pivotal role in bringing your art to life, allowing for a more immersive viewer experience. By blending these strategies together, you can elevate your pyrographic pieces from simple designs to captivating works of art.
The techniques discussed serve as a solid foundation. For instance, layering is an effective way to add complexity to your work. By utilizing various burning methods and intensities, you can create shadows and highlights that mimic the natural play of light. This layering approach not only averts flatness but converts your design into a three-dimensional experience. Take time to practice these techniques, ensuring you understand how different tools and intensities can work in tandem.
Furthermore, contrast remains a key element in enhancing the impact of your pyrographic art. The balance between dark and light areas draws the eye, guiding it through your piece and emphasizing critical components. Not every artwork will demand an equal distribution of dark and light, but knowing how to manipulate these contrasts will enable you to craft a more dynamic visual appeal. Experiment with different shades and tones, noting the dramatic effect that even subtle changes can bring.
Texture is another crucial aspect that adds richness to pyrography. The variety of tools available allows for endless possibilities in creating different textures. From the smoothness of a fine tip to the roughness of a textured stamp, each tool produces a unique effect that can completely transform your piece. Utilize techniques such as stippling, cross-hatching, or even scraping to add these dimensions. The tactile quality you create through texture can encourage viewers to engage more intimately with your art.
Color integration is equally essential in building an engaging composition. While traditional pyrography often gravitates toward monochromatic tones, incorporating color can infuse your artwork with life and vibrancy. Consider using colored pencils or inks to complement your pyrography. By strategically layering colors, you establish depth and dimension, creating a striking visual narrative that captures attention. The addition of color should harmonize with your burning techniques rather than overshadow them. The balance protects the integrity of your pyrographic work while enhancing its overall appeal.
Despite the techniques employed, it’s important to acknowledge common mistakes that artists sometimes make in the pyrographic process. Overworking certain areas can lead to unintended results, such as scorching and a loss of detail. It’s advisable to regularly step back from your work to assess your progress and ensure the design remains cohesive. Simple mistakes can sometimes lead to substantial setbacks, but remaining attentive and making corrections allows for a more enjoyable creative process. Furthermore, thorough planning of your layout can prevent many common errors associated with hurried compositions.
Remember, each piece you create is an opportunity for learning. Whether you’re at the beginning of your pyrographic journey or you have years of experience, there’s always room for growth. Embrace the process of trial and error; the most profound breakthroughs in artistry often stem from mistakes and unplanned outcomes. A flexible mindset cultivates not just skill but also a distinct style that sets your work apart from others.
Ultimately, creating depth and dimension in pyrography involves commitment and vision. Take the time to understand how techniques interrelate, how contrast impacts composition, and how color can elevate your work. By integrating texture and remaining aware of common pitfalls, you pave the way for a rewarding pyrographic experience. Allow your passion for the craft to guide you. With dedication and creativity, you can produce unforgettable pieces of art that resonate with viewers, inviting them to explore and appreciate the intricate beauty of your pyrographic creations. Embrace the journey ahead; you’re on the path to mastering the art of depth and dimension in pyrography.