Techniques for Creating Custom Pyrography Tools
Creating custom pyrography tools can significantly enhance your woodburning experience, allowing for intricate designs and personalized touches. If you’re eager to elevate your artistry, understanding the various techniques for developing these unique tools is essential. Here are some effective methods that can help you craft your own pyrography instruments.
Understanding the Basics of Pyrography Tools
Before diving into the creation of custom tools, it’s crucial to grasp the fundamentals of pyrography. Traditional pyrography tools typically use heated metal tips to burn designs into wood or other materials. The temperature and tip shape directly influence the outcome of your work.
Selecting the Right Materials
To create your pyrography tools, you’ll need some basic materials:
- Heating Element: This could be a soldering iron or a specialized pyrography pen.
- Metal Tips: Stainless steel or brass tips are ideal as they resist rust and maintain heating well.
- Insulation Materials: Items like ceramic or heat-resistant rubber help protect components from heat damage.
- Wood or Handle Material: Choose a comfortable and attractive material for the tool’s handle.
Customizing the Heating Element
To achieve more versatile heating options, consider customizing your heating element. A soldering iron is a popular choice for beginners due to its availability and ease of use. To customize:
- Adjust the Temperature: Some soldering irons come with adjustable temperature settings. This allows you to find the optimal heat level for different materials.
- Change the Tips: Experiment with various tips—round, flat, or pointed—to see which one works best for the designs you’re planning to create.
Creating Custom Tips
Custom tips can add unique characteristics to your pyrography projects. Here’s how you can make your own:
- Shaping Metal: Use pliers to shape your metal tips into the desired form. For example, you can flatten a tip to create wider strokes or sharpen it for fine details.
- Welding Techniques: If you have access to welding equipment, you can fuse different metal pieces to create complex tip shapes.
Designing Ergonomic Handles
An ergonomic handle ensures a comfortable grip, which is vital for long periods of pyrography work. Consider the following when designing your handle:
- Material Choice: Wood, rubber, or synthetic materials offer varying levels of comfort and durability.
- Shape and Size: Aim for a shape that fits your hand comfortably. You can carve or sand the handle to achieve the perfect contour.
Implementing Different Techniques
To fully utilize your custom tools, explore various pyrography techniques:
- Shading: Use different tip shapes to achieve gradients and shading effects.
- Texturing: Employ a swirling technique with your custom tips to bring unique textures to the surface.
- Stippling: Dapple the surface with a fine-point tip to create dot patterns, adding depth and interest to your designs.
Experimenting and Practicing
Once you’ve built your custom tools, the real fun begins! Experimenting is key to mastering the art of pyrography:
- Practice on Scrap Wood: Start your designs on scrap pieces before moving to final projects.
- Try Different Techniques: Don’t hesitate to mix different techniques to find your unique style.
- Seek Inspiration: Join pyrography communities to share tips, receive feedback, and find inspiration from fellow artists.
Crafting your own pyrography tools not only enhances your artistic expression but also brings a personal touch to your work. By following these techniques, you can create a comprehensive set of tools tailored to your needs, ultimately elevating your pyrography projects to new heights. Each step you take in customization can lead you closer to achieving your distinctive artistic voice in the world of woodburning.
Essential Materials Needed for Pyrography Tool Customization
When diving into the world of pyrography, having the right materials for customizing tools is essential. Customizing pyrography tools not only enhances your crafting experience but also allows you to achieve results that resonate with your unique style. Below are the essential materials you will need to create or modify your pyrography tools successfully.
Basic Tool Components
Starting with the foundational elements is crucial. Ensure you have the following:
- Pyrography Pen: The core of any pyrography setup. Select a pen that is comfortable to hold and easy to maneuver.
- Heating Element: This part generates the heat for burning designs onto the wood. Choose a heating element that allows for temperature adjustments.
- Nib/Tip Variety: Having various tips lets you create different types of lines and shading techniques. This diversity can significantly affect your artwork’s complexity.
Power Supply and Equipment
Your pyrography tool requires stable power for optimal performance. Keep these items in mind:
- Variable Power Supply: A reliable power supply helps regulate the temperature of the burning tool. This is crucial for consistent results.
- Safety Equipment: Since pyrography involves heat and sometimes fumes, investing in safety gear like gloves and a mask can protect you while working.
Customization Materials
To personalize your pyrography tools, gather some of these materials:
- Wood Handles: For a more comfortable grip, consider customizing or replacing the handles of your pyrography pen with a wooden one that fits your hand better.
- Decorative Elements: Adding various design elements to your tools, like decorative wraps or embellishments, can improve aesthetics and personalize your toolset.
- Adhesives: High-quality adhesives are essential for attaching different parts of the tool or for securing decorative elements.
Sharpening and Maintenance Tools
Taking care of your pyrography tools ensures they last longer and perform well:
- Metal File or Sharpening Stone: Keeping your tips sharp is key for precise designs. Regular maintenance will improve the clarity of your artwork.
- Cleaning Brush: Use a small brush to remove any debris or soot from the nib after use. This keeps your equipment in top shape.
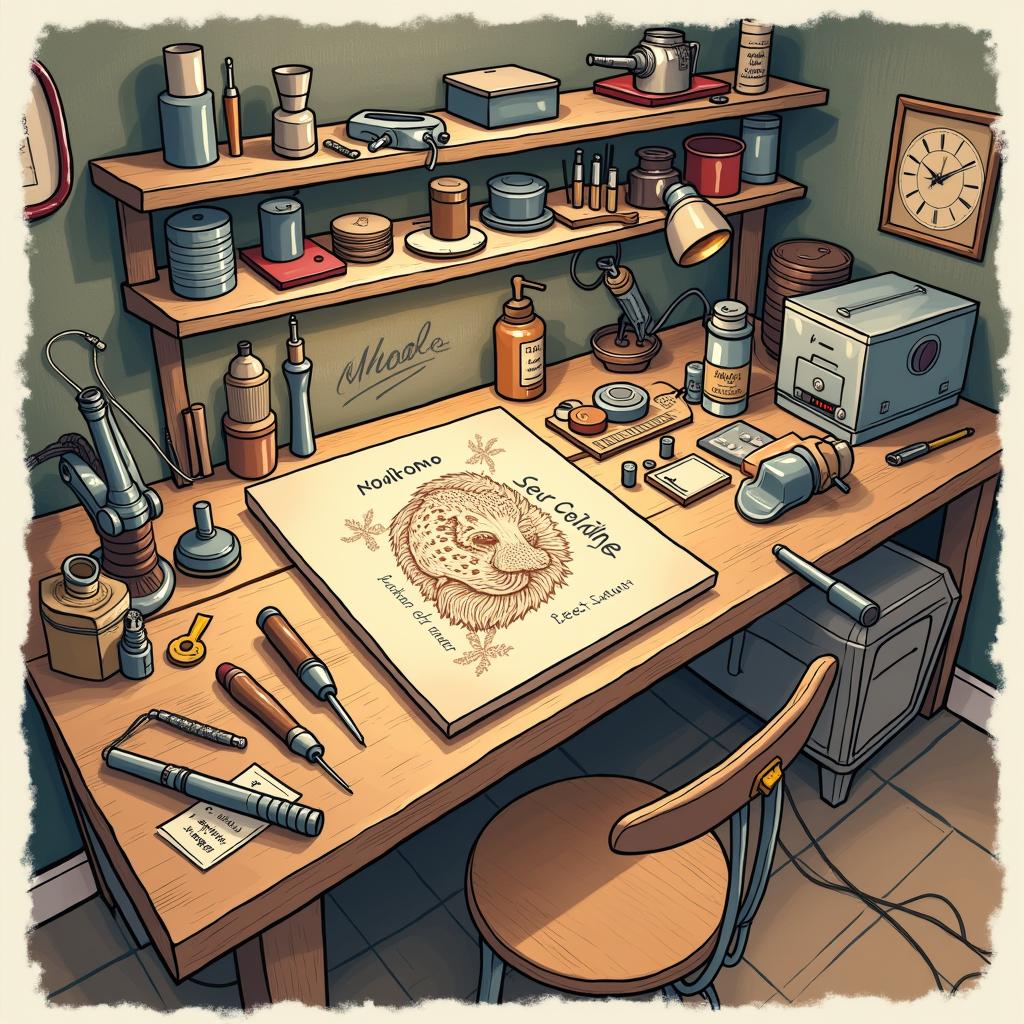
Workspace Essentials
A well-organized workspace enhances your productivity. Consider incorporating the following:
- Heat-Resistant Surface: A surface that can withstand high temperatures prevents damage while you work on your projects.
- Storage Containers: Organize tools and materials using bins or drawers to keep your workspace tidy and efficient.
- Proper Lighting: Good lighting is essential for detailing your work. A desk lamp with adjustable brightness will help illuminate your projects without creating shadows.
Wood and Paper Sources
The type of wood or paper you use makes a significant difference in your final piece:
- Wood Selection: Choose wood types like basswood, birch, or cherry for pyrography. These woods hold up to detailed work and provide clear burning results.
- Practice Paper or Wood: Practice on less expensive materials to perfect your techniques and experiment without the fear of wasting more valuable resources.
Having the essential materials for customizing your pyrography tools makes a significant difference in crafting high-quality work. Each element plays an important role, from the functionality of the tools themselves to the organization of your workspace. By investing in the right supplies and maintaining them, you can elevate your pyrography practice, create stunning artwork, and enjoy a fulfilling creative journey.
Safety Precautions When Working with Pyrography Tools
When diving into the world of pyrography, safety should always take precedence. The art form of burning designs onto materials using heated tools can be both enjoyable and rewarding, but it also presents certain hazards that must be managed carefully. Here are crucial safety precautions to follow when working with pyrography tools.
Personal Protective Equipment (PPE)
Before starting your pyrography project, ensure you’re equipped with the right personal protective equipment. This decreases your risk of injury and enhances your overall safety experience:
- Protective eyewear: Safety goggles shield your eyes from smoke, debris, and any splattering that can occur.
- Gloves: Heat-resistant gloves protect your hands from burns while handling hot tools or materials.
- Respirator mask: A mask will help filter out harmful fumes and particles, especially when burning materials like wood that may release toxic compounds.
- Apron: Consider wearing an apron to protect your clothing from accidental burns or splatters.
Work Environment Safety
Your workspace plays a significant role in ensuring your safety during pyrography. Here are some steps to create a secure work environment:
- Well-ventilated area: Always work in a space with good airflow to disperse fumes. Consider placing a fan near a window to promote natural airflow.
- Stable surface: Ensure your work surface is sturdy and free from clutter. A stable platform decreases the risk of accidents.
- Fire-resistant materials: Use a fire-resistant mat or surface to place your work on. This provides an extra layer of protection just in case an ember falls.
- Limited flammable items: Keep materials such as paper, cloth, and chemicals at a distance from your workspace to minimize fire hazards.
Tool Safety Tips
Handling pyrography tools requires precision and caution. Adhere to these safety tips related to the tools you are using:
- Inspect tools regularly: Before use, check your pyrography tools for any signs of wear or damage. Avoid using damaged tools as they can pose serious risks.
- Handle with care: Always grasp your soldering iron or pyrography pen by the insulated handle. Avoid touching the metal parts to prevent burns.
- Unplug devices: When not in use, always unplug your pyrography tools. This prevents unintended activation and reduces the chances of fires.
- Use proper techniques: Familiarize yourself with the techniques and tips for effectively using your tools to avoid errant slips that can lead to injuries.
Project Management Practices
Stay organized and proactive during your pyrography projects to enhance safety:
- Set clear boundaries: If you are working with others, establish clear areas of focus. Make sure everyone knows where the hot tools are to avoid accidents.
- Stay focused: Avoid distractions that can lead to careless mistakes. When operating pyrography tools, your full attention is crucial.
- Manage your time: Take breaks if you’re working on a long project to maintain your concentration and reduce fatigue. This helps prevent accidents caused by tiredness.
Emergency Preparedness
No matter how careful you are, accidents can happen. Be ready by knowing what to do in case of an emergency:
- Have a fire extinguisher: Keep a fire extinguisher rated for wood and paper fires nearby just in case.
- Know first aid: Familiarize yourself with basic first aid practices. Knowing how to treat burns and other common injuries can be lifesaving.
- Emergency contacts: Keep important contact numbers handy, including emergency services and poison control. This way, you’ll be prepared to act swiftly in a crisis.
By implementing these safety precautions and fostering a mindset of awareness, you can create a safe and enjoyable atmosphere for all your pyrography projects. Committing to these practices not only protects you but also enhances the satisfaction you find in this intricate art form.
Unique Designs You Can Create with Custom Pyrography Tools
Exploring the world of custom pyrography tools opens a realm of endless creativity. Pyrography, or wood burning, not only transforms pieces of wood but turns them into unique works of art. By designing your own pyrography tools, you can create personalized designs that truly reflect your creative vision. Whether you’re aimed at crafting home décor, gifts, or even artistic pieces for your gallery, custom tools can elevate your work significantly.
Creating Intricate Patterns
Custom pyrography tools allow for more intricate designs, enhancing the details and precision in your work. These include:
- Custom Stamps: Design stamps resembling nature, symbols, or geometric patterns which you can imprint onto wood.
- Adjustable Tips: Consider varying the shapes and sizes of the tips. This variety impacts the texture and depth of your work.
- Heated Wire Designs: Create outlines and shapes with heated wire for precise edges and defined features.
Text and Typography Designs
Words can hold great power, and integrating custom text can enhance your pyrography pieces. Here are some ideas:
- Personalized Quotes: Burn quotes that resonate with the artwork or resonate with the recipient.
- Font Variations: Experiment with different fonts by creating custom engraving tips that mimic handwriting or printed styles.
- Monograms: Personalize gifts by including distinct monograms on the surface.
Nature-Inspired Art
Embrace the beauty of nature in your pyrographic designs. Custom tools can help you create masterpieces such as:
- Floral Designs: Custom tips can help you burn intricate floral patterns, from delicate daisies to bold roses.
- Animal Silhouettes: Design tools that can outline animals, adding depth with shading and textures.
- Scenic Landscapes: With advanced control, create landscapes featuring trees, mountains, and rivers to evoke harmony with nature.
Functional Art
Elevate everyday items with artistic flair. Consider applying your custom pyrography techniques to functional items like:
- Coasters: Personalize coasters with family initials, logo designs, or thematic artwork.
- Kitchen Utensils: Engrave spoons, spatulas, or wooden bowls with decorative designs.
- Jewelry: Explore the intersection of pyrography and jewelry-making with custom wooden pendants.
Seasonal and Themed Designs
Harness the spirit of each season or theme through your custom pyrography tools. Think about crafting:
- Holiday Ornaments: Create unique ornaments for the winter holidays that feature the year, family names, or festive motifs.
- Seasonal Decor: Burn designs for Halloween, Thanksgiving, or spring on wood panels for home decoration.
- Themed Artworks: Design tools that correspond with themes, from nautical to bohemian aesthetics.
Collaborative Projects
Team up with friends or fellow artists for collaborative pyrography projects. Custom tools can facilitate interesting styles like:
- Joint Creations: Design and burn multiple elements that come together as a cohesive art piece.
- Community Events: Host workshops using your custom tools to teach others and share creative skills.
- Art Exchanges: Collaborate with other artists by creating pieces in their style or vice versa.
Using custom pyrography tools opens the door to a world of unique designs that express individual creativity and artistic expression. With the right tools, your designs can go beyond the ordinary, creating memorable pieces that resonate with the heart and soul. Embrace your creativity, and let your imagination shape the way you burn your art into wood.
Maintaining and Caring for Your Custom Pyrography Tools
Custom pyrography tools are essential for artisans looking to create intricate designs on wood and other materials. To ensure that these tools perform optimally and have a long lifespan, proper maintenance and care are crucial. Here’s a comprehensive guide to keep your pyrography tools in prime condition.
Regular Cleaning
Cleaning your pyrography tools after each use is vital for their maintenance. Here are some effective practices:
- Brush Off Residue: Use a soft brush to gently remove any burnt wood particles or resin. This prevents build-up that can impair performance.
- Wipe Down with a Damp Cloth: After brushing, take a damp cloth to wipe off any remaining debris. Ensure the cloth is only slightly damp to avoid water damage.
- Use Isopropyl Alcohol for Stubborn Stains: If you encounter stubborn residues, applying a small amount of isopropyl alcohol on a cotton ball can effectively break down tough stains.
Inspecting Tool Components
Frequent inspections of your pyrography tools will help you spot wear and tear before they become major issues. Look out for:
- Heating Elements: Check for discoloration or damage. If the heating element appears defective, consider replacing it promptly.
- Tips: Examine the tips for signs of excessive wear. They should maintain their original shape and sharpness for precise work.
- Wires and Connections: Inspect electrical cords for frays or exposed wires. Any damage can pose electrical hazards, so replace compromised wires immediately.
Storing Your Pyrography Tools
How you store your tools can significantly affect their longevity. Proper storage practices include:
- Use a Tool Case: Invest in a padded case designed specifically for pyrography tools. This helps protect against dust, impacts, and moisture.
- Keep Away from Moisture: Store your tools in a dry environment. Excess humidity can damage electrical components and lead to rust.
- Avoid Overlapping Tips: When placing tips in storage, ensure they do not touch or overlap to prevent bending or damage.
Handling Practices
When using your pyrography tools, adopting ergonomic and careful handling techniques can extend their lifespan. Here are some tips:
- Use Appropriate Pressure: Apply just enough pressure on the tool to achieve your desired depth. Avoid pressing too hard, as this can damage both the tool and the wood.
- Maintain a Steady Hand: Develop a steady hand technique to minimize unnecessary wear on the tips. Practice on scrap wood to enhance your skills.
- Let Tools Cool Down: After use, allow your pyrography tools to cool down before storing them. This prevents damage from heat exposure.
Sharpening and Replacing Tips
Keeping the tips of your pyrography tools sharp is essential for precision work. Follow these steps for sharpening:
- Use a Specialized File: A specialized file works best for reshaping and sharpening. Ensure you follow the contour of the tip while filing.
- Avoid Over-filing: While sharpening, take care not to over-file, as this can compromise the integrity of the tip.
- Know When to Replace: If a tip is too worn down or chipped despite sharpening efforts, it’s time for a replacement to ensure high-quality results.
Learning and Improving Skills
Enhancing your pyrography skills will reflect positively on the lifespan and usage of your tools. The better you understand your craft, the more effectively you’ll use your tools.
- Take Courses: Consider enrolling in online courses or local workshops that focus on advanced pyrography techniques.
- Practice Regularly: Frequent practice helps you develop a better feel for your tools, preventing unnecessary wear through mishandling.
- Engage with Community: Joining online forums or local clubs can offer tips from experienced pyrograhers and foster skill improvements.
By following these essential tips on maintaining and caring for your custom pyrography tools, you’ll ensure they remain efficient and reliable for all your creative endeavors. A little attention now can lead to a big payoff in the quality of your artwork and the longevity of your tools.
Conclusion
Creating custom pyrography tools opens up a world of artistic possibilities, imbued with a personal touch that can reflect your unique style and preferences. By mastering various techniques, from modifying existing tools to constructing your own from scratch, you can elevate your pyrography projects significantly. These custom tools not only enhance your creative expression but also contribute to the overall quality of your artwork.
Throughout your journey in crafting custom pyrography tools, having the right materials is essential. The foundational components like various wood types, handle materials, and heating elements are crucial for ensuring functionality and durability. Durable metals such as copper or stainless steel can provide excellent tips for intricate designs, while ergonomic handles enhance comfort during extended use. Knowing which materials to choose helps you create tools that not only perform well but also withstand the rigors of frequent use.
Safety should always be a top priority when engaging in pyrography. Working with heat tools can pose risks, from burns to inhalation of fumes, making proper safety measures critical. Employ protective gear like gloves, goggles, and masks to shield yourself from potential hazards. Additionally, working in a well-ventilated area ensures that you avoid breathing in toxic fumes emitted during burning processes. Staying informed about safety protocols empowers you to enjoy your art form without compromising your well-being.
Once you’ve customized your pyrography tools and established a safe workspace, the possibilities for design become virtually limitless. Unique designs can range from intricate mandalas to personalized monograms, allowing for creativity that can resonate deeply with the audience. Experimenting with different techniques and styles using your custom tools can lead to truly stunning pieces. You can apply layering effects, shading techniques, and even color enhancements, resulting in artwork that captures light and texture in captivating ways.
After you’ve immersed yourself in the wonderful world of pyrography and created stunning works of art, maintaining your custom tools is vital for longevity and performance. Regular cleaning and proper storage can make a significant difference in preserving the integrity of your tools. For example, keeping the tips clean from residue buildup ensures they maintain heat effectively and can create sharp lines. Moreover, safely storing tools in a protective case prevents damage and prolongs their lifespan. Engaging in routine maintenance not only prolongs the usability of your tools but also saves time and money in the long run.
In every aspect of your pyrography adventure, customizing your tools serves as an enriching experience that fosters creativity and self-expression. By employing the techniques shared, gathering the essential materials, following safety protocols, exploring unique design options, and committing to maintenance, you dramatically enhance your artistic journey. Custom pyrography tools become more than just instruments; they evolve into extensions of your vision, allowing you to share your narrative through intricate art.
Your creativity is the only limit when it comes to what you can achieve with custom pyrography tools. The blend of personal craftsmanship and artistic ambition results in pieces that can resonate with viewers on an emotional level. Each unique design embodies the dedication and ingenuity that goes into the art form, creating a sense of connection and appreciation. Thus, every tool meticulously crafted, every design lovingly burned into wood, tells a rich story of the artist’s journey.
Embrace the process of creating custom pyrography tools as part of your artistic expression. As you refine your skills, enhance your techniques, and explore designs, remember that each piece you create reflects not just your hard work, but also the joy of engaging with a craft you truly adore. Let your creativity flow, for the world of pyrography awaits you with open arms, ready to celebrate the beauty of your creations.