Techniques for Achieving a Rustic Look in Pyrography
Creating a rustic look in pyrography is a fulfilling endeavor that allows you to connect deeply with your materials while expressing your artistic vision. Whether you’re a seasoned artist or a beginner, mastering certain techniques will help you achieve that charming, earthy quality that defines rustic pyrography. Below are valuable insights into techniques and tips that will elevate your artwork to evoke the allure of simplicity and nature.
Selecting the Right Wood
Choosing the proper wood is crucial for achieving a rustic effect. Opt for wood types that naturally showcase knots, grain variations, and textures. Here are some excellent choices:
- Pine: Softwood with visible knots and a light color that deepens upon burning.
- Oak: Features pronounced grain patterns and a rich texture.
- Cedar: Offers a beautiful scent and unique grain, ideal for rustic themes.
- Birch: Known for its smooth surface that highlights detailed pyrography.
Using natural, untreated pieces will enhance the rustic vibe. Make sure to sand the wood lightly to prepare the surface without eliminating the natural characteristics.
Choosing the Right Tools
Your tools play a significant role in achieving a rustic look. While there are many tools available, focus on these essential items:
- Pyrography Pen: Select one with interchangeable tips for various effects.
- Different Tips: Utilize various tips such as shader, liner, and angled nibs to create depth.
- Blowtorch or Wood Burner: For more dramatic effects, consider using a blowtorch on select areas for a smoky rustic look.
- Stencils: Use stencils to create intricate designs if free-hand work feels daunting.
Selecting tools that you’re comfortable with will significantly improve your ability to create stunning rustic textures and finishes.
Textures and Patterns
Creating texture is essential for a rustic aesthetic. Use various techniques to create depth and visual interest:
- Line Work: Use fine lines to mimic the textures of wood, rope, or grasses.
- Shading: Layer different shades by applying varying pressure with your pyrography pen. This technique creates depth and dimensionality.
- Burn Marks: Deliberately create varying burn tones to simulate weathering and age.
- Wood Grain Enhancement: Accentuate the natural grain pattern by following its lines with your burner, highlighting the unique features of the wood.
These techniques will help you mimic nature’s randomness, which is a hallmark of rustic art.
Color Application
While many rustic pyrography pieces lean towards monochrome, adding subtle colors can enhance their visual appeal. Use colored pencils or watercolor to lightly tint areas of your work. Focus on earth tones such as browns, greens, and muted reds to maintain the rustic feel. Remember, less is more; difficult transitions can detract from the simplicity of the rustic look.
Creating a Focal Point
A focal point can enhance the rustic appeal of your piece. Consider these approaches:
- Nature Themes: Create motifs that evoke nature, such as leaves, animals, or landscapes.
- Storytelling: Use your art to convey a story that resonates with the rustic lifestyle, be it farming, camping, or forest adventures.
- Text: Adding heartfelt quotes or rustic-themed phrases can enhance the emotional connection to your piece.
A well-defined focal point anchors your artwork, drawing viewers in while maintaining the charm of rustic aesthetics.
Finishing Touches
Once you’ve completed your piece, consider applying a finish to protect your artwork. Use a natural oil, such as linseed oil, to maintain the wood’s texture while protecting your design. Avoid overly glossy finishes; instead, aim for a matte sheen that underscores the wood’s rustic qualities.
Achieving a rustic look in pyrography involves careful selection of materials, thoughtful techniques, and a connection to the natural world. With the right approach, your artwork will not only embody rustic charm but also evoke feelings of warmth and nostalgia, captivating anyone who lays eyes on it. Embrace these techniques to turn your pyrography projects into timeless rustic masterpieces that resonate with nature’s artistry.
The Significance of Wood Selection in Creating Rustic Designs
When it comes to crafting rustic designs, the choice of wood is an essential factor. Using the right type of wood can significantly influence the final aesthetic. Each wood species carries unique characteristics that can enhance the rustic appeal of any project. Understanding these attributes allows you to make informed decisions that resonate with your creative vision.
One of the first considerations should be the grain pattern. Woods with pronounced grains, like oak or maple, lend themselves to a more traditional rustic look. These woods usually feature interesting textures and color variations that add depth to any piece. The natural markings can give off a sense of authenticity, evoking memories of simpler times.
Next, consider the color of the wood. Darker woods like walnut or mahogany create a warm, rich atmosphere, while lighter woods like pine can achieve a more casual and airy feel. Combining multiple wood colors can create a stunning contrast. However, the key is to ensure that the colors complement rather than clash. For instance, pairing a light pine with a dark walnut can provide a striking visual effect that enhances the rustic theme.
Moreover, the wood’s age plays a crucial role. Reclaimed wood, often sourced from old barns or warehouses, offers a unique weathered look that can’t be replicated. The natural wear and tear of reclaimed wood tell a story that new, polished wood simply cannot. Using reclaimed materials not only enhances the rustic charm but is also an eco-friendly choice, making it a favorite among environmentally conscious designers.
When selecting wood, durability should also be a top priority. Hardwoods like oak, cherry, and hickory are excellent for their resilience and longevity. They hold up well under various conditions, making them ideal for furniture that will be used frequently. On the other hand, softer woods like cedar or pine can be more susceptible to dents and scratches, which may not align with the rustic desire for lasting beauty.
To maximize the rustic appeal of your designs, consider the finishing touches. The method of finishing can either amplify or diminish the wood’s rustic qualities. For a raw, natural feel, you might opt for an oil finish that enhances the wood’s texture and character. Conversely, if you’re aiming for a more polished look, a matte or satin varnish can provide durability while still allowing the natural beauty of the wood to shine through.
Mixed materials can also enhance the rustic vibe. For example, pairing wood with metal elements can create a balanced design that adds an industrial twist to your rustic project. Items made from wrought iron or aged bronze provide a fantastic contrast to wooden surfaces and can accentuate the rustic aesthetic beautifully.
When embarking on a rustic design project, it’s essential to think about the project’s purpose. Will it be a piece for indoor or outdoor use? The environment can greatly influence your wood selection. For outdoor pieces, go for naturally weather-resistant woods like teak or redwood. They will endure exposure to the elements without deteriorating quickly. Indoor pieces may not need as sturdy of a wood, providing options to choose lighter, softer woods if desired.
Here’s a concise list of tips for selecting wood in rustic designs:
- Choose wood species with pronounced grains for added texture.
- Consider wood colors that complement each other.
- Opt for reclaimed wood for an authentic, weathered look.
- Prioritize durable hardwoods for long-lasting projects.
- Select finishing methods that enhance the rustic charm.
- Incorporate mixed materials to create visual interest.
- Think about the intended use and environment for the piece.
Don’t underestimate the importance of maintenance. Certain woods require more care to maintain their rustic charm. Wood that is exposed to the elements may need regular oil treatments to preserve its beauty and durability. Understanding the upkeep involved can help you select the right materials for your lifestyle and design goals.
The choice of wood is foundational in achieving the desired rustic look in your designs. By considering grain patterns, colors, durability, and finishing methods, you can ensure your project truly embodies rustic charm. Embrace the natural beauty and the stories that different types of wood carry, and let them shine in your creations.
Incorporating Natural Elements into Pyrography Projects
Natural elements into pyrography projects can elevate your artistry and bring a unique warmth to your creations. Pyrography, or wood burning, allows artists to imprint designs onto surfaces using heat. By integrating aspects from nature, you can create pieces that resonate deeply with viewers and add a distinctive rustic vibe.
Choosing the Right Materials
Start with selecting the ideal wood or other natural materials that will serve as your canvas. Some options include:
- Plywood: Affordable and readily available, plywood provides a smooth surface for detailed designs.
- Birch: Known for its light color, birch is perfect for clear and bright designs.
- Cedar: Its natural scent and distinctive grain make cedar an excellent choice for rustic works.
- Driftwood: With its weathered texture and coloration, driftwood embodies a natural aesthetic and complements outdoor-themed art.
Design Inspiration from Nature
Nature offers an abundance of inspiration for pyrography designs. Consider incorporating:
- Floral Patterns: Interpret wildflowers, leaves, or other botanicals into intricate floral designs that reflect the beauty found outdoors.
- Animal Motifs: Capture the essence of wildlife through depictions of birds, mammals, or aquatic creatures.
- Landscapes: Create detailed scenes of mountains, forests, or rivers to evoke a sense of tranquility and connection to nature.
Techniques for Blending Natural Elements
When it comes to integrating natural elements into your pyrography, consider employing a variety of techniques to enhance your project:
- Texturing: Use different pyrography tips to create varied textures that mimic the feel of natural elements, such as tree bark or grass.
- Layering: Layer multiple designs or shades to add depth to your artwork, making the natural components stand out.
- Coloration: Although pyrography primarily involves burning wood, you can incorporate natural stains or dyes for added color.
Integrating Other Natural Materials
Don’t limit yourself to just wood! Consider combining your pyrographic designs with other natural materials to create mixed media pieces:
- Stone: Burn designs into flat stones for decorative garden elements.
- Leather: Incorporate designs onto leather items such as coasters or wallets, providing a rustic flair.
- Fabric: Pyrography can also be done on thick fabric, allowing for creative wearable art.
Finishing Touches
The finishing touches can significantly influence the presentation of your pyrography project. Here are some tips to consider:
- Sealing: Protect your project by sealing it with a natural finish such as beeswax or an eco-friendly varnish. This step enhances longevity while preserving the natural look.
- Framing: Frame your piece with reclaimed wood or rustic materials to reinforce the natural theme.
- Displaying: Choose a setting that complements your artwork. Hanging it in a natural environment or a rustic interior can enhance its appeal.
Natural elements into pyrography projects not only showcases your artistic talent but also creates a message of environmental appreciation. By choosing the right materials, drawing from nature’s beauty for inspiration, and employing various techniques, your work can evoke the spirit of the outdoors. As you explore these avenues, you’ll develop a unique style that resonates with both nature lovers and art enthusiasts, filling your space with warmth and authenticity.
Tools and Materials Essential for Rustic Pyrography
Creating rustic pyrography artwork requires specific tools and materials to achieve that distinctive, earthy look. When crafting pieces that echo the charm of nature, you’ll want to be mindful of the items you choose. Below, discover essential tools and materials that can elevate your rustic pyrography projects, making your creations even more stunning.
Pyrography Pens
Your primary investment will be a good-quality pyrography pen. This tool allows you to create intricate designs and patterns on wood surfaces. Look for pens that offer both adjustable temperature settings and a variety of interchangeable tips. This versatility lets you experiment with different textures and effects, catering perfectly to the rustic theme.
Wood Selection
The type of wood you choose has an enormous impact on the overall look of your artwork. Here are some excellent choices for rustic pyrography:
- Pine: Affordable and easy to work with, pine features a light color that displays designs beautifully.
- Cedar: With its rich, aromatic scent, cedar adds a natural charm to any piece; it also has a lovely reddish hue.
- Basswood: This is a preferred choice for beginners as it’s soft and takes on designs exceptionally well, resulting in a smooth finish.
- Birch: Known for its beautiful grain, birch wood provides a stunning backdrop for your rustic designs.
Wood Finish
To complete your rustic look, using a wood finish is essential. A natural oil finish, such as tung oil or linseed oil, enhances the wood grain without overpowering your design. These finishes also protect your artwork from moisture and wear. Apply the oil with a soft cloth, allowing it to soak into the wood for deep nourishment.
Carbon Paper
Before you start burning your design into the wood, you’ll need to transfer your image. Using carbon paper makes this process easy and ensures accuracy. Simply place the carbon paper between your design and the wood, trace your image, and lift the layers. The lines will guide your pyrography work, allowing you to focus on details without worrying about losing your place.
Safety Gear
Working with wood and heat can create hazards, so safety gear is a must. Equip yourself with:
- Safety goggles: Protect your eyes from any flying debris while sanding or working with wood.
- Dust mask: A mask is crucial when sanding wood, as it prevents inhalation of fine particles.
- Heat-resistant gloves: These are necessary to keep your hands protected from the hot tips of pyrography pens.
Tool Cleaning Supplies
Maintaining your tools is important for longevity and effectiveness. Invest in cleaning supplies such as:
- Brushes: Use a stiff brush to clean out wood dust and debris from your pen tips.
- Soft cloths: These are ideal for wiping down your tools and workspace, ensuring a clean working environment.
Additional Decorative Tools
To enhance the rustic appeal of your artwork, consider using additional decorative tools. Stencils, wood burning stamps, and carving tools can add extra detailing or designs, emphasizing the rustic aesthetic. They also offer creative ways to embellish your pyrography pieces, making them truly unique.
Surface Preparation Tools
Before you begin your pyrography, getting the wood ready is critical. Use sandpaper or sanding blocks to smooth the surface. A sanded surface reduces splinters and allows for better heat transmission during burning, which results in cleaner lines and overall finer details.
By assembling this collection of essential tools and materials, you can dive into your rustic pyrography projects with confidence. Each element plays a crucial role in crafting pieces that embody the beauty and warmth of the rustic aesthetic, transforming simple wood into stunning works of art.
With the right preparation and appropriate materials, your rustic pyrography will not only look beautiful but also showcase your dedication and artistry, bringing a sense of nature into your home.
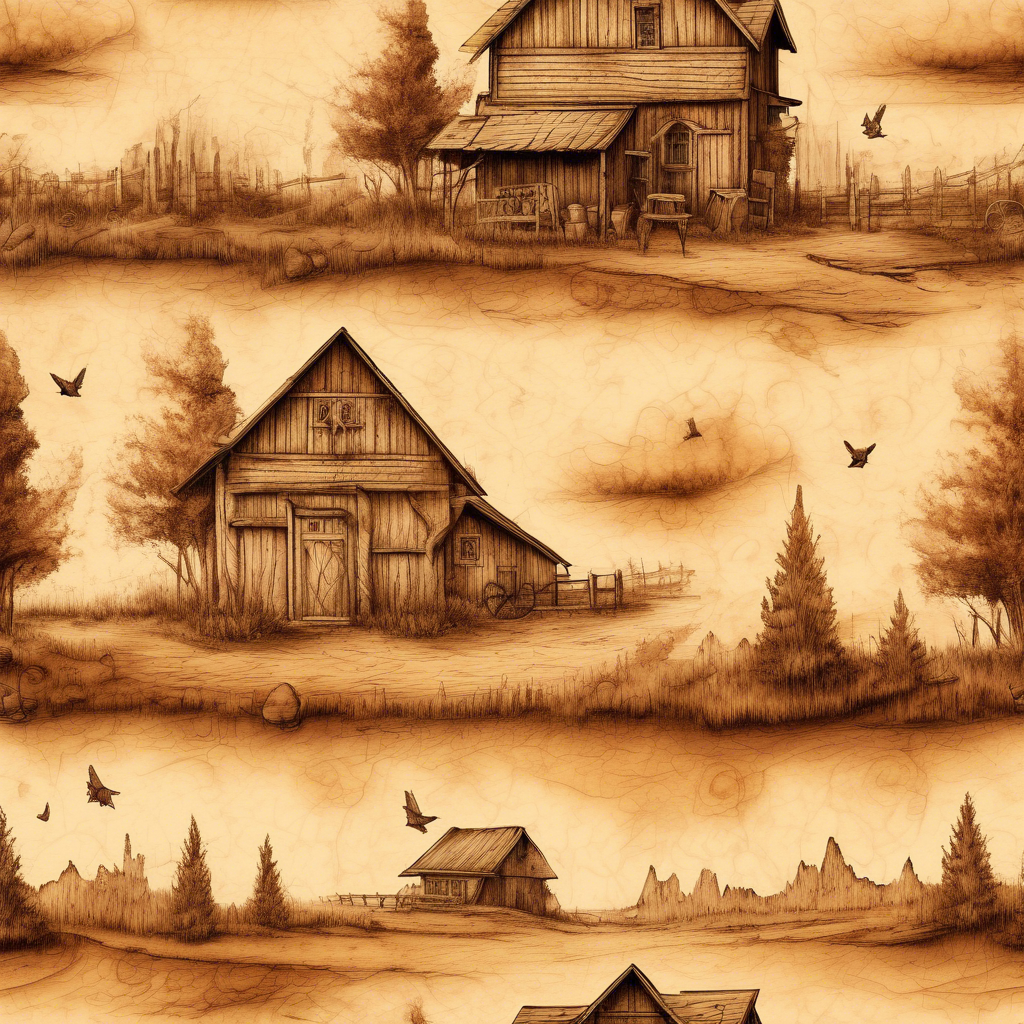
Inspiration Sources for Rustic-Themed Pyrography Artworks
When venturing into the world of rustic-themed pyrography, inspirative sources play a crucial role in shaping your artistic vision. A rustic aesthetic often evokes feelings of warmth, nature, and a simpler time, allowing artists to showcase their creativity through woodburning techniques. To cultivate a rich collection of inspiration, consider the following areas:
1. Nature and Landscapes
Nature serves as a profound wellspring of ideas for rustic pyrography. This can include:
- Trees and Forests: The intricate patterns of bark and the gentle curves of branches can inspire detailed wood burnings.
- Mountains and Valleys: Capturing the majesty of landscapes adds depth to your artwork.
- Wildlife: Animals like deer, bears, and birds can be beautifully incorporated into rustic scenes.
By observing natural settings, artists can appreciate the organic textures and forms they can translate into pyrographic designs.
2. Vintage Textiles and Patterns
Old quilts, rugs, or even pieces of fabric can provide fantastic motifs for pyrographic art. The following can be considered:
- Floral Patterns: These commonly found in vintage textiles lend themselves well to woodburning.
- Geometric Shapes: Classic patterns can be simplified into forms suited for wood art.
- Color Palettes: Drawing color inspiration from textiles can guide your wood selection and burning techniques.
By reflecting light and warmth, these textile proximities offer a soft yet eye-catching element to artwork.
3. Rustic Architecture
Distinctive structures can provide a rich source of inspiration. Consider these ideas:
- Cabins and Cottages: Capture the cozy essence of log homes or historic cottages.
- Farmhouses: The simplicity of farm architecture evokes nostalgia and can inspire rustic designs.
- Bridges and Barns: Iconic rural structures can feature prominently in your pyrography, offering themes of comfort and home.
The textures of these buildings illustrate how pyrography can evoke rustic charm, enhancing detail in your work.
4. Folk Art and Cultural Influences
Exploring folk art from various cultures may lead you to discover unique styles to incorporate:
- Traditional Craftsmanship: Studying local artisan techniques can provide innovative approaches to your own pyrographic style.
- Cultural Symbols: Identifying symbols in folk art can shape the narrative of your pieces.
- Historical Contexts: Understanding the origins and meanings of certain art forms can make your work more profound.
Integrating folk art elements can make your pyrography deeply personal and reflective of shared histories.
5. Animals and Nature Spirits
Animals often play a significant role in rustic themes. Consider how you might use them:
- Realistic Depictions: Capturing the likeness of animals enhances the connection to nature.
- Mythical Creatures: Incorporate nature spirits or animal guardians from mythology.
- Habitats: Showcase animals in their natural surroundings to create engaging, beautiful compositions.
Bringing wildlife into your work invokes the spirit of the rustic outdoors and brings life to your pyrographic projects.
6. Seasonal Themes
Displaying the changes of the seasons can also inspire rustic artwork:
- Spring Blooms: Capture blooming flowers and budding trees with detailed techniques.
- Summer Landscapes: Bright and bold depictions of fields and sunlight offer a cheerful vibe.
- Winter Scenes: Snowy landscapes or cozy interiors can evoke feelings of warmth amidst the cold.
Each season possesses its distinctive attributes that can be portrayed beautifully through your woodburning artistry.
Ultimately, finding inspiration for rustic-themed pyrography may come from your environment, experiences, or even personal interests. By exploring these diverse sources, you can cultivate a rich array of ideas that add depth, emotion, and texture to your creations. As you develop your unique style, don’t hesitate to let your imagination run wild. different elements allows for originality in your art, resonating with audiences and nurturing your love for rustic themes in pyrography.
Conclusion
Creating a rustic look in pyrography involves a harmonious blend of technique, material choice, and creativity. As explored throughout this article, various techniques play a critical role in achieving that desired rustic aesthetic. For instance, utilizing shading and texturing techniques can mimic the natural elements found in nature, fostering a sense of authenticity and warmth. Precise control over the burner will enable you to create soft lines, deep shadows, and intricate designs that resonate with the rustic style.
The selection of wood is equally vital in this artistic endeavor. Different types of wood possess unique textures, colors, and grain patterns that contribute to the overall rustic feel of your projects. Softwoods like pine or cedar lend themselves to a lighter feel, while hardwoods like oak or walnut provide a robust foundation and rich color variations. Understanding the characteristics of each wood type not only aids in the functional aspects of burning but also influences the aesthetic quality of the finished piece.
Natural elements into your pyrography projects enriches the artwork’s texture and depth. From leaves and flowers pressed into the wood prior to burning to the use of bark or branches as canvases, these components can enhance the rustic appeal significantly. You can also experiment with seasonal motifs, which adds an organic dimension to your work and connects your art with nature.
Equipping yourself with the right tools and materials is essential for successful rustic pyrography. A quality pyrography pen with adjustable temperature settings allows for precision in burning techniques, while various tips are necessary for different styles. Tools such as sanding blocks, natural stains, and sealants are crucial for finishing touches, ensuring that the final piece not only looks great but also stands the test of time.
Inspiration is often the cornerstone of any creative process. When engaging in rustic-themed pyrography, drawing inspiration from the world around you can provide a wellspring of ideas. Nature walks, visits to rustic cabins, and exploring local art can all fuel your imagination. Art from various cultures and historical periods can also offer a fresh perspective, inviting you to explore different styles and motifs that enhance your rustic vision.
As you embark on your journey to create rustic-themed pyrography artworks, remember that patience and practice are key. Each piece is an opportunity to refine your skills and experiment with new ideas. The joy of pyrography lies in the process of creation; it allows you to transform a simple piece of wood into a work of art that tells a story and reflects your personal touch.
Engaging with fellow pyrographers can also be incredibly beneficial. Joining online communities, attending workshops, or participating in art shows can broaden your skills, provide valuable feedback, and spark new ideas. Sharing your journey and learning from others can motivate you to push the boundaries of your creative expression further.
Don’t shy away from making mistakes. Each misstep can serve as an educational experience, guiding you to master your tools and techniques. The beauty in rustic art often lies in its imperfections, reminding us that nature is not uniform, and neither should our artwork be.
The completion of each project marks not just a final piece of art but a step in your continual growth as an artist. Each creation reflects your journey, passion, and skill development. Celebrate these milestones, and take the time to appreciate how far you’ve come in your pyrography practice.
As you get hands-on with your burning tools, let your creativity run wild. The rustic aesthetic is all about celebrating authenticity, beauty, and the intricate relationship between art and nature. Dive deep into your projects, explore various techniques, and embrace the journey of creating rustic pyrography artworks that will stand the test of time in beauty and craftsmanship. Whether it’s a gift for a loved one or a cherished piece for your home, let each artwork tell its own story, resonating with the warmth and charm of rustic design.