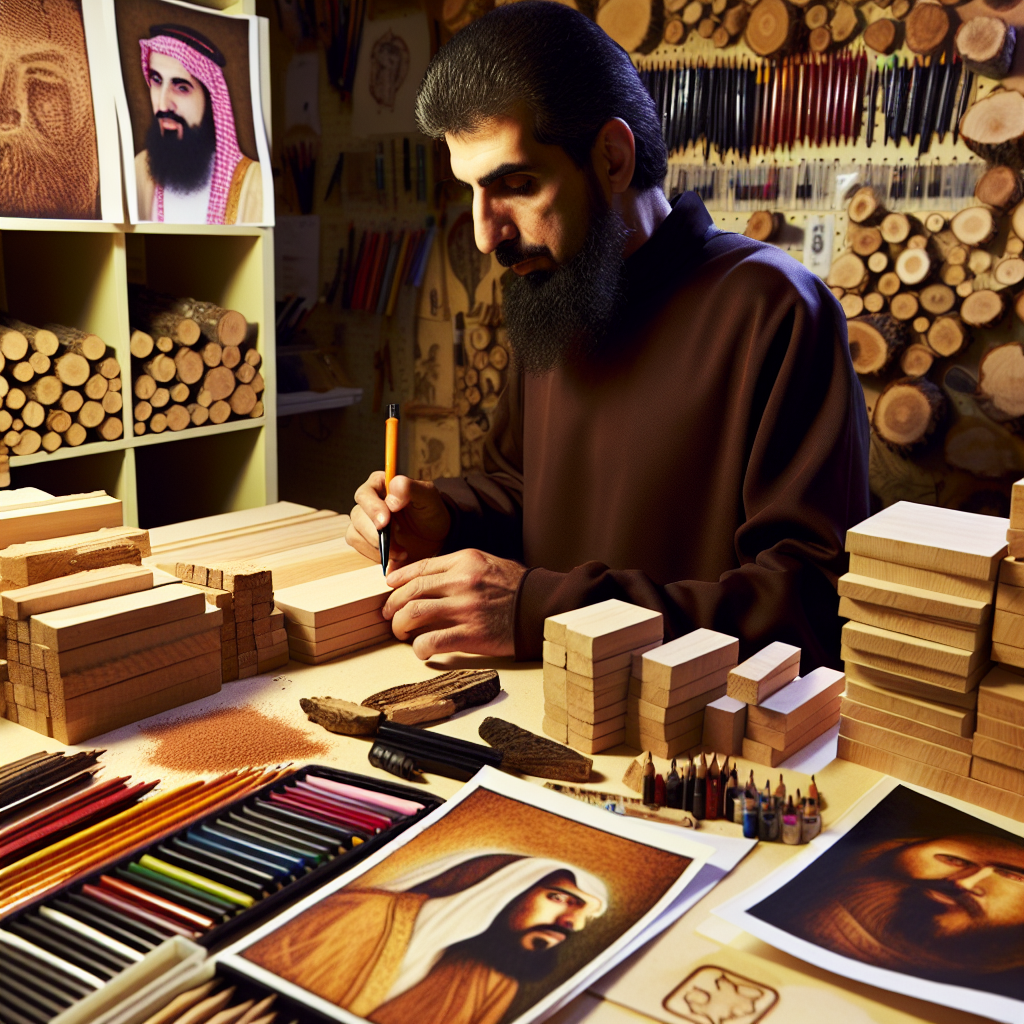
The Art of Pyrography Portraits: Techniques and Inspirations
Pyrography, often referred to as wood burning, is a captivating art form that transforms wooden surfaces into breathtaking works of art. One of the most intriguing applications of pyrography is the creation of portraits. Through a combination of technique, creativity, and inspiration, artists can capture the essence of a subject with just a heated tool. As you explore the art of pyrography portraits, consider the following essential tips and techniques to help you bring your artistic vision to life.
Understanding Tools and Materials
Before diving into the world of pyrography portraits, it’s crucial to familiarize yourself with the tools and materials that will aid in your craft. Here’s a list of essential items that every pyrography artist should consider:
- Pyrography Pen: A reliable tool that allows for precise control over temperature and stroke.
- Wood Surface: Choose wood that has a smooth grain, such as basswood or birch, which provides a better canvas for your artwork.
- Carbon Pencils: Use these to sketch your design onto the wood before starting to burn.
- Sandpaper: Smooth out your wood surface to prevent any rough edges from interfering with your work.
- Finishing Oils or Sealers: These protect your finished piece and enhance its appearance.
Choosing the Right Reference Image
A successful portrait begins with a well-chosen reference image. Aim for a photo that clearly showcases the distinct features and expressions of your subject. Here are some tips for selecting the right image:
- Look for good lighting: Natural light helps to reveal intricate details.
- Avoid busy backgrounds: Focus on the subject to keep the viewer’s attention where it belongs.
- Select a portrait that conveys emotion, as this will significantly impact your final piece.
Sketching Your Design
Once you have your image, the next step involves transferring the design onto your wood surface. Use carbon pencils to sketch the essential outlines and features without getting too detailed. This preliminary sketch serves as a roadmap for your pyrography work.
Mastering Techniques
One of the most exciting aspects of pyrography is the variety of techniques you can employ to produce different textures and effects. Here are some fundamental techniques that can elevate your portrait work:
- Shading: Use varying temperatures and pressure to create depth. Light strokes produce subtle shades, while heavier strokes yield darker areas.
- Line Work: Consistent, clean lines can help define features such as hair, eyebrows, and facial contours.
- Whip Technique: This method allows artists to achieve soft, feathered edges that mimic the softness of hair.
- Dot Technique: Utilizing small dots can add texture and detail, perfect for rendering features like freckles or skin textures.
Experimenting with Color
While traditional pyrography tends to focus on shades of brown, adding color can provide a striking contrast and depth to your portraits. Consider these methods for incorporating color:
- Wood Stains: Apply wood stains to enhance specific areas before or after burning.
- Colored Pencils: After burning, use colored pencils to add fine details or highlights.
- Transparent Paints: A very light wash can infuse color without overwhelming the burning.
Finishing Touches
Once you complete your pyrography portrait, it’s essential to protect and enhance your artwork. Sand any rough edges for a smooth finish, and apply a sealant or oil to preserve the wood and enhance the grain. This not only protects your piece from wear and tear but also adds a lovely luster to the surface.
Take a step back and admire your work. Pyrography portraits are more than just a visual representation; they are an expression of emotion, creativity, and skill. Each piece tells a story, and the journey you take to create it is just as important as the end result.
Embrace the excitement of this unique art form, and let your creativity flow as you explore the world of pyrography portraits.
Choosing the Right Wood for Pyrography
When diving into the world of pyrography, one of the most crucial decisions you’ll face is selecting the right wood. The type of wood not only impacts the aesthetic outcome of your art but also influences your experience as you work. Certain woods accept pyrography marks better than others, showcasing finer detail and allowing for intricate designs. Here’s a deeper look into the factors that should guide your choice of wood for pyrography, along with some wood types that are particularly well-suited for the craft.
First and foremost, consider the grain and density of the wood. Different woods have different textures, surfaces, and densities which can significantly affect how your pyrography tool interacts with the material.
Grain Patterns
The grain pattern can create stunning effects in your finished piece. Woods with more prominent grain can add texture to your artwork, while woods with a fine, smooth grain create a more polished appearance. For pyrography, most artists favor:
- Basswood: This is often the go-to choice for beginners and experts alike. Its even grain and pale color allow for precise burning and are easy to work on.
- Pine: Readily available and affordable, pine features a soft texture that accommodates intricate designs. However, watch out for knots, which can disrupt burning but also add character.
- Birch: With its fine, consistent grain, birch tends to produce clean lines and high contrast, making it perfect for detailed portraits.
Density and Hardness
The hardness of the wood significantly affect how deep the pyrography tool can burn. Softer woods are easier to work with, but they can sometimes lead to less defined edges. Conversely, harder woods can require more experience and patience but often yield richer, deeper burns. Typical options include:
- Maple: This dense wood offers a smooth surface that works beautifully for detailed pyrography. It’s tough, so you may need a higher heat setting.
- Cedar: This is not just a popular choice because of its lovely aroma. It has a softer texture, which makes it a good candidate for relief work.
- Cherry: Known for its warm tones, cherry is moderately hard and burns well, allowing for deep, expressive shading.
Color and Finish
The natural color of wood can impact the final look of your artwork. Lighter woods tend to show the burned marks distinctly, while darker woods may create a more subtle effect. When selecting woods, consider:
- Environmental Factors: Some woods might have natural oils or resins that can interfere with burning. For instance, woods like oily mahogany can produce inconsistent results.
- Surface Preparation: The wood should ideally be sanded smoothly to enhance the application of heat. Any rough patches can lead to uneven burning.
- Sealing and Finishing: After completing your project, consider how you might finish the piece. Some finishes can enhance the grain and color of the wood but might also alter the appearance of the burning. Testing on scrap wood is advisable.
As you explore various wood types, consider the purpose of your pyrography. Are you crafting functional pieces, wall art, or intricately detailed portraits? Each of these may require different wood specifications to achieve the desired outcome.
Ultimately, your choice of wood leads to an endless variety of artistic possibilities. Experimenting with different woods will not only enable you to discover your personal style but also help you understand how different materials respond during the pyrography process. Before committing to a large project, it’s wise to test a few wood samples to see how they handle the pyrography tools you plan to use.
Choosing the right wood for pyrography is an adventure in itself. With due consideration of grain, density, color, and finishing options, you can ensure that your next project will not only be enjoyable but will also produce stunning results.
Tools and Equipment Essential for Pyrography Portraits
Embarking on the journey of pyrography portraits requires a combination of artistic vision and the right tools. The essence of this craft lies in its simplicity, yet having the appropriate equipment can significantly enhance your final piece. To achieve intricate details and stunning results, here’s a comprehensive overview of essential tools and equipment you’ll need.
Pyrography Pens
The core of any pyrography setup is the pyrography pen. These tools come in a variety of styles, each offering unique benefits:
- Fixed Temperature Pens: Ideal for beginners, these pens maintain a consistent temperature, allowing for a straightforward burning experience.
- Adjustable Temperature Pens: For more advanced artisans, these pens permit you to control the temperature, offering flexibility for different wood types and detail levels.
- Multi-Use Tips: Some pens come with interchangeable tips, allowing you to switch between different shapes for shading, lining, and detailing.
Materials for Burning
Choosing the right material for your portrait is crucial. Here are some options:
- Basswood: This wood is popular among pyrographers due to its light color and fine grain, which allows for detailed work.
- Pine: Readily available and easy to work with, pine adds rustic charm, though its knots can complicate fine details.
- Plywood: Ideal for detailed work, it offers a smooth surface but may produce varying results depending on the quality.
Safety Gear
Working with heat necessitates precautions. Protect yourself with the following equipment:
- Safety Glasses: Always wear glasses to protect your eyes from fumes and wood particles.
- Dust Mask: Breathing in wood dust can be harmful. A dust mask will keep you safe during sanding and finishing tasks.
- Heat-Resistant Gloves: These gloves are essential for handling hot tools and preventing burns.
Additional Tools
While the pyrography pen is critical, several other tools can enhance your work process:
- Sandpaper: Preparing your wood surface with fine-grit sandpaper ensures a smooth burning surface, resulting in cleaner details.
- Graphite Transfer Paper: This tool allows you to transfer your portrait sketches onto the wood. It’s a straightforward way to maintain accuracy.
- Soft Eraser: If you make a mistake while sketching, a soft eraser helps gently lift graphite without damaging the wood.
- Stencils: For those looking to create intricate patterns without extensive freehand skills, stencils can guide your design.
Finishing Products
Once your portrait is complete, applying a finish is essential. Here are some popular options:
- Wood Finish: Oil or varnish can protect your artwork while enhancing its natural beauty. Choose a clear product for an unobtrusive finish.
- Wax: Beeswax works well for a natural finish; it provides a subtle shine and protective coating.
Workspace Setup
A well-organized workspace can boost your creativity and efficiency. Keep these points in mind when setting up:
- Lighting: Good lighting is essential for seeing details clearly, so invest in a bright, adjustable lamp.
- Temperature Control: A temperature-controlled environment helps ensure that your wood behaves predictably during burning.
- Organized Tool Storage: Keep your tools organized to avoid confusion and enhance your focus.
In the realm of pyrography portraits, the right tools can make a world of difference. By assembling a solid kit of pyrography pens, suitable wood materials, and supportive tools, you’re well on your way to creating stunning art. Remember also to prioritize safety equipment and a well-structured workspace to cultivate an environment conducive to creativity. Explore these essentials, and let your artistic nature shine through your pyrographic creations.
Enhancing Pyrography Portraits with Color and Texture
Pyrography, the art of decorating wood or other materials with burn marks, is a captivating form of artistic expression. When creating portraits using pyrography, adding color and texture can greatly enhance the depth and vibrancy of the artwork. Integrating these elements allows artists to convey emotions and nuances that a simple, monochrome design might miss.
To effectively incorporate color and texture into pyrography portraits, consider the following advanced techniques:
Choosing the Right Medium
The first step is selecting the appropriate materials to achieve your desired results. Here’s what you should focus on:
- Wood Type: Choose a fine-grain hardwood like basswood or birch that takes color well. These woods provide a smoother surface for burning and coloring.
- Pyrography Tools: Utilize a highly controllable pyrography pen with adjustable temperature settings. This control is essential for achieving intricate details while burning.
- Coloring Medium: Decide between colored pencils, watercolors, or alcohol inks. Each medium presents unique advantages. For example, alcohol inks are vibrant and can create striking, translucent effects.
Mastering Texture Techniques
Texture is crucial in adding depth to your portraits. Experiment with these techniques to bring your artwork to life:
- Shading: Use varied burn techniques – such as dot shading, hatching, or cross-hatching – to create contrasting light and shadow. This method enhances facial features and expressions.
- Burn Depth: By adjusting the heat on your pyrography tool, you can create different shades of brown and even black. Darker burns give a sense of depth, while lighter burns can indicate highlights.
- Carving: Lightly carve the surface to add additional texture. This technique can mimic the appearance of hair or fabric.
Color
Once you’ve established a foundational texture, it’s time to integrate color into your portrait:
- Layering: Apply your coloring medium in layers to build vibrancy. Start with a base layer and allow it to dry before adding subsequent layers to prevent muddying the colors.
- Blending: Use a blending tool or a soft brush to softly mix colors. This technique creates a more natural transition between shades and enhances realism in skin tones.
- Highlighting: Use white or a lighter color to highlight specific areas, which can create a three-dimensional effect. This technique is especially effective for eyes or areas of fabric that catch the light.
Creating Contrast
Contrast plays a significant role in emphasizing features in pyrography portraits. Here are ways to achieve this:
- Color vs. Burn: Balance the starkness of your burn work with color. For instance, a richly colored background can make the detailed, burned figure stand out even more.
- Light and Dark: Utilize a good mix of dark and light tones in your burning and color application. This interplay can lead to striking visual interest throughout the portrait.
Final Touches
Once you’ve achieved the desired look, take a moment to evaluate your portrait:
- Finish: Protect your artwork with a non-toxic finish like polyurethane or varnish, which can enhance the colors and preserve the artwork for years.
- Framing: Consider how you will display your work. A well-chosen frame will complement your pyrography portrait and help showcase your hard work.
By consciously blending color and texture in your pyrography portraits, you enrich the story that your artwork tells. With practice and experimentation, you can refine your skills and create unique pieces that resonate with viewers on a deeper level. Embrace the journey of combining these techniques, and let your creativity shine through every piece you create.
Common Mistakes and How to Avoid Them in Pyrography
In the world of pyrography, the art of designing and creating stunning images with the technique of burning wood, many aspiring artists encounter several common pitfalls. Understanding these mistakes, along with strategies to prevent them, can significantly enhance your pyrography experience.
One prevalent mistake is the choice of wood. Not all wood is suitable for pyrography. Softwoods like pine or fir can burn unevenly and produce excessive smoke, while hardwoods like maple or birch generally provide a better surface for detailing. Opting for the right wood not only improves the quality of your artwork but also contributes to smoother execution. Always verify the type of wood you plan to use before starting your project.
Another frequent issue occurs with the pyrography pen itself. New users often leave the pen at a constant temperature without adjusting it according to the wood type or the detail required. Utilizing different temperature settings is crucial for achieving various shading effects. As a rule of thumb:
- For light wood, use a lower temperature to avoid burning the grain.
- For dark wood, a higher temperature may be necessary for the design to stand out.
- Always test your settings on a scrap piece beforehand.
Additionally, many beginners underestimate the importance of practice. Pyrography requires patience and skill development, and diving into complex designs without practice can lead to frustration. Spend time mastering basic techniques, such as lines, shading, and patterns, before attempting intricate portraits or landscapes. Regular practice not only builds confidence but also aids in refining your style and techniques.
Another mistake to avoid is neglecting the significance of planning your design. Jumping straight into burning without a clear vision can lead to unwanted results. A well-thought-out sketch is essential. Here are a few strategies to plan your design:
- Sketch on paper first: Draw your design on paper, ensuring proportions and elements are balanced.
- Transfer to wood: You can either lightly trace your design on the wood or use carbon paper for precision.
- Use simple outlines: Start with basic shapes, then fill in details as you grow comfortable.
While working on your pyrography piece, be aware of overworking the wood. Many beginners have a tendency to go over the same area repeatedly, which can cause deep burns and scars on the surface. Instead, aim for a smooth and steady hand, allowing the tool to do the work. If you think an area needs more definition, try to allow the wood to cool before revisiting it. This approach helps maintain the integrity of the wood and the design.
Another common error is improper lighting when working. Insufficient lighting can lead to inaccuracies in your work. Ensure that your workspace is well-lit, allowing you to see details and flaws clearly. Natural light is preferable, but if that’s not possible, consider investing in adjustable task lighting for your studio.
Neglecting equipment maintenance can impact the quality of your pyrography work. Ensure that you keep your pyrography pen clean and well-maintained. Residue build-up can affect heat distribution and lead to uneven burns. Regularly clean the tip as per the manufacturer’s guidelines, and consider investing in quality tips as they can elevate the details in your work.
By recognizing these common pitfalls and implementing strategies to prevent them, you can significantly enhance your pyrography skills. Remember, the key to mastering this beautiful art form lies in practice, patience, and careful planning. Keep these tips in mind, and your journey in creating captivating pyrography artworks will be much smoother and far more enjoyable.
Conclusion
As we journey through the captivating world of pyrography portraits, it’s clear that this ancient art form offers a rich avenue for creative expression, combining the precision of drawing with the warmth of wood. The techniques and inspirations explored in this art form encourage both beginners and seasoned artists to dive deeper into their craft. By understanding the intricate processes involved and embracing the meditative nature of burning wood, artists can create stunning portraits that resonate with emotion and authenticity.
Choosing the right wood is pivotal to achieving the best results in pyrography portraits. Not all woods are created equal. Selecting the ideal substrate not only impacts the final appearance but also affects the ease of work and the longevity of the art. Hardwoods, such as basswood or birch, provide a smooth surface that readily accepts burn marks, allowing for fine detail work, which is particularly essential in portraiture. This consideration becomes more critical as you push the boundaries of your skills, creating complex features and capturing the essence of the subject.
Equipping yourself with the appropriate tools and equipment cannot be overlooked. A quality pyrography pen, various nibs for different effects, and a steady hand are the backbone of this craft. Alongside basic burning tools, items like stencils, graphite transfer paper, and even cleaning supplies can enhance your workflow and results. Having the right gear can turn a challenging project into a more manageable one, helping artists maintain the flow of creativity while reducing frustration. Furthermore, understanding how to maintain your tools, ensuring they’re always in peak condition, is a cornerstone of successful pyrography.
When it comes to elevating your pyrography portraits, the addition of color and texture plays a transformative role. Layering colors adds depth and vibrancy, breathing life into wooden canvases. Whether you’re using colored pencils, watercolors, or acrylics, these mediums can enhance the natural beauty of the wood and the warmth of the burns. Texturing techniques, like wood grain enhancement or layering different burn intensities, can help replicate skin textures, fur, or other complex features of the subject. These elements are essential to creating a portrait that not only captures likeness but also conveys personality and emotion.
However, venturing into pyrography is fraught with potential missteps. Understanding common mistakes, such as improper pressure application, heating the pen to the wrong temperature, or selecting unsuitable wood, can save you time and resources. Each artist will inevitably experience a few hiccups, but with careful attention to detail and a willingness to learn from these blunders, the journey becomes a rewarding endeavor. Regular practice, coupled with seeking feedback from fellow artists, cultivates a growth mindset that is crucial in honing your craft.
Alongside mastering techniques and tools, engaging with the pyrography community can enrich your experience and knowledge. Online forums, social media groups, and local workshops provide a wealth of resources for both inspiration and guidance. They allow you to share your work, engage with others, and stay motivated. Learning from different perspectives and styles can spark new ideas and push creative boundaries, further enhancing your journey in creating stunning pyrography portraits.
As you delve into the exploration of pyrography portraits, remember that this art form is as much about the process as the final product. Embrace the journey, experiment with techniques, and allow your creativity to flow. Each portrait tells a story, and through the thoughtful application of pyrography techniques, the narrative becomes alive within the wood itself. Whether you’re capturing the likeness of a loved one, a cherished pet, or a beloved character from a fictional realm, the satisfaction derived from shaping your vision into reality is unparalleled.
The world of pyrography offers limitless possibilities, waiting for you to explore. With every stroke, every burn, you not only transform wood into art but also reflect a piece of yourself, inviting others to see through your eyes. So, gather your tools, select your wood, and embark on your adventure in pyrography portraits—your canvas awaits.