
Basswood leads the pack for pyrography with its soft texture and light color that creates ideal burning conditions. Birch and poplar serve as great alternatives, each delivering unique burning effects based on their hardness levels. The right wood choice makes or breaks a pyrography project – I look for specific traits like fine, non-resinous grain patterns and low sap content that protect my tools and support detailed burning work.
Key Takeaways:
- Basswood (410 lbf hardness rating) is ideal for beginners due to its soft texture and light color
- Avoid pressure-treated lumber, composite materials, and softwoods like pine due to toxic fumes and unpredictable burning
- Wood moisture content should stay below 10% for optimal burning results
- Progressive sanding from 80 to 220-grit is essential for surface preparation
- Proper ventilation and safety equipment (respirator, safety glasses) are crucial for safe pyrography work
The Essential Woods for Beautiful Pyrography Results
Selecting Your Perfect Wood Canvas
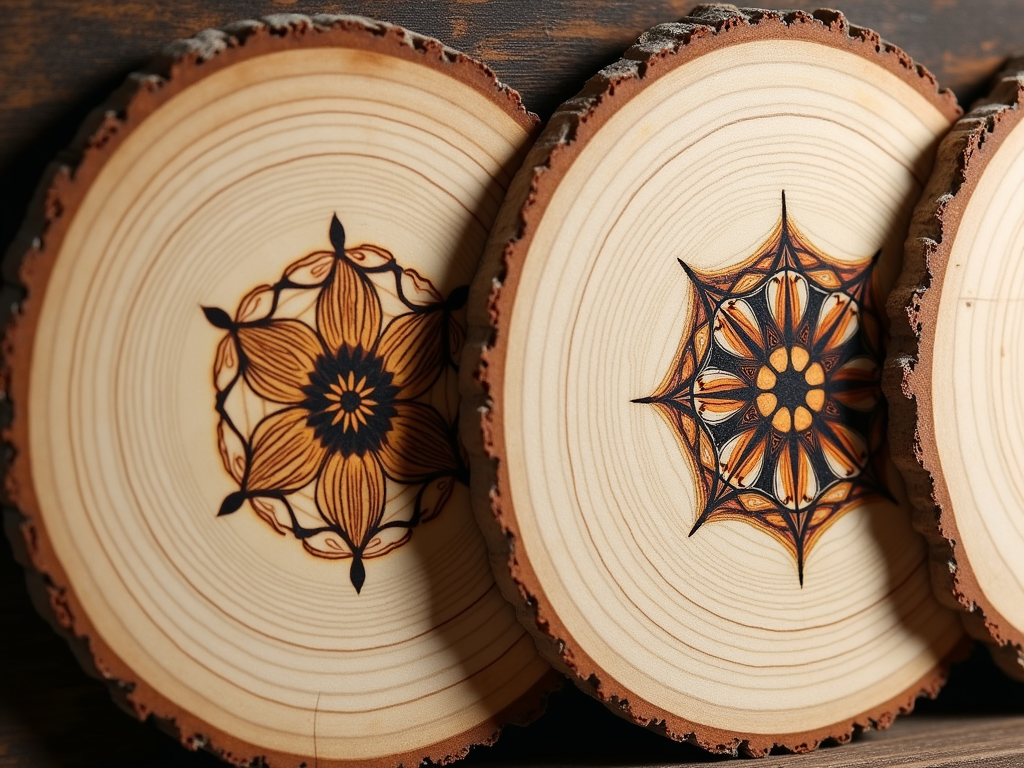
I’ve found that choosing the right wood makes a huge difference in pyrography results. Basswood stands out as an excellent choice for beginners, with its soft texture and light color creating perfect conditions for burning. The wood’s Janka hardness rating of 410 lbf makes it incredibly forgiving for newcomers learning temperature control and burning techniques.
While basswood leads the pack, birch and poplar are fantastic alternatives that offer their own unique benefits. Birch boasts a slightly harder surface with a 1260 lbf rating, creating crisp, defined lines. Poplar sits comfortably between the two with a 540 lbf rating, offering a sweet spot of workability and durability.
Here’s what makes these woods perfect for pyrography:
- Light-colored surfaces that showcase burns with stunning contrast
- Fine, non-resinous grain patterns that allow smooth, consistent burning
- Minimal sap content that prevents burning tool damage
- Even texture that supports detailed work
The right wood choice directly impacts your burning success. I always recommend starting with these proven options before experimenting with other varieties.
Dangerous Woods That Can Ruin Your Pyrography Project
I’ve learned through experience that choosing the wrong wood for pyrography can be hazardous to both your health and artwork. While choosing wood for pyrography projects might seem straightforward, certain types can pose serious risks.
Wood Types to Avoid
Before starting your next project, I want to highlight several wood types that should never make it to your workbench. Pine and other softwoods create problems due to their high resin content, leading to uneven burns and potential flare-ups. This resin can also release harmful fumes when burned.
Here are the woods and materials to avoid:
- Pressure-treated lumber containing chromated copper arsenate – these release toxic fumes
- Composite materials like MDF, plywood, or particleboard – the glues produce dangerous toxins
- Softwoods including pine, cedar, and fir – they burn too quickly and unpredictably
Instead, I recommend starting with beginner-friendly hardwoods that offer consistent burning patterns and safe burning characteristics. These alternatives will help ensure both your safety and the quality of your pyrography work.
Getting the Perfect Surface for Your Pyrography Design
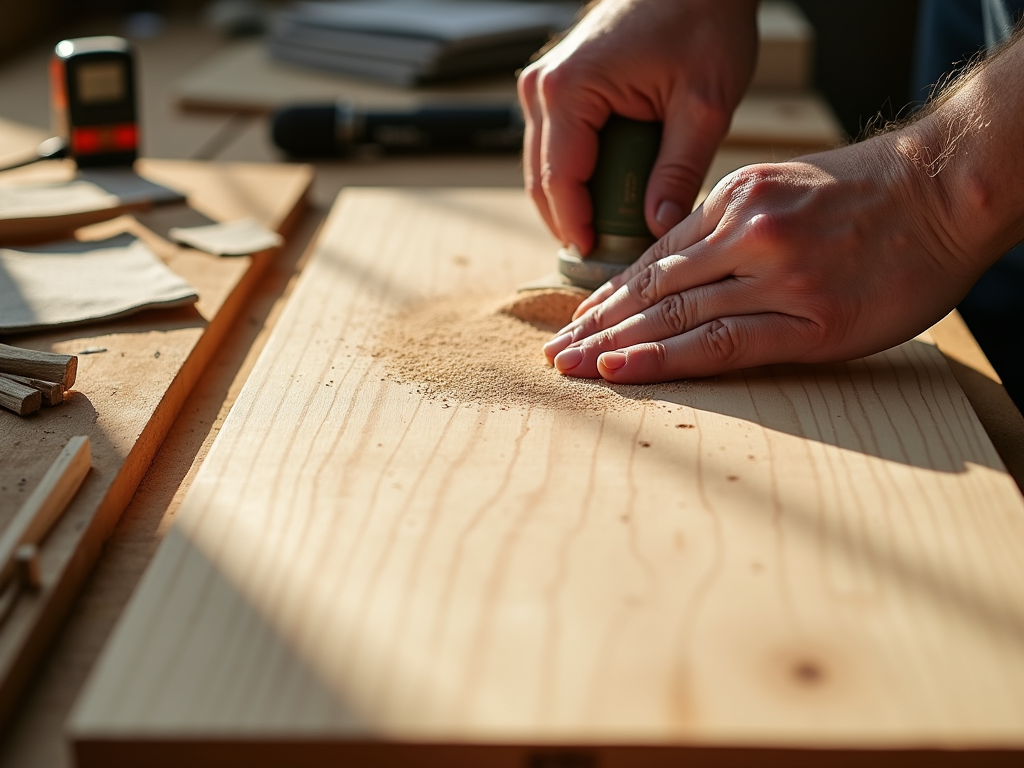
Surface Preparation Steps
Before I start burning my designs, proper surface preparation makes a huge difference in the final result. When working with wood suitable for pyrography projects, I always begin with thorough sanding. Starting with coarse 80-grit sandpaper and moving up through progressively finer grits to 220 creates an ideal surface. Moving the sandpaper with the grain direction prevents scratches that could show through the finished work.
Wood Moisture Considerations
The moisture content of your chosen wood piece plays a critical role in burning success. I recommend using a moisture meter to check that the content stays below 10%. Kiln-dried wood typically offers the best results since it’s been professionally dried to optimal levels.
Here’s my essential pre-burning checklist:
- Sand progressively (80 → 100 → 120 → 150 → 180 → 220 grit)
- Check moisture content with a meter
- Remove all dust with a tack cloth
- Test burn a small area
- Verify surface smoothness by touch
Following these steps creates clean, crisp lines in your pyrography artwork and helps prevent unwanted burning patterns or uneven marks.
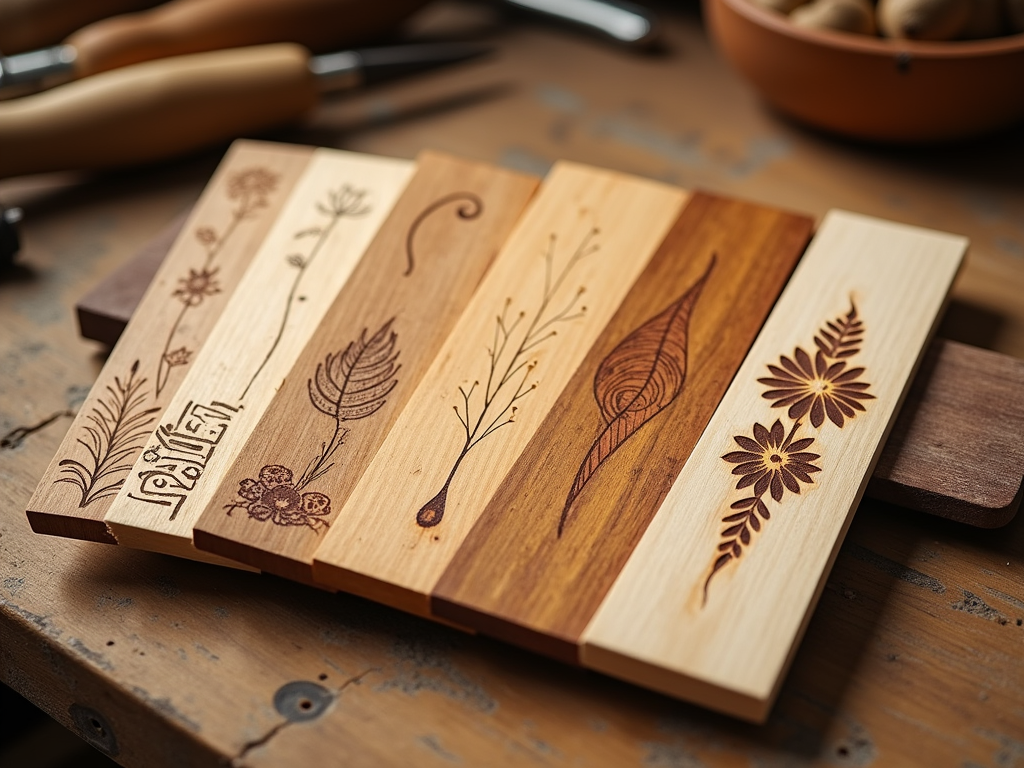
Alternative Woods for Advanced Pyrography
Premium Wood Options for Detailed Work
As you gain experience with wood burning techniques and materials, exploring different wood species can enhance your pyrography projects. Aspen shares many characteristics with basswood, making it an excellent starting point for branching out into new materials. Its light color and uniform texture create an ideal canvas for crisp burns.
For artists ready to tackle more challenging materials, maple offers exciting possibilities for pyrography. Though harder than basswood, maple’s density allows for exceptionally fine detail work, perfect for intricate designs. Cherry wood provides a stunning natural backdrop with its reddish-brown hue, creating dramatic contrast in burned designs.
Here’s what I’ve learned about working with different birch varieties:
- Yellow birch offers moderate hardness and takes burns consistently
- White birch provides a softer surface with minimal grain interference
- Both varieties respond well to varied temperature settings
- Grain patterns can add natural elements to your design
These harder woods need higher heat settings and more pressure than softer varieties. Premium wood selection is crucial for achieving the finest detail in your pyrography work. I recommend testing small pieces of each wood type to understand their unique burning characteristics before starting larger projects.
Essential Safety Practices for Wood Burning
Personal Protection While Wood Burning
I can’t stress enough how important proper ventilation is when doing pyrography. Your workspace needs plenty of fresh air flow to safely carry away any fumes or dust particles. Before starting any wood burning project safely, I always put on my P100 or N95 respirator to protect my lungs.
Safety glasses and dust masks are must-have items in my toolkit, especially when I’m sanding or preparing wood for pyrography work. Some key safety practices I follow include:
- Wearing eye protection at all times during burning and sanding
- Using a dust mask specifically when sanding wood surfaces
- Keeping my work area clean and free of wood dust buildup
- Watching for any allergic reactions to different wood types
- Avoiding woods known to produce irritating dust
Certain woods can trigger adverse reactions like skin irritation or respiratory issues. I make sure to check if I’m sensitive to a particular type of wood for pyrography by testing it on a small scale first. Regular cleaning of my workspace helps prevent dust accumulation and reduces exposure to potentially harmful particles.
Sources:
Wood-Database
Pyrography School
Walnut Hollow
Learn Pyrography
“The Art and Craft of Pyrography” by Lora Irish
“Pyrography Basics” by Lora Irish
“Great Book of Woodburning” by Lora Irish