Creative DIY Pyrography Tool Holder Ideas for Every Workspace
Creating a dedicated space for your pyrography tools can greatly enhance your crafting experience. Organizing your workspace not only saves time but also ensures that you have easy access to all your essential items. Here are some creative DIY pyrography tool holder ideas to inspire you.
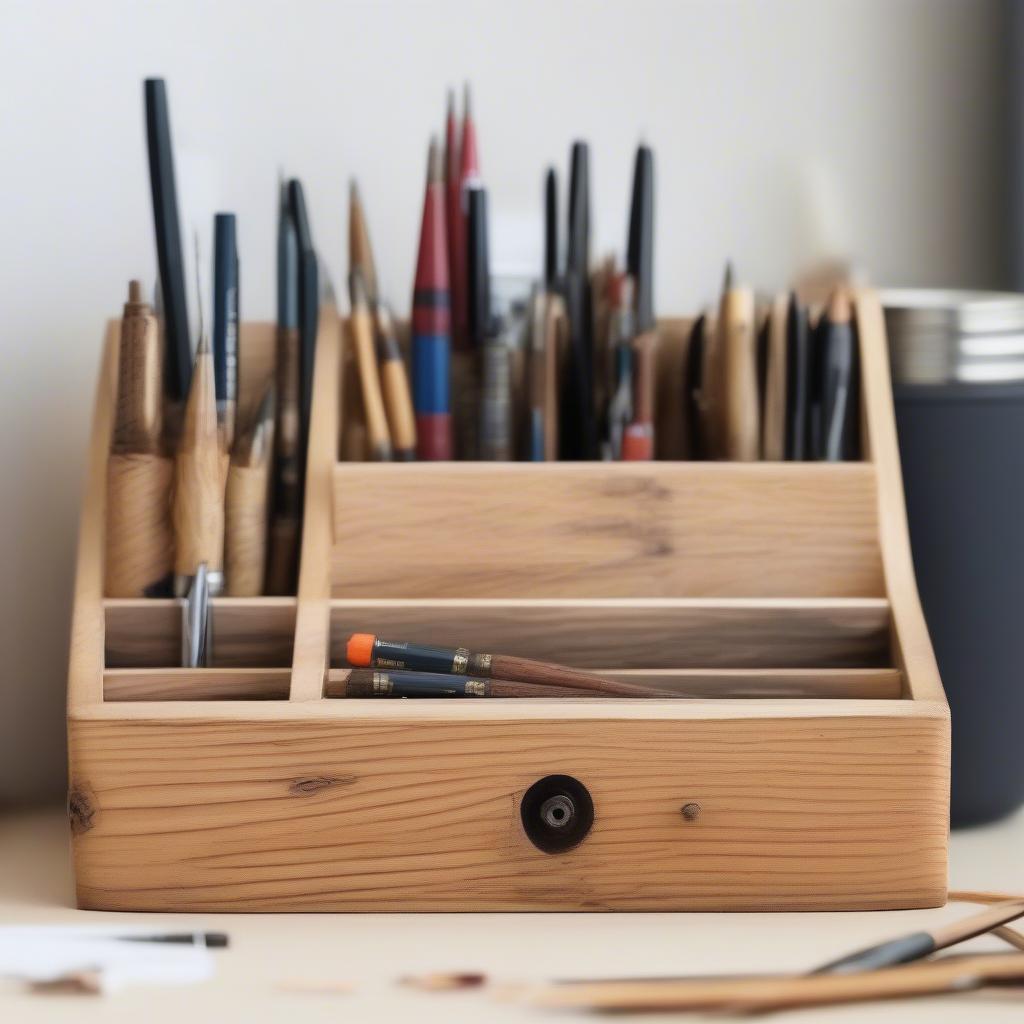
Rustic Wooden Tool Holder
Building a rustic wooden tool holder is a fantastic way to showcase your craftsmanship while adding functionality to your workspace. You can use repurposed wood to create a unique and eco-friendly holder. Here’s a simple guide:
- Materials: Old pallets or reclaimed wood, wood glue, sandpaper, and a wood finish.
- Steps:
- Cut the wood into desired pieces to form the base and sides.
- Assemble the holder using wood glue.
- Sand down any rough edges to ensure a smooth finish.
- Optionally, apply wood finish for added durability and aesthetic.
This rustic tool holder not only looks great but also offers ample space for your pens, nibs, and even small wood pieces.
Magnetic Tool Strip
For a modern and sleek storage solution, consider a magnetic tool strip. This minimalist design keeps your tools visible and easily accessible.
- Materials: A magnetic strip or bar, mounting hardware, and a power drill.
- Steps:
- Attach the magnetic strip to the wall above your workspace.
- Ensure it’s securely fixed with appropriate mounting hardware.
- Simply place your pyrography tools, such as tips and pens, onto the magnetic strip for easy retrieval.
This option not only saves space but also adds a contemporary touch to your workspace.
Repurposed Caddy Organizer
Transforming an old caddy or toolbox into a pyrography tool organizer is both practical and creative. Here’s how you can breathe new life into an overlooked item:
- Materials: An old toolbox or caddy, paint (optional), and dividers.
- Steps:
- Clean the toolbox thoroughly.
- Paint it in a color that complements your workspace for a personalized touch.
- Add dividers inside to separate various tools, such as pens, nibs, and cleaning brushes.
This practical tool holder not only looks stylish but also makes it easy to transport your tools if needed.
Wall-Mounted Shelves
If you’re looking for a space-efficient solution, wall-mounted shelves can be a lifesaver. With the right configuration, they can house all your pyrography tools and supplies.
- Materials: Wooden boards, brackets, and screws.
- Steps:
- Choose the wall space where you want to install your shelves.
- Attach the brackets securely to the wall.
- Place the wooden boards on the brackets.
- Organize your pyrography tools and supplies on the shelves for easy access.
Wall-mounted shelves give you the flexibility to customize your storage based on your needs.
Drawer Dividers
If you already have a desk or cabinet, consider using drawer dividers to keep your pyrography tools neatly sorted.
- Materials: Foam or wood for dividers, measuring tape, and a saw.
- Steps:
- Measure the interior of your drawer to determine the optimal size for your dividers.
- Cut foam or wood into pieces that will fit snugly within the drawer.
- Arrange the dividers to create sections for your various tools.
Drawer dividers are not only practical but also help protect your tools from damage by preventing them from rolling around.
These DIY pyrography tool holder ideas into your workspace can elevate your crafting experience. Not only do they enhance organization, but they also add a touch of creativity to your environment. Whichever method you choose, the key is to tailor your solution to your specific needs, allowing you to focus on bringing your pyrographic visions to life.
Essential Materials for Crafting Custom Tool Holders
Crafting custom tool holders can turn a chaotic workspace into an organized haven. Whether you’re a DIY enthusiast or a professional crafter, having the right materials is crucial to the success of your project. Here’s a look at essential materials you need to start creating custom tool holders that are both functional and aesthetically pleasing.
Wood and Plywood
Wood is one of the most popular materials for crafting tool holders. Its versatility allows for a range of designs, from simple racks to complex multi-compartment storage. Here are some types of wood to consider:
- Pine: Affordable and easy to work with, making it an ideal choice for beginners.
- Maple: Offers durability and a finer finish, suitable for more advanced projects.
- Plywood: Offers strength and can be laminated for a polished look. It’s perfect for larger tool holders.
Hardware
Quality hardware can make a world of difference in the durability and functionality of your tool holder. Pay attention to the following items:
- Screws: Use wood screws for a sturdy hold. Consider using brass screws for a more decorative finish.
- Brackets: L-brackets can provide additional support for wall-mounted tool holders.
- Hinges: If you’re creating a closed tool holder, sturdy hinges will allow for smooth access.
Fastening Solutions
Sometimes, screws and brackets aren’t enough. Depending on the design, strong adhesives may be needed:
- Wood Glue: Perfect for securing joints and ensuring longevity.
- Double-Sided Tape: Great for temporary positions before drilling in screws.
- Epoxy: Works well for heavy-duty applications and can bond multiple materials.
Tools
To successfully create your custom tool holder, the right tools are as essential as the materials themselves. Here’s a list of must-have tools:
- Power Drill: Necessary for creating pilot holes and securing screws.
- Saw: A miter saw or jigsaw works well for cutting wood to the desired dimensions.
- Sander: To give your tool holder a smooth finish and remove any rough edges.
Finishing Materials
Once your tool holder is constructed, adding a finishing touch enhances its appearance and longevity. Consider the following:
- Varnish: Provides a protective layer and gives the wood a glossy finish.
- Paint: Custom colors can help match your holder to your workspace’s aesthetic.
- Stain: Ideal for enhancing the natural grain of the wood while adding color.
Optional Accents and Features
Adding features can elevate the functionality of your tool holder:
- Labels: Help you and others quickly locate the tools needed.
- Magnetic Strips: Great for holding metal tools securely.
- Cork Board Backing: Allows for easy pinning of notes and reminders.
The beauty of crafting custom tool holders lies in the ability to tailor them to your needs and preferences. Combining various materials allows you to create innovative solutions that meet your specific requirements. From wood types to hardware, every choice contributes to the overall functionality and appearance of the tool holder.
Investing in essential materials not only enhances the durability of your custom tool holder but also adds an element of personal touch to your workspace. As you gear up for your next DIY project, keep this list of materials handy to ensure your crafting experience is both enjoyable and productive.
Organizing Your Pyrography Tools: Tips and Best Practices
For those who love pyrography, keeping your tools organized can greatly enhance your crafting experience. A neat workspace not only boosts productivity but also sparks creativity. Here’s how to effectively organize your pyrography tools using clever ideas and practical methods.
Utilizing Tool Holders
An essential first step in organizing your pyrography tools is investing in or creating tool holders. DIY pyrography tool holder ideas can transform your cluttered workspace into a well-arranged area. Consider these approaches:
- Mason Jar Holders: Recycle mason jars to hold your pyrography pens, brushes, and even scrap wood pieces. Attach the jars to a wooden board for easy access.
- Pegboard Systems: A pegboard wall lets you hang tools using hooks and clips. Customize it according to your tool sizes and frequently used items, creating a display that’s both functional and decorative.
- Lazy Susans: Use a lazy Susan to keep portable pyrography tools organized. Place your soldering iron, tips, and brushes on it for easy access while working.
Drawer Organizers and Trays
Drawer organizers and trays can significantly enhance organization within your workspace. Utilize the following tips:
- Dividers: Customize drawer dividers with adjustable compartments to categorize your pyrography tools. This allows you to know exactly where everything is at a glance.
- Plastic Caddies: Store smaller items like replacement tips and sandpaper in caddies. Choose transparent options to easily spot what you need.
- Stackable Trays: Invest in stackable organizational trays to maximize vertical space while keeping different categories separate.
Labeling Your Tools
Labeling can save precious time in locating specific tools and materials. Here are some methods to implement:
- Color Coding: Use colored labels or tape to categorize your tools. For instance, use blue for cutting tools and green for painting supplies.
- Label Makers: A label maker can create clean, professional labels for every tool. Stick them on drawers, organizers, and tool holders for easy identification.
- Smartphone Apps: Manage your inventory digitally by photographing and cataloging your tools in a note-taking app.
Maintaining Cleanliness
A clean workspace is just as important as organization. Regular maintenance prevents clutter from accumulating and keeps your tools in top condition.
- Daily Clean-Up: Dedicate a few minutes each day to tidy your workspace. Return tools to their designated spots after use.
- Weekly Maintenance: Once a week, conduct a thorough check of your tools. Wipe down your pyrography pens with a lint-free cloth, and make sure all items are in their proper places.
- Deep Cleaning: Schedule monthly deep cleans, where you dust your shelves, clean your tool holders, and discard any unusable materials.
Creating a Functional Workspace
Designing a workspace that fosters creativity can make a world of difference. Here are some suggestions for an effective pyrography setup:
- Proper Lighting: Ensure ample lighting is available in your working area. Task lighting directly over your workspace can help you see intricate details while burning.
- Ergonomic Setup: Arrange your workspace for comfort. Your chair and table should allow you to work for long periods without strain.
- Inspirational Decor: Surround yourself with art and visuals that inspire you. This can include your past projects, artwork from others, or even nature themes.
By implementing these organizational tips, you can turn your pyrography practice into a more enjoyable and efficient experience. Not only will you save time searching for tools, but you’ll also create an inviting environment that fuels your creativity.
Enhancing Safety and Accessibility in Your Pyrography Setup
Creating a safe and accessible pyrography workspace is crucial for any artist looking to hone their craft. Safety should never be compromised, especially when wielding tools that can reach high temperatures. Accessibility ensures that you can work efficiently and comfortably, enhancing creativity and productivity. Below are comprehensive strategies to improve both safety and accessibility in your pyrography setup.
Choose the Right Workspace
Your pyrography workspace should be well-structured to minimize hazards. Select a location that has adequate ventilation to prevent the accumulation of fumes. Natural light is desirable, but if it’s not available, consider installing bright task lights that mimic daylight. Ensure that your workspace is clutter-free, as a tidy environment not only boosts efficiency but also reduces the risk of accidents.
Tool Organization
Organizing your tools effectively can minimize hazards. Here’s how you can achieve a safer and more accessible setup:
- Magnetic Strips: Install magnetic strips on the wall to hold your pyrography tips and other metal tools. This keeps your tools off your work surface and readily accessible.
- Tool Caddies: Use portable tool caddies or tackle boxes to store your pyrography pens, tips, and accessories separately. Label each item clearly to find what you need quickly.
- Dedicated Drawers: Consider installing drawers in your workspace for easy access to frequently used items. This replaces the need to rummage through boxes, reducing distractions.
Use Protective Gear
Protective gear is essential in any pyrography setup. The following items should be staples in your workspace:
- Safety Glasses: Always wear safety glasses to protect your eyes from flying debris or accidental impacts.
- Heat-Resistant Gloves: Invest in good-quality heat-resistant gloves that will protect your hands when handling hot tools.
- Dust Masks: When sanding or finishing wood, wear a dust mask to avoid inhaling harmful particles.
Electrical Safety
Electrical safety is another critical aspect of your pyrography environment. Consider the following measures:
- Surge Protectors: Use surge protectors to safeguard against electrical surges that can damage your tools.
- Proper Cords: Keep cords untangled and elevated to prevent tripping over them. Employ cord clips to organize cords neatly along the wall.
- Routine Checks: Regularly inspect your electrical devices to check for frayed wires or other issues. Don’t hesitate to replace faulty equipment.
Ergonomics Matter
Choosing ergonomic furniture can significantly enhance your comfort while working. Here’s how to make your workspace more accommodating:
- Adjustable Chairs: Use chairs that can be adjusted according to your height for proper posture support.
- Height-Appropriate Tables: Your table height should allow your arms to rest at a 90-degree angle while working. Consider using adjustable height tables if necessary.
- Footrests: If your feet don’t touch the floor comfortably, use a footrest to support good posture while seated.
Fire Safety Precautions
Given the nature of pyrography, fire safety should never be overlooked. Implement these precautions:
- Fire Extinguisher: Keep a fire extinguisher within reach. Ensure it’s classified for electrical fires.
- Heat-Resistant Surface: Use heat-resistant mats under your working space to reduce fire risks.
- Ember Disposal: Have a designated container for disposing of any heated or smoldering debris safely.
The Importance of Regular Maintenance
Regular maintenance of your tools and workspace is another fundamental aspect of safety and accessibility. Clean your pyrography tools after each session to ensure they remain in top condition. Regularly organize and declutter your workspace to maintain a safe environment. These actions not only enhance safety but also lead to a more enjoyable creative process.
By creatively structuring your pyrography workspace with safety and accessibility in mind, you can cultivate an environment that fosters creativity while minimizing risks. Whether it’s through effective organization, protective gear, or ergonomic furniture, these strategies will set the foundation for a productive and safe pyrography experience.
Inspiration from the Pyrography Community: Unique Tool Holder Designs
For pyrography enthusiasts, having an organized workspace is crucial for unleashing creativity. One often overlooked aspect of crafting is the tool holder. An effective tool holder not only keeps tools within reach but also fosters inspiration. The pyrography community is filled with innovative ideas for DIY tool holders that blend functionality with artistry.
Repurposed Wooden Boxes
One popular idea in the community is using repurposed wooden boxes. These can range from old cigar boxes to vintage toolboxes. By customizing a wooden box, you can create a unique storage unit that fits seamlessly into your workspace. Here’s how to go about it:
- Choose the Right Box: Select a box that has ample space for your pyrography tools.
- Add Compartments: Use dividers made out of cardboard or wood to segregate different tools.
- Decorate: Embellish the box with pyrography designs to make it a work of art.
This design not only organizes your tools but also serves as a stunning display piece. A beautifully decorated box can inspire you each time you reach for your tools.
Magnetic Tool Holder
Another creative concept emerging from the pyrography community is the magnetic tool holder. This functional design allows tools to be easily accessible and visible, reducing time spent searching for items. Follow these steps to create your own:
- Materials: Gather a piece of wood, strong magnets, and adhesive.
- Placement: Attach the magnets to the wood, ensuring they are spaced to accommodate various tool sizes.
- Add Finishing Touches: Customize the wooden base with pyrography patterns.
The magnetic tool holder will keep your tips and other small tools organized, while its artistic design will enhance the aesthetic of your workspace.
Wall-Mounted Organizers
Wall-mounted organizers are gaining popularity due to their space-saving benefits. These holders not only free up desk space but also provide a unique canvas for creativity. Here’s a simple guide to crafting an effective wall-mounted tool holder:
- Select a Wooden Board: Choose a wooden board that can comfortably house your tools.
- Install Hooks and Clips: Attach hooks and clips to secure various tools, allowing you to catch inspiration at a glance.
- Personalize: Pyrography designs can turn your wall-mounted holder into an eye-catching work of art.
This design meets both aesthetic and practical needs while providing an inspiring view of your favorite tools.
Tool Holder with Built-in Design Space
For those who love to sketch out ideas before getting started, a tool holder with a built-in design space is a fantastic option. This multifunctional holder allows you to keep your tools organized while providing a dedicated area to brainstorm and sketch. Here’s how to create this multifunctional holder:
- Use a Large Block of Wood: Choose a sturdy block that can function as both a tool holder and a sketching surface.
- Create Tool Grooves: Carve out grooves to hold your pyrography tools securely.
- Add a Smooth Surface: Sand and finish one side for sketching, encouraging the free flow of ideas.
This design allows for immediate creativity and spontaneity, making it ideal for artists who like to blend planning with crafting.
Multi-Tiered Organizers
Multi-tiered organizers offer another unique way to store pyrography tools. By creating levels for different types of tools, you can maximize space and improve accessibility. To make a multi-tiered organizer:
- Use Stacked Boxes: Stack small wooden boxes or trays to create levels.
- Label Each Tier: Mark which tools belong on each level to minimize clutter.
- Decorate with Pyrography: Personalize each box with unique designs before stacking them.
Multi-tiered designs can be as simple or complex as you wish, and their organizational capabilities can keep your workspace tidy and efficient.
Inspiration from the pyrography community opens a world of creative possibilities for tool holders. From repurposed wooden boxes to innovative magnetic solutions, these DIY ideas not only organize but also elevate your artistic space. So gather your materials, let your imagination flow, and create a tool holder that inspires your pyrographic journey.
Conclusion
Creating an effective DIY pyrography tool holder not only enhances your workspace but also elevates your entire crafting experience. Whether you are a seasoned pyrographer or a beginner looking to expand your skills, developing a personalized tool holder can make all the difference in terms of organization, efficiency, and safety. By implementing creative ideas for tool holders, you can tailor your workspace to fit your unique needs and preferences.
Throughout this article, we’ve explored a variety of creative DIY pyrography tool holder concepts, spanning from simple pegboards to customized drawer systems and even compact carts. These ideas illustrate how a little creativity can transform your workspace, making it not just a functional area but also an inspiring one. It’s important to consider the specific requirements of your pyrography projects as well. For instance, if you frequently use various tips or stencils, designing a holder that accommodates those accessories will save you valuable time in the long run.
Equipping yourself with essential materials for crafting your custom tool holders is another critical aspect. Using sturdy materials like wood, acrylic, or even repurposed items can lead to durable constructions that withstand the rigors of regular use. By gathering the necessary tools, such as saws, drills, and sanders, you can embark on these projects with confidence. Remember, quality matters; investing time in choosing the right materials ensures that your DIY holders will last for years to come, showcasing your craftsmanship and enhancing your toolkit.
Organizing your pyrography tools efficiently is vital to maintaining an uncluttered workspace. Implementing a systematic approach to organization can significantly enhance productivity. Using labels for different sections in your tool holders, categorizing your tools based on their size or function, and ensuring easy accessibility can streamline your workflow immensely. Adopting best practices such as regularly cleaning your workspace and putting tools back in their designated spots can foster a more pleasant and productive crafting atmosphere.
Safety should always be a top priority, especially when dealing with hot tools in your pyrography setup. Constructing holders that not only organize your tools but also keep them safely stored when not in use is essential. features such as heat-resistant surfaces, proper ventilation, and fireproof storage options for your pyrography pens can enhance safety and give you peace of mind as you work. Additionally, making sure that your tools are within easy reach can prevent accidental burns or injuries, allowing you to focus on creativity rather than safety concerns.
The wealth of inspiration in the pyrography community can’t be overlooked. Engaging with other pyrographers can provide insights into unique tool holder designs and innovative solutions to common challenges. Community forums, social media groups, and exhibitions are excellent resources for gathering ideas. By sharing your creations online, you not only contribute to the communal knowledge but may even spark inspiration in others. Design is all about sharing and evolving, and every crafter’s journey adds to the rich tapestry of artistic expression.
Ultimately, the process of crafting DIY pyrography tool holders is as much about the journey as the destination. Embrace the chance to explore your creativity, experiment with materials, and develop a workspace that reflects your personal style. As you dive into these projects, you’ll likely find that creating custom holders enhances not just your organization but also your overall passion for pyrography.
By dedicating time to crafting a thoughtful workspace, you open the door to greater artistic expression. These DIY tool holders will help keep your area free of clutter, increase your efficiency, and, most importantly, allow you to focus on what you love most: pyrography. Each tool holder you create will not only serve a practical function but will also stand as a testament to your creativity and ingenuity. So gather your materials, put on your DIY hat, and bring your vision to life. Your pyrography toolkit deserves a space that reflects your unique creative journey.