Choosing the Best Finish for Your Pyrography Artwork: Key Considerations
When it comes to pyrography artwork, the finish you choose can significantly alter the final appearance and longevity of your piece. Selecting the right finish isn’t just about aesthetics; it also involves considering the type of wood, intended use of the artwork, and environmental factors. Here’s a comprehensive look at key considerations for choosing the best finish for your pyrography projects.
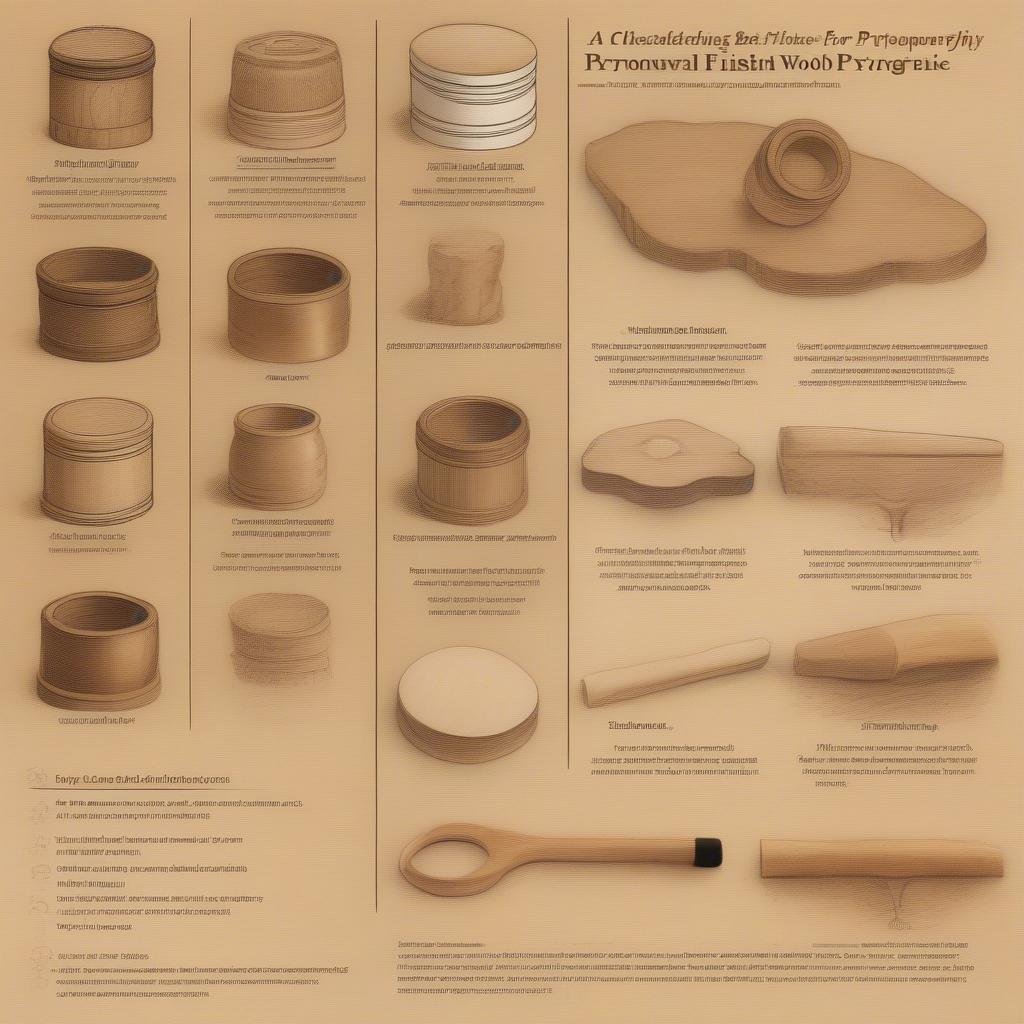
Understanding Different Finishing Options
Different finishes offer varying levels of protection, sheen, and texture. Here’s a brief overview of common types:
- Varnish: Available in different sheens, varnish provides durable protection against moisture and scratches. It’s an excellent choice for pieces that will be displayed outdoors or in humid environments.
- Oil: Natural oils, such as tung or linseed oil, penetrate deep into the wood to enhance its natural grain. Oil finishes can give your artwork a rich, warm tone, but they may require more frequent reapplication.
- Wax: Wax provides a soft, natural finish and is easy to apply. However, it offers minimal protection and is best suited for art pieces that won’t be handled frequently.
- Polyurethane: This synthetic finish is extremely durable, making it ideal for high-traffic items. It’s available in both water-based and oil-based formulas, each offering different levels of sheen.
Factors to Consider When Choosing a Finish
Selecting the best finish requires thoughtful consideration of several factors:
1. Type of Wood
The type of wood used in your pyrography artwork will significantly influence your finish choice. Hardwoods like oak or maple have tight grains that respond well to oil-based finishes. Conversely, softer woods can absorb finishes differently, so water-based or varnish options may work better for them to avoid discoloration.
2. Intended Use
Consider how the artwork will be used. If it’s simply decorative and kept indoors, a wax or oil finish might suffice. However, if it’s for furniture or items that endure wear and tear, a durable polyurethane or varnish finish will provide the necessary protection.
3. Desired Aesthetic
The finish can greatly alter the visual appeal of your pyrography piece. A high-gloss varnish may enhance the colors and contrast in your artwork, while a matte finish will offer a more subdued look, preserving the natural beauty of the wood grain.
4. Environmental Conditions
If your artwork will be exposed to fluctuating temperatures or humidity levels, opt for a finish that can withstand such conditions. Varnish is typically more resilient against these environmental stressors, while wax is susceptible to water and damage.
Application Techniques for Finishes
How you apply your chosen finish can affect the end result. Here are some tips for various finishing techniques:
- Brushing: Use a quality brush to apply varnish or polyurethane. Keep strokes consistent and avoid overworking the surface to prevent bubbles.
- Wiping: For oils and some varnishes, use a clean cloth to wipe on and remove excess. This technique ensures an even application.
- Spraying: If you’re comfortable using aerosol finishes, this method can provide a smooth, even coating without brush strokes.
Testing Your Finish
Before finishing your entire piece, it’s prudent to test your chosen finish on a scrap piece of wood or a less important section of your artwork. This step will help you gauge how the finish interacts with the wood and affects the colors of your pyrography designs.
Final Thoughts
Ultimately, the best finish for your pyrography artwork will depend on your specific needs and preferences. By considering the type of wood, intended use, desired aesthetic, and environmental factors, you can make an informed decision that enhances your artwork’s beauty while ensuring its longevity. With the right finish in place, your pyrography masterpieces will captivate audiences and stand the test of time.
Exploring Different Types of Finishes: Which One Suits Your Style?
When it comes to enhancing pyrography artwork, choosing the right finish can make all the difference in achieving the desired aesthetic and protecting your work. Various types of finishes exist, each with its unique characteristics suited to different styles and purposes. Understanding these options will allow you to elevate your finished pieces while preserving their beauty. Here’s a closer look at the different types of finishes available for your pyrography creations.
Water-Based Finishes
Water-based finishes are excellent for those looking for an easy-to-apply and quick-drying option. They tend to have low odor and are non-toxic, making them a suitable choice for artists working in smaller or less ventilated spaces.
- Advantages:
- Fast drying time, allowing for quicker project completion.
- Minimal environmental impact due to low VOC (volatile organic compounds) content.
- Easy clean-up with soap and water.
- Disadvantages:
- May not provide as strong a protective layer compared to oil-based finishes.
- Can raise the grain of wood, requiring sanding between coats.
Oil-Based Finishes
If you seek a richer, deeper tone in your pyrography artwork, oil-based finishes might be your go-to. They seep into the wood, enhancing the grain and bringing out the natural beauty of the material.
- Advantages:
- Creates a durable, water-resistant surface.
- Enhances the wood grain for a natural, warm appearance.
- A longer drying time allows for a smoother application.
- Disadvantages:
- Requires solvent for clean-up, posing a health risk if inhaled.
- Takes longer to dry, which can prolong your project timeline.
Shellac Finishes
Shellac is a classic choice for wood finishes, made from natural resin secreted by the lac bug. This finish gives a warm tone while providing a good level of protection.
- Advantages:
- Dries quickly and can be re-coated in a short amount of time.
- Non-toxic and environmentally friendly when applied as a liquid.
- Disadvantages:
- Not as durable as some oil-based finishes.
- Can be affected by water, making it less suitable for pieces exposed to moisture.
Varnish Finishes
Your pyrography pieces could also benefit from varnish, providing a hard, protective layer while enhancing the visual appeal. Varnishes come in glossy, satin, and matte options.
- Advantages:
- Durable protection against scratches and fading.
- Multiple sheens allow for customization based on personal style.
- Disadvantages:
- Can yellow over time, especially with certain formulations.
- Requires careful application to avoid drips and unevenness.
Paste Finishes
Paste finishes, such as beeswax or a blend of waxes, offer a unique texture and finish to your artwork. They’re particularly effective on detailed pyrography where you want to preserve the intricacies.
- Advantages:
- Provides a soft, natural finish that doesn’t overpower the artwork.
- Easy to apply and reapply, allowing for maintenance over time.
- Disadvantages:
- Less durable than other finishes, requiring periodic maintenance.
- May attract dust and dirt more than smoother finishes.
Choosing the best finish for your pyrography artwork significantly impacts its durability, aesthetic, and overall presentation. Take your time to experiment with these different finishes, and consider the unique characteristics of each one to find the perfect complement to your artistic style. Whether you prefer the warmth of oil-based finishes or the crisp clarity of water-based options, the right finish will help your artwork shine beautifully.
The Impact of Finish on the Durability and Longevity of Pyrography
When it comes to pyrography, the finish you choose can significantly impact the durability and longevity of your artwork. Different finishes serve various purposes, from protecting the wood to enhancing the artwork’s aesthetic appeal. Understanding how each finish interacts with your pyrographic designs will help you make a savvy choice for your pieces, ensuring they withstand the test of time.
Types of Finishes
There are several common finishes used in pyrography, each with unique properties. Here are some popular options:
- Lacquer: This quick-drying finish provides a hard, glossy surface that protects against scratches and moisture. However, it can be challenging to apply in even coats, so careful technique is crucial.
- Varnish: Typically oil-based or water-based, varnishes are great for providing a durable barrier against environmental elements. Oil-based varnish tends to yellow over time, while water-based options maintain clarity.
- Shellac: Made from natural resins, shellac offers a warm glow and rich appearance. It’s easy to apply and dries quickly, but it may require more frequent reapplications compared to other finishes.
- Polyurethane: This synthetic finish forms a tough layer that protects against impacts and moisture. Available in oil and water-based formulas, it’s perfect for outdoor items or pieces that may experience heavy use.
- Wax: While wax provides a beautiful, matte finish, it’s much less protective than other options. It’s best suited for pieces that will be displayed indoors, away from the elements.
Factors Affecting Durability
The durability of your pyrography artwork can be influenced by a variety of factors:
- Environment: If your artwork will be displayed outdoors or in a high-moisture environment, choosing a water-resistant finish like polyurethane becomes essential.
- Usage: Consider how the item will be used. If it’s a frequently handled piece, a more robust finish like lacquer or varnish can help protect against wear and tear.
- Wood Type: Different woods absorb finishes in varying ways. Softer woods may require multiple coats to achieve adequate protection, while harder woods may need less treatment.
Application Techniques
How you apply the finish also plays a substantial role in the artwork’s durability:
- Light Coats: Applying multiple thin coats is often more effective than one thick coat. This ensures that the finish dries properly and adheres well, preventing peeling or bubbling.
- Sand Between Coats: Lightly sanding between each coat will create a smoother finish and allow for better adhesion of subsequent layers.
- Testing on Sample Pieces: Before finishing your main artwork, try out different finishes on scrap pieces of the same wood. This helps you understand how each finish interacts with the wood grain and pyrographic details.
Enhancing Aesthetics
Beyond protection, the right finish enhances the visual appeal of your pyrography. For example:
- Glossy Finishes: Lacquers and oil-based varnishes enhance wood grain, making colors appear more vibrant and details more defined.
- Matte Finishes: Wax or matte varnish provides a subtle look that may suit rustic projects, softening contrasts and lending warmth to the work.
- Custom Blends: Some artists combine finishes to achieve unique effects. For instance, a matte base followed by a glossy top coat can create interesting contrasts in texture.
Ultimately, selecting the right finish for your pyrography artwork is about balancing protection and aesthetics. By carefully evaluating the finish types, considering application techniques, and being mindful of your artwork’s environment and usage, you can elevate the lifespan and beauty of your pieces. This thoughtful approach not only enhances their durability but also allows you to fully enjoy and showcase your artistic expressions for years to come.
Techniques for Applying Finishes to Enhance Your Pyrography
When it comes to pyrography, the artwork’s finish can dramatically enhance its beauty and durability. By applying the right techniques, you can elevate your pieces from simple woodburns into stunning works of art. Here are several techniques for applying finishes that not only protect your artwork but also amplify its aesthetics.
1. Choosing the Right Finish
Before diving into application methods, it’s crucial to select an appropriate finish. Here are some common options:
- Oil Finishes: These penetrate wood and enhance its natural grain. They provide a warm, rich look and a soft sheen.
- Varnishes: These are available in various sheens, from matte to glossy. They create a strong, protective layer over the pyrography.
- Wax Finishes: This option offers a low-gloss finish and is easy to apply. It also can provide a slight water resistance.
- Shellac: Shellac dries quickly and provides a warm finish. It can be reactivated with alcohol, which allows for easy touch-ups.
2. Preparing Your Artwork
Prior to applying any finish, ensure your pyrography work is clean and free from soot or debris. Dust your project using a soft brush or cloth. If you’ve applied any pencil markings, erase them carefully. Proper surface preparation will ensure a smooth and even application of the finish.
3. Application Techniques
The method of application can greatly influence the final look of your artwork. Here are several techniques:
- Brush Application: Use a high-quality, soft brush to apply your chosen finish. This method works well for oils and varnishes. Brush in smooth, even strokes, following the grain of the wood. Make sure to avoid overloading the brush to prevent drips.
- Spray Application: For varnishes, a spray can provide an even coat. Keep the can about 10-12 inches from the surface while spraying in light, sweeping motions. This technique is perfect for achieving a glossy finish without brush strokes.
- Cloth Application: Using a clean, lint-free cloth, you can rub in oils and waxes. This method not only applies the finish but also works the product into the wood for better penetration.
- Dip Application: For smaller pieces, dipping them into a finish can yield excellent results. Make sure to let the excess finish drip off before setting the piece on a drying rack.
4. Layering Finishes
Layering can add depth and richness to your pyrography. Start with a base layer such as an oil finish, and once it’s fully dry, you might want to add a top coat like varnish. This combination protects the artwork while enhancing its appearance. Just ensure to let each layer dry completely before applying the next to avoid any unwanted smudges or reactions.
5. Drying and Curing Times
Understanding drying and curing times is essential for achieving the best results. Oils often require up to several days to cure fully, while spray varnishes may dry to the touch within a couple of hours. However, always consult the manufacturer’s instructions for specific wait times at each stage, as this varies based on environmental conditions.
6. Protective Coatings
If your pyrography artwork will be displayed in areas exposed to moisture or direct sunlight, consider applying additional protective coatings. UV-resistant finishes can protect against fading, while waterproof finishes can safeguard against spills or humidity. Both methods ensure your artwork retains its allure over time.
7. Maintaining Your Artwork
Once your finishes have been applied, proper maintenance is key to preserving your pyrography. Avoid placing your pieces in direct sunlight or areas with high moisture. Regularly dust your artwork with a soft cloth to prevent buildup and maintain its pristine condition.
Choosing and applying finishes effectively will elevate your pyrography art, ensuring it not only looks stunning but also stands the test of time. With careful selection and application techniques, your pyrography can be both a cherished creation and a lasting treasure.
Common Mistakes to Avoid When Selecting a Finish for Your Artwork
When it comes to finishing your artwork, the choices can be overwhelming. Everyone wants their creations to look their best, but many artists make common errors in selecting the right finish. Here’s a guide to help you dodge those pitfalls and enhance the longevity and appearance of your work.
Ignoring the Medium
One of the biggest missteps artists make is ignoring the responsive nature of their artwork’s medium. Different types of finishes react uniquely with various art materials. For instance, using an oil-based varnish on watercolor can cause blurring or bleeding. Always match the finish to your medium—acrylic varnishes work well with acrylic paintings, while oil-based finishes suit oil paintings.
Forgetting About the Environment
Consider where your artwork will be displayed. Environmental factors like sunlight, humidity, and temperature play a significant role in the choice of finish. A piece displayed in a sunny room may require UV protection to prevent fading, while a humid area calls for finishes that resist moisture. Ignoring these details can lead to degradation over time.
Underestimating Clear Coats
Clear coats serve as a protective layer, but many artists fail to understand their importance. They not only enhance the appearance of the artwork by adding depth but also provide necessary protection against scratches and dust. Many artists overlook the need for a clear coat thinking it will dull the colors, but that’s a misconception. If you select a high-quality product, you may actually enhance the vibrancy of your colors.
Using the Wrong Finish for the Desired Effect
Each finish offers a different look, such as matte, satin, or glossy. Artists often choose a finish based solely on their personal preference, not considering the intended effect of their artwork. For example, a glossy finish might overpower a soft, traditional piece, while a matte finish might dull vibrant colors in a modern work. Always align your finish choice with the emotional tone of your artwork.
Neglecting Proper Application Techniques
Application techniques can greatly affect the final appearance of the finish. Many artists rush through this stage, applying too thick a layer or skipping sanding between coats. To achieve an even and professional look, use thin, even layers and allow adequate drying time. Review product instructions carefully and consider practice on a scrap piece before working on your artwork.
Not Testing Before Committing
Failing to test your selected finish can lead to disastrous results. Before applying a finish to your entire artwork, take time to experiment on a small, inconspicuous area or a test piece. This allows you to evaluate the effect and ensure compatibility with your media. Trial and error are key to finding the perfect finish.
Disregarding the Importance of Acclimatization
Before applying your chosen finish, ensure your artwork is fully cured and acclimated. This vital step helps prevent bubbling, uneven application, or even peeling. Each medium has a specific drying time; be patient and allow your artwork to acclimatize to room temperature. This way, the finish can bond effectively.
Choosing Inexpensive Options
While saving money is always appealing, selecting low-quality finishes can be a false economy. Inexpensive products may seem budget-friendly but often yield subpar results and lack durability. Invest in reputable brands that align with your artistic vision. Quality finishes protect your artwork and enhance its aesthetic appeal.
Relying Solely on Online Reviews
Online reviews can provide guidance, but relying solely on them can lead to poor decisions. Each artist’s experience and application methods vary, as do environmental conditions. So, it’s essential to consider personal experimentation over anecdotal advice. Speak to fellow artists, visit local art supply stores for recommendations, and trust your instincts when selecting finishes.
Skipping Maintenance and Reapplication
Many artists assume that once they finish their artwork, it needs no further care. However, different finishes will wear down or fade over time, necessitating reapplication or touch-ups. Create a maintenance plan for your pieces, especially if they are displayed in high-traffic areas or natural light. Regular care will ensure your artwork remains stunning for years to come.
By keeping these common mistakes in mind, you can thoughtfully select a finish for your artwork that not only enhances its appearance but also contributes to its longevity. A well-chosen finish can truly bring your creation to life while protecting it for years to come. Don’t rush the finishing process; take the time to research and experiment. Your artwork deserves it.
Conclusion
When it comes to enhancing your pyrography artwork and ensuring it stands the test of time, knowing how to choose the best finish cannot be overstated. By carefully considering the key factors involved, you set the stage for an artwork that not only captivates visually but also maintains its integrity over the years. The considerations range from the type of wood used to the nature of the artistic design; each choice influences the overall outcome.
Diving into the various types of finishes illuminates the multitude of options available to artists. Whether you gravitate towards oil-based finishes, water-based varnishes, or natural oils, each finish offers a unique luster, level of protection, and compatibility with different pyrographic designs. While some finishes accentuate the natural grain of the wood, others provide a more vivid sheen that can dramatically alter the final look of your piece. Finding the right match for your artistic style is not just about aesthetics but also about ensuring that the chosen finish serves the purpose your artwork deserves.
Taking a closer look at the impact of the finish on durability and longevity reveals integral details that every pyrography artist should consider. Your artwork is an investment, and the right finish can safeguard against environmental factors like humidity, UV rays, and temperature fluctuations. For instance, a high-gloss finish might be stunning but could also make your artwork more susceptible to scratches and chips. Conversely, a matte finish may lend a rustic charm but might not offer the same level of protection. Hence, weighing the pros and cons of each finish in terms of durability can help you make informed decisions that preserve your work for future generations.
As you embark on the journey of applying finishes, mastering the techniques is equally essential. A smooth application can be the difference between a visually appealing finish and one that detracts from your artistry. Techniques range from using brushes and rags to spraying finishes, each requiring different levels of skill and attention. Experimentation often yields the best results, allowing you to refine your process and discover the optimal technique for your unique style. Remember, taking the time to apply a finish carefully can enhance the depth and intricacy of your pyrography, allowing your intended details to shine.
It’s equally crucial to be aware of common mistakes artists can make when selecting a finish. These pitfalls can include choosing a finish without testing it first on a sample piece, leading to unexpected reactions with the wood or the pyrographic design. It’s easy to overlook the drying time and compatibility issues between different finishes, which can alter the visual outcome or even damage your artwork. Moreover, failing to consider the long-term effects of your selected finish—such as yellowing over time or its reaction to air and moisture—can lead to frustrating, regretful outcomes. Awareness and vigilance in this area can eliminate potential hazards that could mar your cherished pieces.
Ultimately, the art of choosing the best finish for your pyrography artwork blends thoughtful consideration with personal style. Each type of finish carries its own features and limitations, impacting not just how your artwork looks but how long it remains a vivid part of your collection. By approaching this decision with an informed mindset and practicing the appropriate application techniques, you set yourself up for success.
Navigating the world of finishes may seem daunting at first, but it enhances your pyrography and expands your artistic repertoire. Embrace the learning experience; allow it to refine your skills and deepen your appreciation for the medium. Your choices today will resonate in the legacy of your artistry tomorrow. Whether you prefer a clear varnish to maintain a natural look or a more vibrant stain to infuse your work with color, remember that each finish can tell a story. As you finish your next pyrography piece, may it not just be a reflection of your talent but also an enduring testament to your attention to detail and commitment to excellence. With these insights at hand, you can confidently approach finishing your artwork, allowing it to capture the imagination for years to come.