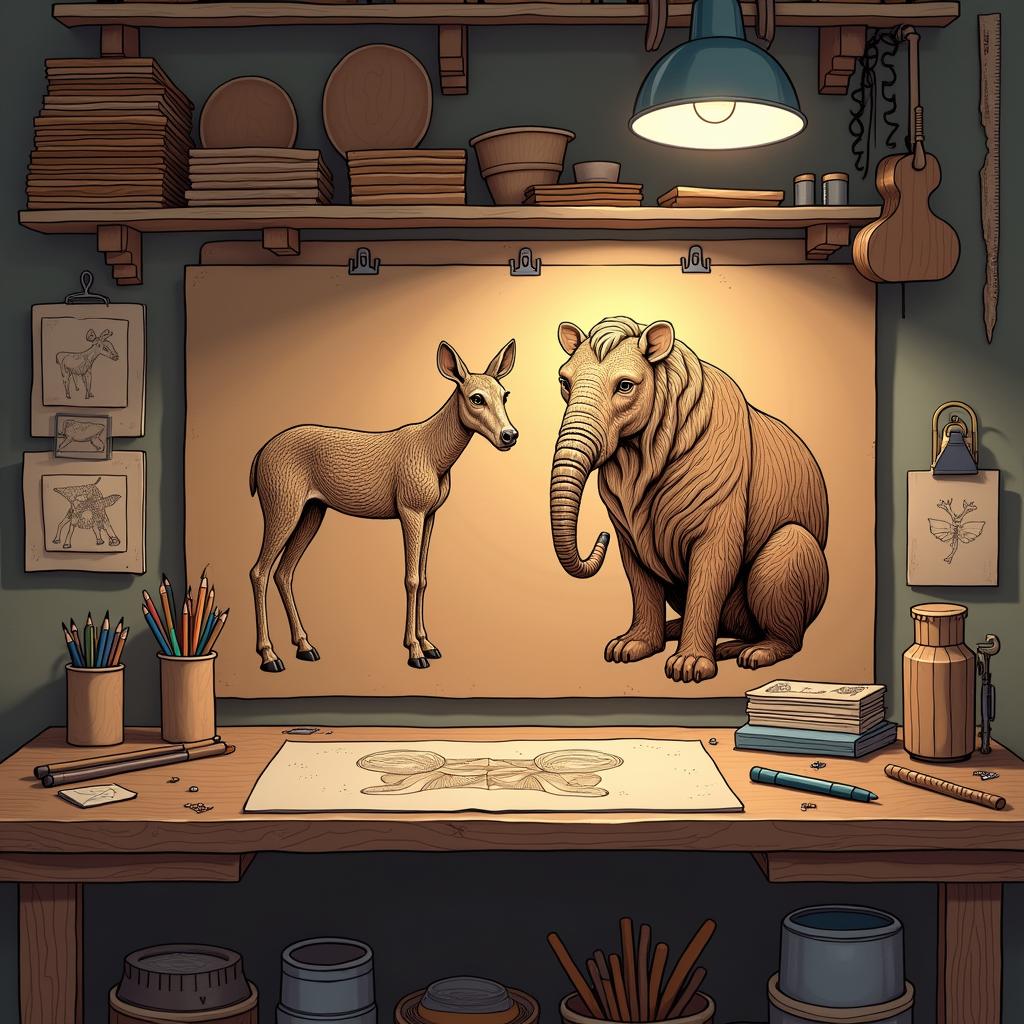
Best Pyrography Techniques for Creating Realistic Animals
Creating realistic animal art with pyrography involves a combination of techniques that can elevate your woodburning skills. By understanding and mastering these methods, you can bring lifelike qualities to your projects while enjoying the creative process.
Understanding the Materials
Before diving into the pyrography techniques, it’s crucial to choose the right materials. The type of wood you select profoundly affects the outcome of your artwork. Here are some popular options:
- Pine: Affordable and easy to work with, it’s a great choice for beginners.
- Birch: Known for its smooth surface, birch allows for intricate designs.
- Maple: Offers a fine grain for detailed work, making it ideal for realistic depictions.
Choosing the best wood not only impacts the visual outcome but also how well it takes on the pyrography technique you choose.
Tip #1: Use Reference Images
One of the best ways to ensure accuracy is to use high-quality reference images. Pay close attention to details such as fur patterns, muscle definition, and even the play of light and shadow on the animal’s form. Using photo editing software can help you adjust these images to fit your desired style before transferring them onto wood.
Tip #2: Mastering Different Burn Techniques
Different burn techniques can create various textures and effects. Here’s a look at some essential methods:
- Shading: This technique involves varying the pressure and speed of the pyrography tool to create gradients. Use a light touch for subtle shadows and a heavier hand for deeper tones.
- Cross-hatching: By using intersecting lines, you can build texture and depth. This works well for areas such as fur or feathers.
- Pointillism: Small dots can form intricate patterns or textures. This method is excellent for adding detail to animal eyes or scales.
Experiment with these techniques on scrap pieces of wood before applying them to your main project.
Tip #3: The Importance of Layering
Layering is vital for creating realistic depth in animal pyrography. Start with the lighter areas and gradually build up to darker tones. This technique allows for a more dynamic contrast and can evoke movement and life within your piece. Take your time—realism is often about patience and precision.
Tip #4: Tools and Equipment
Your choice of tools can also significantly influence the realism of your animal art. Invest in a high-quality pyrography pen that allows for precise control. Consider adding different tips to your arsenal:
- Fine point tips: Great for intricate, detailed work.
- Shading tips: Useful for broader, softer areas.
- Writing tips: Ideal for adding text or finer details.
Using the correct tool will make it easier to achieve the level of detail necessary for realistic representations.
Tip #5: Finishing Touches
Once your artwork is complete, consider how to enhance it further. A finish can add depth and protect your piece. You might opt for a natural finish oil to give the wood a warm glow or a clear varnish for a more polished look. Always test finishes on scrap wood to see how they affect color.
Tip #6: Practice, Practice, Practice
The key to mastering pyrography is consistent practice. Don’t get discouraged by initial results; each attempt is a step toward improvement. Explore various animal forms and try to replicate their details in different styles. The more you practice, the better you’ll become at understanding how to translate lifelike qualities onto wood.
By incorporating these techniques and tips into your pyrography practice, you’ll find yourself creating more realistic animal art with each project. Embrace the learning process, stay patient, and enjoy the art of woodburning!
Essential Tools and Materials for Pyrography Projects
When diving into the world of pyrography, having the right tools and materials is essential for achieving stunning results. Whether you’re a beginner or an experienced artist, understanding what you need will set the foundation for your projects and enhance your creativity.
Pyrography Tools
The main tool in pyrography is the pyrography pen, also known as a wood burner. Here are the key types and components to consider:
- Pyrography Pen: The pen is the primary tool used to burn designs into wood or other materials. Look for a model with adjustable temperature settings for versatile burning.
- Tips or Nibs: Different tips allow for various line thicknesses, shading, and detailing. Common options include:
- Bull Nose Tip – for thick lines and shading
- Pointed Tip – for fine lines
- Shading Tip – designed for creating gradient effects
Choosing a pen with interchangeable tips enables you to experiment with various techniques and styles.
Wood and Surface Materials
The choice of material greatly influences the outcome of your pyrography work. Here are some options:
- Wood: The most popular choice for pyrography. Select woods that have a fine, even grain, such as:
- Basswood – soft and easy to work with, great for beginners
- Pine – affordable and commonly used, but knots can create challenges
- Birch – offers a smooth surface and excellent detail
- Leather: Often used in decorative projects, leather tends to absorb pyrography heat well, creating striking designs.
- Paper and Cardstock: For practice runs or smaller designs, thick paper can be a good option.
Safety Equipment
While engaging in any form of crafting or art, safety should be a priority. Here are the essentials:
- Protective Eyewear: Safety goggles will protect your eyes from sparks or wood debris.
- Heat-Resistant Gloves: Helps protect your hands while handling hot tools and working on projects.
- Ventilation: Ensure your workspace is well-ventilated to avoid inhaling fumes.
Additional Tools for Enhancing Your Projects
Beyond the basic tools and materials, several additional items can support your pyrography journey:
- Pencils: Use graphite pencils for sketching out designs on your wood surface before burning.
- Erasers: A fine art eraser can help clean up any graphite marks you don’t want to keep.
- Ruler: For precise measurements and straight lines, having a ruler is crucial, especially for geometric designs.
- Sandpaper: Lightly sand the wood surface before beginning; this helps to create a smooth canvas for your artwork.
Maintenance Supplies
Just as important as having the right tools is maintaining them. Regular care ensures longevity and optimal performance:
- Cleaning Supplies: Use a soft cloth to remove soot or debris from your pyrography pen’s tips between uses.
- Replacement Tips: Over time, tips can wear down. Keep a stock of essential nibs to ensure you can always create your best work.
As you explore the diverse realm of pyrography, the right tools and materials will elevate your artistry. By investing time in selecting the best pyrography equipment, you ensure a more enjoyable crafting experience, allowing your creativity to shine through your unique designs.
Understanding Texture and Depth in Pyrography
Exploring Texture
Texture in pyrography is vital for imitating the surface quality of the subject. Here are some techniques to achieve a remarkable sense of texture:
- Dot Technique: Use dots to replicate fur or feather patterns. Vary the density and size of the dots to create dimension and realism. For instance, closely spaced dots create a sense of shadow, while widely placed dots can depict highlighted areas.
- Cross-Hatching: This involves layering lines in one direction and then crossing them with lines in another direction. It’s particularly effective in showing depth, especially in areas like under the chin of an animal or beneath leaves.
- Stippling: Similar to the dot technique, stippling involves creating texture through small dots. The tighter the dots are placed, the darker the area becomes. This technique is excellent for achieving gradients of color, like the subtle transitions seen in a wolf’s fur.
- Burning Techniques: Different tips and burning temperatures can create varied textures. Sharp tips produce fine lines, while broader tips create soft marks. Experimenting with these can help you replicate the unique texture of animal features.
Creating Depth
Depth gives your artwork a three-dimensional feel. Here are a few strategies to consider:
- Layering: Build depth by layering your pyrography gradually. Start with lighter burns to outline shapes, and progressively add darker shades and intricate details. This method mimics how shadows would naturally appear in real life.
- Shading Techniques: Incorporate various shading techniques such as smooth shading, scumbling, or even using the traditional burn strokes. These techniques provide depth by creating a gradient effect, allowing certain parts of the animal to recede while others protrude.
- Light Sources: Always take into account the light source when designing. Shadows will be cast differently depending on where your imaginary light is positioned. Highlight areas facing the light and deepen shadows that are away from it to create a sense of volume.
Combining Texture and Depth
The synergy of texture and depth can result in breathtaking pyrographic art. By combining the techniques mentioned, you’ll create scenes that feel alive. For example, when portraying a fox, using stippling for the lush fur while utilizing cross-hatching for the shadows underneath its body enhances the overall realism. Here’s how to effectively combine these elements:
- Plan Your Composition: Before you start burning, sketch your design. This helps in visualizing how texture and depth will play out. Identify areas that will need more detail and where highlights or shadows should be placed.
- Use Reference Images: Observing photographs or real-life subjects provides insight into how light interacts with textures. Pay close attention to how shadows fall and textures appear, adjusting your technique accordingly.
- Practice Patience: Mastering these techniques takes time. Don’t rush through your artwork. Allow yourself to practice each approach so it becomes second nature. With experience, you’ll find it easier to balance texture and depth effectively.
Ultimately, the beauty of pyrography lies in its ability to capture intricate details and evoke emotion through textures and depth. As you experiment with various techniques and materials, remember that the journey to mastery is as enriching as the finished piece. Each stroke can transform a flat image into a vibrant portrayal that resonates with viewers, especially when depicting the wonders of the animal kingdom.
Mastering Light and Shadow: Enhancing Realism in Pyrography
Creating depth and realism in pyrography, especially when depicting animals, revolves significantly around mastering light and shadow. This essential aspect enhances your artwork’s three-dimensional quality and brings your subjects to life. Understanding how light interacts with forms and surfaces is crucial for any pyrographer aiming to achieve a realistic portrayal.
Understanding Light Sources
To enhance realism in your pyrography, you first need to recognize the various types of light sources. Each light source influences how shadows fall and how textures are perceived. Consider the following:
- Natural Light: Sunlight offers a broad spectrum of colors and can vary dramatically depending on the time of day.
- Artificial Light: Indoor lighting can produce harsh shadows or soft glows based on the bulb type.
- Spotlight: Focusing light on a specific area can create strong contrasts and dramatic effects.
Identify your primary light source before starting your pyrography project. This decision will help you determine where highlights and shadows will lie, guiding your burning technique effectively.
Shading Techniques
Effective shading is the backbone of any realistic pyrography piece. Here are some techniques you can employ:
- Cross-hatching: This technique involves layering lines crisscrossed to build depth. Vary the density of the lines to create gradients.
- Stippling: Using dots strategically creates texture and shadow. The closer the dots are, the darker the area appears.
- Burning Depth: Adjust the pressure and angle of your pyrography tool to create darker shadows. Heavier pressure darkens the wood significantly.
Combining these techniques allows you to emphasize differences in texture, such as fur or feathers, crucial for realistic animal depictions.
Creating Contrast
Contrast is essential in bringing your artwork to life. The interplay between light and shadows creates visual intrigue and can highlight specific areas of your piece. Here’s how to effectively use contrast in your pyrography:
- Identify Focal Points: Determine the most important features of your animal that will draw the viewer’s eye. Ensure these areas have sharp contrasts with surrounding elements.
- Blend Vs. Defined Edges: Balance smooth transitions with sharply defined edges. Use smooth shading for areas like the body, while relying on defined lines for features like eyes and fur outlines.
Strong contrasts not only enhance depth but can also evoke emotion, making your artwork more compelling.
Choosing Textures Wisely
Textures play a pivotal role in conveying realism in pyrography. Different animals exhibit distinctive fur patterns, scales, or feathers that are essential for character portrayal. To effectively depict textures in your creations:
- Observe Real-life References: Study photographs or real animals to understand how light interacts with various textures.
- Practice Different Techniques: Experiment with various pyrography techniques to find out which best replicates the texture you want to achieve. For instance, use fine lines for smooth fur and random, jagged marks for rougher textures.
Ultimately, being versatile with your texture representation significantly impacts the realism of your piece.
Finalizing Your Artwork
Once you’ve established your shading, textures, and contrasts, take a step back and evaluate your work. Look for any areas that may need additional shadow or highlights to enhance depth. Small adjustments can make a big difference in the final appearance. It may also be beneficial to seek feedback from fellow artists or online communities, as they might offer insights you hadn’t considered.
Mastering light and shadow in pyrography is a skill that develops over time and through practice. By focusing on the interplay between these elements, and by employing the techniques discussed, you can create stunning and realistic representations of animals that resonate with viewers.
Common Mistakes to Avoid When Burning Animal Portraits
Creating stunning animal portraits through pyrography can be a rewarding experience, but it’s easy to fall into common traps that may compromise your work. To elevate your craft, let’s explore some frequent mistakes that artists often make and how to avoid them. Understanding these pitfalls can drastically improve the quality of your creations.
Neglecting Proper Preparation
One of the most significant oversights in pyrography is the absence of adequate preparation. Before you even touch the wood with a burning tool, ensure you:
- Select the Right Wood: Choose a wood that’s suitable for pyrography, such as basswood or birch, as they have a fine, even grain ideal for detailed work.
- Sketch Your Design: Use a light pencil to outline your animal portrait. This will guide your burning process and help prevent mistakes.
- Sand the Surface: A smooth surface will make the burning process easier and produce cleaner lines.
Ignoring Lighting and Shadows
Realism in animal portraits is achieved through shading and highlights, which embody the essence of the subject. A common error is overlooking these essential elements. To avoid this mistake:
- Study Reference Photos: Use clear, high-quality photos to understand light placement and how it affects your animal’s features.
- Practice Different Techniques: Familiarize yourself with various shading techniques, such as stippling or cross-hatching, to add depth to your work.
- Create a Value Scale: This will help you understand the transitions between light and dark areas, leading to a more realistic portrayal.
Rushing the Process
In the pursuit of perfection, some artists rush their work, leading to errors and unsatisfactory results. Take your time to ensure each detail is attended to:
- Work in Layers: Build your image gradually. Start with lighter burns and gradually deepen them to achieve the desired effect.
- Take Breaks: Stepping away from your work can give you a fresh perspective and help you identify mistakes more effectively.
- Double Check Your Progress: Regularly check your work against your reference photo to ensure accuracy.
Using the Incorrect Temperature Setting
Your pyrography tool’s temperature setting is crucial in achieving the desired results. An incorrect temperature can lead to undesired burns:
- Test Your Tool: Always perform a test burn on a scrap piece of wood before starting on your final project to gauge the right temperature.
- Adjust as Needed: Be prepared to adjust your temperature settings as you burn different areas of your portrait, especially if you’re transitioning between detailed lines and broader shading.
Overlooking Tool Maintenance
Another common misstep is failing to maintain your pyrography tools. Proper care ensures quality work and longevity of your equipment:
- Clean the Tip Regularly: Residue can accumulate and affect the burning quality, so wipe the tip frequently during your session.
- Replace Worn Tips: A damaged or worn-out tip can ruin your precision, so replace it as necessary.
Neglecting to Seal Your Work
After completing your artwork, don’t forget to take the final step: sealing. Neglecting this can lead to fading and damage over time:
- Choose the Right Finish: A clear wood finish or sealer will protect your design while enhancing its vibrancy.
- Apply Evenly: Use a soft cloth or brush to apply the sealer, ensuring an even coat across the entire surface.
Avoiding these common mistakes allows you to create animal portraits that truly captivate and reflect the beauty of your subjects. By focusing on preparation, lighting, pacing, tool care, and finishing, you can elevate your pyrography skills and produce breathtaking art. Each step in the process adds to the richness of your artwork, so take your time and enjoy the journey.
Conclusion
Creating realistic animal portraits through pyrography is a rewarding and intricate journey that allows artists to unleash their creativity while honing their skills. The techniques discussed throughout this article illuminate the best pathways to crafting stunning representations of animals through the meticulous art of wood burning. Whether you’re a novice just starting out or an experienced artist looking to refine your craft, understanding these core elements will undoubtedly elevate your work.
Firstly, an exploration of the best pyrography techniques demonstrates the intricacies involved in recreating the beauty of wildlife. Techniques such as shading, layering, and stippling are essential for achieving the lifelike quality you desire. Each stroke of the pyrography tool is an opportunity to bring texture to your portrayal, and practice will make the process a natural extension of your artistic vision. By implementing varied heat settings and diverse techniques, you can create an impressive depth that breathes life into your creations. Failure to appreciate the effects of heat on different types of wood can lead to disappointment. Thus, proper experimentation is key to mastering this skill.
Equipping yourself with the necessary tools and materials is an essential step in achieving realistic results with pyrography. From quality wood burning tools to the right type of wood, every detail matters. Using basswood or birch can provide a clean surface, while composite woods may offer different textures and qualities. Furthermore, investing in high-quality pens and tips can create sharper details and smoother transitions. With the right tools at your disposal, you set the stage for an artistic experience that enhances your ability and confidence.
Understanding the nuances of texture and depth in pyrography cannot be overstated. When working on animal portraits, it’s important to observe not just the surface of the creature but also how light interacts with it. For instance, the softness of a fur coat or the glistening of wet skin requires a meticulous approach to texture replication. Artists must pay attention to how the pyrography technique evokes the various surface qualities, adjusting their methods accordingly to harness the interplay of light and shadow effectively. A realistic animal portrait is not merely about the image itself; it’s about capturing the essence and character of your subject.
This leads to the critical skill of mastering light and shadow. Recognizing how to create contrast within your artwork vastly enhances realism. Properly placed shadows can create an illusion of depth, while highlights can draw attention to focal points. This dynamic quality can transform your piece from a flat representation into a vibrant, multidimensional sublime depiction of life. Alongside understanding light’s play in your work, be vigilant to the balance this creates. Too much shadow can overpower an image, while insufficient contrast can take away its realism entirely. Therefore, a careful approach to defining light sources in your artwork will make all the difference.
Although pitfalls in pyrography can seem daunting, recognizing common mistakes is vital for growth. Beginners may rush the burning process, leading to uneven textures or unintentional burns. Others may overlook the importance of composition, resulting in disconnected or awkwardly positioned subjects. By being aware of these common challenges, artists can better prepare themselves to approach their work with patience and care. An ongoing evaluation of one’s technique allows for continual improvement, and embracing mistakes as learning opportunities fosters a more profound love for the craft.
Realistic animal pyrography is an art form requiring dedication, practice, and an understanding of intricate techniques. By harnessing the fundamentals of tools and materials, mastering the elements of texture and depth, and skillfully managing light and shadows, you can create brilliant pyrographic representations of animals. So, as you embark on this creative journey, keep refining your skills, experiment fearlessly, and most importantly, enjoy the process of bringing your artistry to life. The heart of pyrography lies in capturing the connection between the artist and subject, highlighting the magical beauty that exists within nature. Through patience and practice, your unique touch will undoubtedly render stunning animal portraits that resonate with all who behold them.