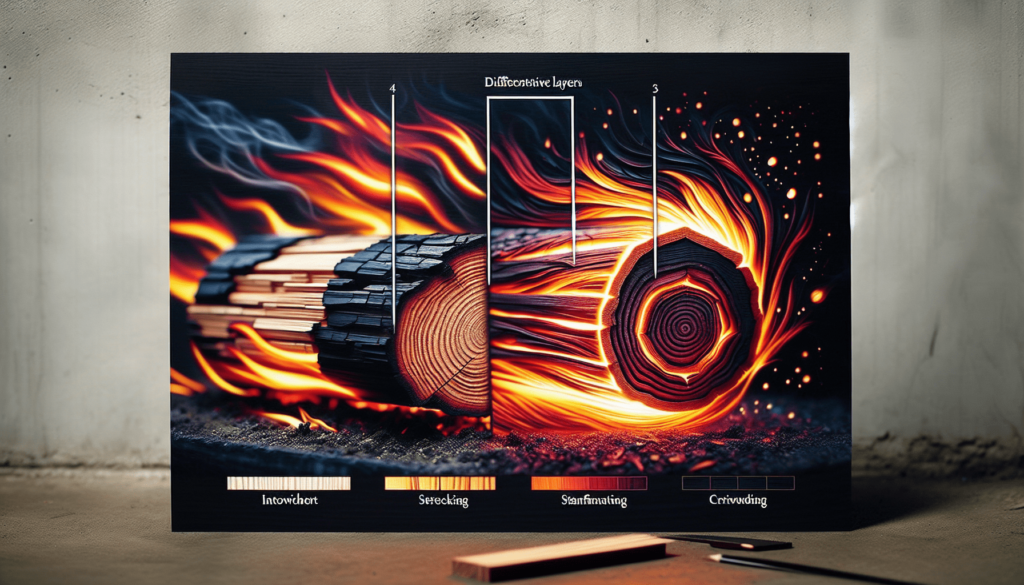
When I first started burning wood for my fireplace, I never realized there was so much more to it than just striking a match. Understanding the stages of burning wood can actually help you get a better fire, save on fuel, and produce less smoke. From the initial drying phase where the moisture escapes, to the crackling and glowing of the combustion stage, and finally to the slow, smoldering embers of the charcoal phase, each step is crucial for a sustained and efficient fire. What is it about burning wood that captivates us so? Is it the cozy warmth it provides or the crackling sound that makes any space feel instantly homier? Maybe it’s the primal satisfaction of producing fire, a nod to our ancestors who first discovered this transformative power. Whatever the reason, wood-burning is both an art and a science. Today, let’s go through the stages of burning wood, breaking it down like a well-played game of Jenga, starting from the bottom and working our way up.

Preparation: The Unsung Hero
Before you even think about striking a match, the preparation stage is key. Dry, seasoned wood is a must. Think of it like baking a cake; you wouldn’t slap together ingredients haphazardly and expect a decent result, right?
Selecting the Right Wood
First off, not all wood is created equal. Some types burn hotter and cleaner than others. Hardwoods like oak and maple are your best friends here. They’re dense, meaning they burn longer and provide steady heat.
| Type of Wood | Characteristics | Pros | Cons |
|---|---|---|---|
| Oak | Heavy, dense | Long burn time, high heat | Takes longer to season |
| Maple | Dense | Burns clean and hot | Can be pricey |
| Pine | Light, resinous | Ignites quickly, cheap | Produces a lot of smoke |
Seasoning the Wood
Don’t let the term “seasoning” fool you—this isn’t gourmet cooking. Seasoning wood means letting it dry out, generally for six months to a year. This is crucial because wet wood won’t burn properly. It’s like trying to run a marathon in flip-flops—possible, but not effective.
Storing the Wood
Once you’ve got your seasoned wood, storage becomes crucial. You don’t want all that hard work to go down the drain due to poor storage. Think of your woodpile as a fine wine collection; it needs to be elevated off the ground and covered, but also ventilated. You’re looking for a balance.
Stage 1: Ignition
Now that you’ve prepped like a pro, it’s game time. The first stage of burning wood is ignition. This is the kindling and fire starting process.
Kindling and Tinder
Kindling and tinder are essential. Tinder is the small stuff that catches fire quickly—twigs, dry leaves, even some paper. Imagine tinder as the appetizer at a fancy restaurant; it’s not meant to fill you up but to get things going. Kindling, on the other hand, is like your main course. Small sticks and thin pieces of wood will catch from the tinder and start to build up the heat.
Starting the Fire
Time to channel your inner pyromaniac. Arrange your tinder in a small pile at the base. Place your kindling teepee-style over the tinder. As you light the tinder, the flames will rise and catch the kindling. Think of this as laying the groundwork for a killer project. Don’t rush it; let it build.
Stage 2: Growth
Ah, the flames have taken. This is where things start to get exciting. The growth stage is when the fire begins to establish itself and becomes more self-sustaining. The goal here is to transition from kindling to larger logs.
Adding Larger Wood
Once your kindling is burning well, you can slowly add larger logs. Slow and steady wins the race. If you pile on too much too quickly, you’ll smother your fire like an overenthusiastic bear hug.
Encouraging Airflow
Air is your friend. Ensure there’s good airflow to maintain combustion. Flue dampers, fire grates, and properly arranging your logs can help with this. Think of it as providing enough oxygen for your workout—without it, you’re just going to fizzle out.
Monitoring and Adjusting
This isn’t a “set it and forget it” process. Keep an eye on your fire, adding logs and adjusting the arrangement as needed. It’s like tending to a garden; it requires ongoing attention but is oh-so-rewarding.
Stage 3: Fully Developed Fire
Now we’re talking! This is the stage where your fire is roaring, providing maximum heat output. It’s the culmination of all your hard work.
Consistent Fuel Supply
To maintain a fully developed fire, you need to consistently add fuel. Remember, we’re not just piling on wood willy-nilly. This is a systematic process. Add larger logs at regular intervals to keep the heat going.
Managing Heat Output
This is where you can fine-tune the heat output. Using a fire poker to shift the logs or adjusting the damper can help manage the intensity. It’s like driving a car—you’ve got to know when to speed up and when to slow down.
Enjoying the Fruits of Your Labor
Sit back and revel in the warmth and light. This is the payoff. The ambiance created by a well-developed fire is unbeatable. You’ve earned it.

Stage 4: Decline
All good things must come to an end, and your fire is no exception. The decline stage is where the fire starts to die down. This is an inevitable part of the process.
Allowing the Fire to Burn Out
At this stage, it’s best to let the fire naturally die down. Resist the urge to add more wood—it’s time for the fire to rest. Think of it as the cool-down period after an intense workout.
Managing Ashes
Once the fire has died down, you’ll be left with ashes. Cleaning out the ashes is essential for the next time you start a fire. A layer of ash can be used to insulate your next fire, but too much can smother it. It’s all about balance.
Reflecting on the Process
Use this time to reflect on what worked and what didn’t. Maybe you added wood too quickly or didn’t allow enough airflow. Every fire is a learning experience, much like life itself.
The Science Behind Burning Wood
While the stages give you a practical roadmap, there’s also fascinating science behind it. Let’s dive into what’s happening at a molecular level.
Pyrolysis
Pyrolysis is the process where organic materials decompose under high heat in the absence of oxygen. This is the initial stage where wood breaks down into various gases and solid residues. Think of it like wood’s dramatic transformation, shedding its old form to become something new.
Combustion
Once pyrolysis has done its job, combustion takes over. The gases released during pyrolysis mix with oxygen and ignite, producing heat, light, and various byproducts. This is where the magic happens.
Heat Transfer
Heat transfer in a fire occurs in three ways: conduction, convection, and radiation. Conduction is heat moving through solid materials like the wood itself. Convection is the transfer of heat through liquids or gases, and radiation is the heat you feel when you stand near the fire.
| Heat Transfer Method | Description | Example in Fire |
|---|---|---|
| Conduction | Heat transfer through solid material | Heat moving through the log |
| Convection | Heat transfer through liquids or gases | Hot air rising from the fire |
| Radiation | Heat transfer through electromagnetic waves | The warmth you feel standing near the fire |
Safety First
We can’t talk about fire without mentioning safety. A fun night around the fireplace can quickly turn into a disaster if precautions aren’t taken.
Fire Extinguishers and Safety Tools
Always have a fire extinguisher, a bucket of sand, or even just a bucket of water nearby. It’s like having an insurance policy—you hope you never need it, but you’ll be glad it’s there if you do.
Proper Ventilation
Make sure your burning area is well-ventilated. This prevents the buildup of harmful gases like carbon monoxide. Open a window or use a screen if you’re indoors.
Supervision
Never leave your fire unattended. It’s the rule that’s saved many a household from disaster. Keep an eye on it, especially if there are kids or pets around.
Sustainable Practices
If you love burning wood, you should also love the environment. Sustainable wood-burning practices help us enjoy our fires without causing undue harm.
Sourcing Wood Responsibly
Try to use sustainably sourced wood or consider wood alternatives like bio-bricks. It’s like opting for organic produce—you’re making a choice that benefits more than just yourself.
Efficient Burning
Burn your fires efficiently to reduce emissions and particulate matter. A hot, clean-burning fire is not only better for the environment but also for your lungs.
Reducing Waste
Use every bit of the wood, and consider creative ways to use the ash in your garden or compost. It’s recycling, fire-style.
Final Thoughts and Warm Wishes
And there you have it—the stages of burning wood, from preparation to ashes. Whether you’re a seasoned (pun intended) pro or a newbie, knowing these stages can help you make the most of your wood-burning experience. Like all good things, mastering the art of fire takes time and practice, but the warmth, ambiance, and primal satisfaction are well worth the effort.
May your fires burn bright, and your wood be ever seasoned!

