Have you ever looked at intricate wood-burned art and thought, “I wish I could do that”? Trust me; you’re not alone. I remember the first time I saw a beautifully detailed wood-burned plaque at a local craft fair. Just like that, I was hooked. But, as with any new hobby, the first hurdle is figuring out what tools I need to get started. So, what tools do I need for wood burning? Let’s take this journey together and break it all down.

Getting Started: Essential Tools for Wood Burning
So, to kick things off, let’s talk basics. We’re not talking nuclear physics here, but there are some essentials you can’t skip.
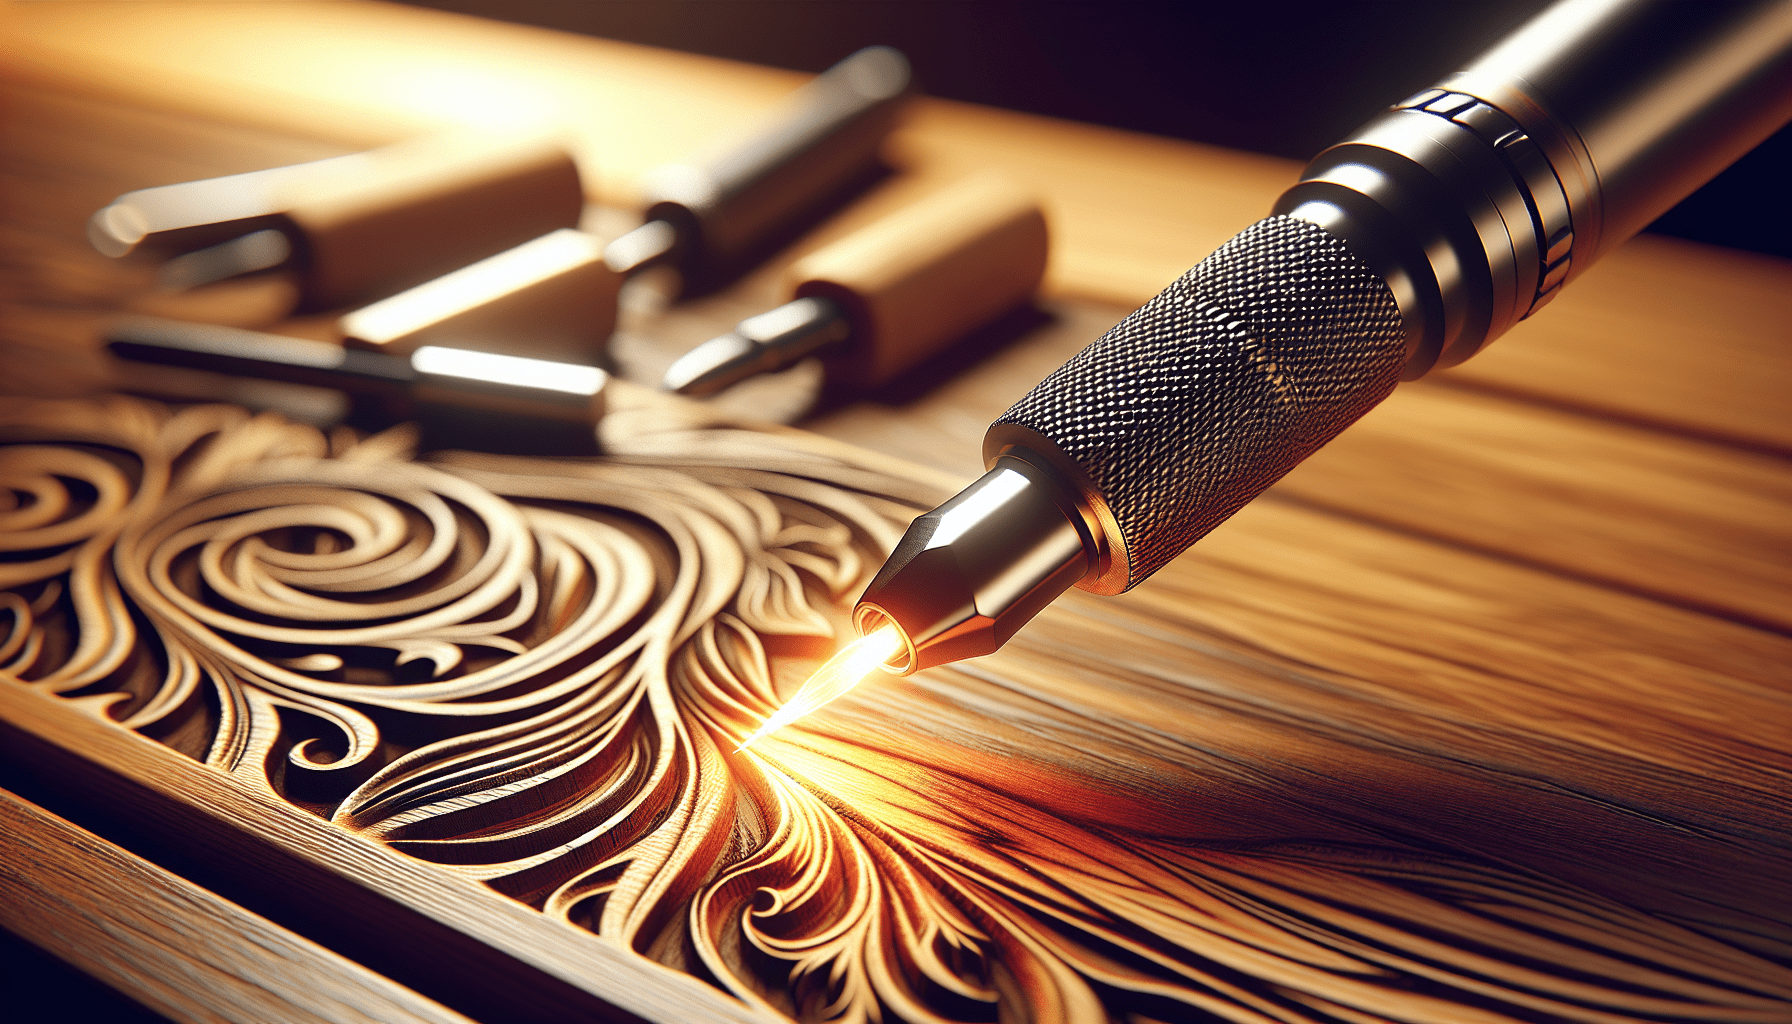
Wood Burning Tool (Pyrography Pen)
First and foremost, you need a pyrography pen. Think of this as your magic wand. It’s got a pencil-like handle and a tip that heats up to scorch the wood, creating the patterns and designs you want. There are two main types: solid-point burners and wire-nib burners.
| Type | Description |
|---|---|
| Solid-point Burners | These are great for beginners. They’re less pricey and easier to use but offer less precision. Think of these as your gateway to the craft. |
| Wire-nib Burners | These are for more detailed and precise work. They heat up faster and have adjustable temperature settings. If you’ve mastered the basics and want to take it up a notch, this is your tool. |
A Variety of Tips
Just like you wouldn’t use the same brush for a paint masterpiece and for painting your fence, you need different tips for different effects in wood burning. Most starter kits come with a few basic tips, but as you grow, you’ll want to expand your collection.
| Tip Type | Use Case |
|---|---|
| Universal Tip | This is your go-to for almost anything. Think of it like your Swiss Army knife. |
| Flow Tip | Perfect for drawing lines. If you’re outlining a design, this is your best friend. |
| Calligraphy Tip | If you’re into fancy lettering, then this one’s indispensable. It’ll give you those beautiful strokes you see in old manuscripts. |
| Shading Tip | For adding depth and dimension. If your design looks like it’s screaming for some realism, the shading tip will be your hero. |
Adjustable Temperature Settings
When I first started, I didn’t give much thought to adjustable temps. Big mistake. Turns out, having control over the heat can make a world of difference. High heat for dark, deep burns and low heat for lighter, softer strokes. It’s like seasoning your food; the right amount makes all the difference!
Sandpaper
Never thought sandpaper would be a conversation piece, did you? But trust me, it’s crucial. Before you start burning, you want your wood as smooth as possible. Any little bump or uneven surface can ruin a beautiful design faster than you can say, “Oops.” Aim for a fine-grit sandpaper, usually around 220-grit.
Transfer Paper
Unless you’re a freehand wizard, you’ll need transfer paper to get your designs onto the wood. It’s basically carbon paper, like the kind you probably used in school (if you’re old enough to remember that). Place it between your design and the wood, and trace over your lines.
Optional But Seriously Useful Tools
Alright, those are the must-haves. Now, let’s talk about some optional tools. Not necessary, but they’ll make your life so much easier.
A Sturdy Work Surface
You need a workspace that won’t wobble. Trust me on this one. The last thing you want is your intricate design turning into some Dali-esque nightmare because your table decided to dance a little jig.
Safety Gear
Ok, I know, safety gear isn’t sexy, but neither is a trip to the ER. A pair of heat-resistant gloves and safety glasses can save you a lot of pain.
Fans and Ventilation
If you’ve ever accidentally set off the smoke alarms while cooking, you know just how crucial ventilation can be. A small fan or doing your burning in a well-ventilated area can help reduce smoke inhalation. Some even use a small vacuum system to suck the smoke away.
A Good Light Source
You can’t burn what you can’t see. A bright, adjustable desk lamp can be a game-changer, especially if you’re burning late into the night (which, let’s be honest, happens more often than you’d think).
Metal Ruler and French Curves
A ruler and French curves are essential for adding consistent lines and curves to your design. Sure, it sounds like something out of geometry class, but it works!
Choosing Your Canvas: Types of Wood
You can’t talk about wood burning without, well, talking about wood. So let’s get into it: what kind of wood should you be using?
Softwoods vs. Hardwoods
Most beginners start with softwoods, mainly because they’re easier to burn and more forgiving. Pine, basswood, and Poplar are popular choices. They burn evenly and don’t require too much pressure. Hardwoods like oak and walnut, on the other hand, are tougher to burn but give a much more polished look when finished. If you’re feeling adventurous and have a bit more experience, give them a shot.
| Wood Type | Characteristics |
|---|---|
| Pine | Soft, easy to burn, and affordable. Great for beginners but can have a lot of resin, which might get sticky. |
| Basswood | Soft and fine-grained, ideal for detailed work. It’s like the kind, forgiving grandma of wood. |
| Poplar | Another softwood that’s pretty easy to burn. It’s also relatively cheap, so you can experiment without sobbing over mistakes. |
| Oak | A hardwood that offers a finished, professional look. Takes more time and practice. Get ready for a workout! |
| Walnut | Another hardwood, a bit pricier but absolutely stunning when finished. It’s like upgrading from a compact to a luxury car. |
Design Inspiration and Patterns
Finding that perfect design can sometimes be the hardest part. It’s like staring at a blank canvas, wondering where to start.
Research and Reference
Hop online to find patterns and inspiration. Websites like Pinterest or Instagram are gold mines. But don’t stop there. Step outside and take a walk in the park or even through your local craft store. Inspiration is everywhere.
Practice Makes Perfect
Before diving into a big project, test out your design on a scrap piece of wood. This helps you get a feel for how the wood and your tools behave. My first project looked more like a child’s crayon drawing—no shame in that. Practice!

The Burning Process: Step-by-Step
Now, let’s get down to the nitty-gritty. How do you actually burn a design into wood?
Step 1: Prepare Your Wood
Grab your sandpaper and go to town smoothing out the wood surface. The smoother, the better. Wipe off any dust with a damp cloth and let it dry.
Step 2: Transfer Your Design
Use the transfer paper to get your design onto the wood. Secure it with some tape so it doesn’t shift around. Trace over your pattern with a sharp pencil.
Step 3: Set Up Your Work Area
Make sure you’ve got your workspace all set up—good lighting, ventilation, and all your tools within reach.
Step 4: Start Burning
Plug in your pyrography pen and let it heat up. Remember, slow and steady wins the race here. Start with light lines to outline your design. You can always go darker, but you can’t go back if you go too dark too soon.
Step 5: Shading and Detailing
Once your outline is done, you can start adding in the details and shading. Switch out the tips as necessary to achieve different effects and textures.
Step 6: Clean and Finish
Once you’re happy with your design, let it cool down. You might find some soot or residue; a quick brushing or light sanding can clean it up. Finally, if you want to preserve your masterpiece, consider applying a finish like a clear coat or varnish.
Troubleshooting Common Issues
Ah, the joy of beginner mistakes. We all make them, so don’t get discouraged. Here are some common problems and how to tackle them.
Uneven Lines
This could be due to inconsistent pressure or heat. Practice maintaining the same pressure and give your pen time to heat properly.
Blotchy Shading
Use a lighter hand and build up the shading gradually. Sometimes, switching to a shading tip can help.
Burnt Edges
Too much heat focused in one spot can cause burnt edges. Try turning the heat down or moving faster.
Maintaining Your Tools
Just like any other tool, your pyrography pen needs a little TLC to keep it in tip-top shape.
Cleaning the Tips
Over time, residue will build up on your tips. Use a tip cleaner or a piece of fine-grit sandpaper to keep them clean. Some use a brass brush—just be gentle.
Checking Cords and Connections
Keep an eye on your cords for wear and tear. It’s not just a safety issue; a worn-out cord can also impact performance. Make sure all connections are tight and secure.
Conclusion: Embrace the Learning Curve
Wood burning isn’t just an art form; it’s a journey. One where every burn, every line, and every piece of wood tells a story. It can be frustrating, sure, especially when things don’t turn out the way you envisioned them. But the joy and satisfaction you’ll feel when you finally get it right are truly worth it.
So, there you have it. If you were wondering, “What tools do I need for wood burning?”—now you know. Whether you’re just starting or looking to upgrade your gear, the right tools can make all the difference in the world. Happy burning!