I create stunning wood-burning patterns by blending classic methods with modern artistry. Each design tells a different story through varied strokes, shading, and texture on wooden surfaces. Practice with simple shapes develops into more advanced artwork like detailed wildlife scenes and intricate mandalas.
Key Takeaways
- Geometric patterns provide an excellent foundation for beginners while offering room for advanced complexity.
- Nature-inspired designs like leaves and flowers are forgiving for newcomers and help develop essential shading skills.
- Sacred patterns such as mandalas and Celtic knots require precise measuring but create deeply meaningful artwork.
- Wildlife and pet portraits demand mastery of different texturing techniques for fur, feathers, and scales.
- Cultural and fantasy-inspired designs allow artists to tell stories through symbolic patterns and creative expression.
Stunning Geometric Patterns for Modern Wood Art
Creating Clean Lines and Shapes
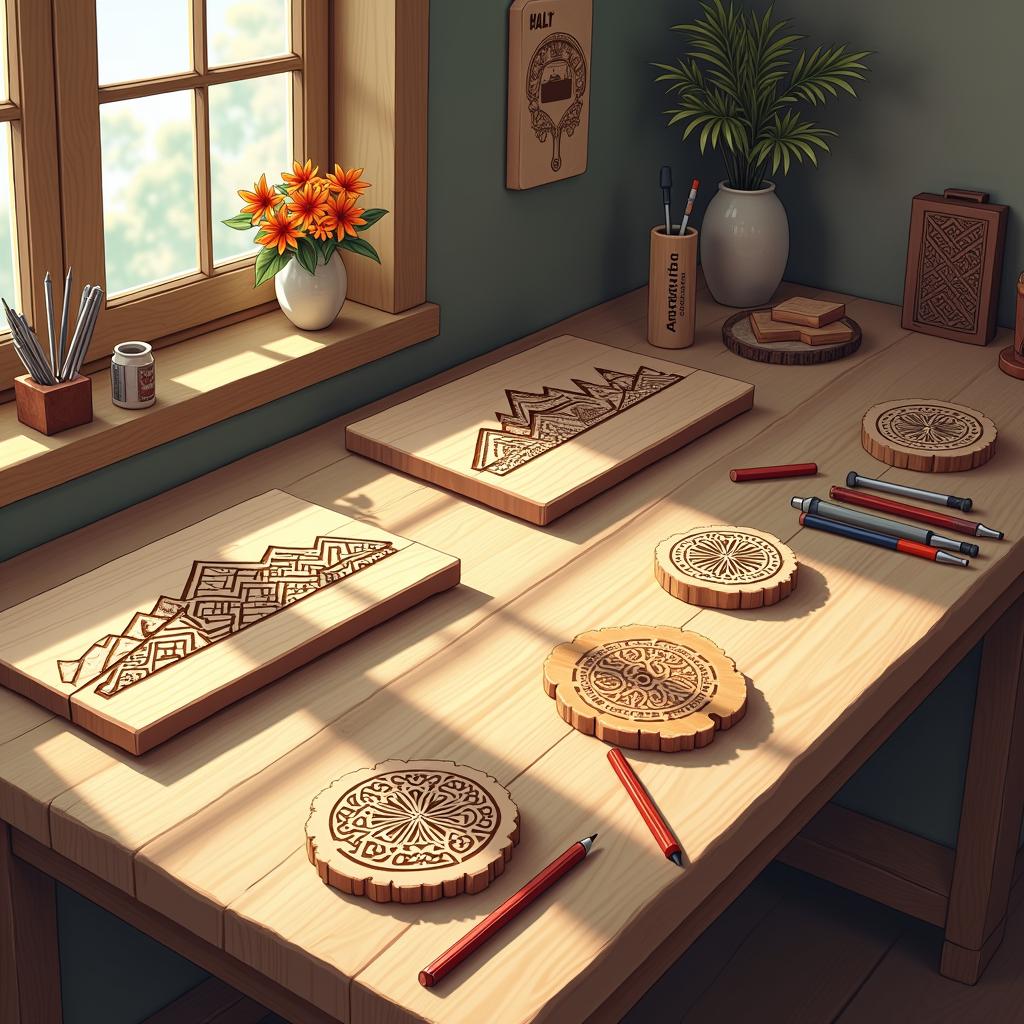
Geometric patterns have become my go-to choice for adding a modern touch to wood burning projects. I’ve found that simple geometric patterns can create stunning visual impact through careful attention to symmetry and repetition. According to Woodworker’s Journal, 35% of woodworkers prefer geometric patterns, making them a popular choice for contemporary pieces.
Clean lines form the foundation of geometric wood burning. I start by marking my design using rulers, protractors, and compasses to ensure perfect angles and curves. This precision lets me create intricate tessellations and repeating patterns that catch the eye. The key is maintaining consistent spacing and angles throughout the design.
Adding Depth and Dimension
I’ve discovered that varying burn depths and line widths transforms flat geometric patterns into dynamic artwork. By adjusting the pressure and temperature of my pyrography pen, I can create subtle gradients and shadows that make shapes pop off the surface.
Here are my favorite geometric pattern styles to try:
- Triangle tessellations with alternating burn depths
- Concentric circles with graduating line weights
- Hexagonal honeycomb patterns with shadow effects
- Intersecting straight lines creating optical illusions
- Mandala-inspired designs combining curves and angles
- Square grids with varied internal patterns
- Diamond repeat patterns using parallel lines
- Spiral geometrics with increasing spaces
- Abstract compositions of basic shapes
- Minimalist single-line geometric forms
These patterns work brilliantly on both small decorative items and larger statement pieces. I’ve found that focusing on precision in geometric burning helps develop steady hand control and consistent burn techniques that improve all my pyrography work.
The beauty of geometric patterns lies in their versatility. I can scale them up or down, repeat them in different configurations, and combine multiple patterns to create unique compositions. Starting with basic shapes and gradually adding complexity helps build confidence in creating these striking modern designs.
Nature-Inspired Designs: From Simple to Spectacular
Essential Transfer and Pattern Techniques
My favorite way to start nature-inspired pyrography involves using carbon paper to transfer designs onto wood. This simple method lets you focus on burning technique rather than drawing skills. Basic wood burning patterns like oak and maple leaves make perfect starter projects, as their natural vein patterns create stunning results with minimal complexity.
Starting with leaves helps develop crucial shading skills through their organic lines and textures. I’ve found that adding depth and texture to wood burning patterns comes naturally when practicing with nature’s templates. The varied lines in leaf veins offer built-in guidance for creating dimension.
Here are my go-to nature patterns for beginners:
- Oak leaves with bold central veins
- Maple leaves featuring branching patterns
- Simple sunflower outlines with textured centers
- Basic rose designs focusing on petal layers
- Tree silhouettes with a crescent moon backdrop
These natural motifs have stood the test of time – floral patterns were particularly popular in 15th Century European wood carvings, showing their enduring appeal. I’ve discovered that realistic wood burning techniques like stippling and gradient shading can transform these simple patterns into spectacular artwork.
For realistic texture in flower centers or tree bark, stippling creates amazing depth. The technique involves making tiny dots close together or spread apart to create shadows and highlights. I start with light pressure and gradually build up darker areas, letting the natural wood grain enhance the organic feel of each piece.
Popular pyrography patterns often feature nature themes because they’re forgiving for beginners while offering room for artistic growth. The organic shapes mean slight imperfections can add character rather than detract from the design.

Sacred Circles: Creating Meaningful Mandalas and Celtic Designs
Creating circular patterns through wood burning lets me tap into ancient artistic traditions while producing stunning decorative pieces. The process starts at the heart of the design – quite literally – as I work outward from a central point to build intricate mandala patterns with deep spiritual meaning.
Building Mandalas Layer by Layer
The key to crafting perfect mandalas lies in careful planning and symmetry. I start by marking the center point and using a compass to draw concentric circles that will guide my burning. These circles serve as the foundation for detailed patterns that radiate outward. Each layer adds depth and meaning, drawing inspiration from Hindu and Buddhist traditions where mandalas represent the universe and cosmic harmony.
Recent studies from the Journal of Art Therapy indicate that creating symmetrical art patterns can significantly reduce stress levels and promote mindfulness. That’s why I recommend adding texture and depth to your mandala designs through:
- Varied line weights to create visual hierarchy
- Dotwork shading for dimensional effects
- Repeating geometric patterns
- Nature-inspired elements like petals and leaves
- Sacred symbols meaningful to your practice
Celtic Knot Techniques and Border Patterns
Celtic knots bring a different kind of sacred geometry to wood burning projects. These popular wood burning patterns feature continuous lines that weave over and under each other in endless loops. I’ve found that successful Celtic designs depend on precise spacing and consistent line width.
My go-to method involves creating a grid system first. This helps maintain even spacing between the weaving lines. I use a pencil to sketch the basic pattern before burning, making sure crossing points alternate between over and under consistently. The trick is to burn slowly and steadily, maintaining consistent temperature and pressure to achieve clean lines that look like they’re actually woven through each other.
Traditional Celtic borders often incorporate key elements like triquetras (three-pointed knots) and quaternary knots (four-pointed designs). These can be combined with mandala patterns to create pieces that blend different sacred traditions. I typically use a shader tip for filling larger areas and a fine point for the detailed line work that makes these designs pop.
The math behind these patterns isn’t as scary as it might seem. By dividing your circle into equal sections (usually multiples of 4 or 8 for mandalas, or 3 for Celtic designs), you can create a framework that guides your burning process. A protractor and ruler are essential tools for laying out these precise measurements.
When burning Celtic knots or mandalas, I’ve learned to pace myself and take breaks. This helps maintain steady hands for those crucial straight lines and perfect curves. The end result should be a harmonious blend of technical precision and spiritual expression.
Wildlife and Pet Portraits in Wood
Creating Lifelike Animal Textures
I’ve found that mastering animal portraits starts with a solid grasp of texture techniques. Realistic wood burning techniques make the difference between a flat drawing and a piece that captures your subject’s spirit. Carbon paper transfer lets me position the image perfectly on the wood surface, setting a strong foundation for the detailed work ahead.
Different animals need different approaches. For fur textures, I use light, directional strokes that follow the natural growth pattern. Feathers require varied pressure and curved lines to capture their delicate structure. When burning scales, precise geometric patterns with clean edges create that distinctive reptilian look. Adding depth and texture to your patterns brings these creatures to life.
From Simple to Detailed Portraits
Starting with silhouettes helps build confidence before tackling detailed portraits. Here’s what I focus on when creating animal portraits:
- Use reference photos to study your subject’s unique features
- Start with basic shapes and build layers of detail
- Pay attention to the direction of fur or feather growth
- Create contrast between light and dark areas
- Add highlights in the eyes for that spark of life
With pets in 67% of U.S. households according to APPA data, custom pet portraits have become incredibly popular. Common pyrography patterns often feature wildlife subjects like owls, wolves, deer, and various bird species. These subjects offer great practice for different texturing techniques while creating meaningful artwork.
I’ve noticed that specific wood burning designs carry deep symbolism, particularly in wildlife art. Each animal can represent different qualities – owls for wisdom, wolves for loyalty, deer for gentleness. This symbolic connection makes wildlife portraits even more special for both artist and recipient.
The key to success lies in patience and layering. I start with the basic shape and major features, then gradually build up the details. Wood burning patterns for beginners often include simple animal silhouettes, which serve as excellent practice for understanding form and shadow. As skills improve, adding intricate details like individual fur strands or feather barbs creates stunning realism.
Through consistent practice with these techniques, I’ve seen dramatic improvements in my wildlife portraits. Each piece becomes an opportunity to capture not just the physical appearance, but the character and spirit of these amazing creatures. Personalizing items with wood burning designs of beloved pets or wildlife creates unique, meaningful gifts that people treasure.
Cultural Heritage Through Wood Burning
Ancient Designs for Modern Expression
Traditional tribal patterns offer a rich source of inspiration for wood burning projects. I’ve found that ancient symbols and cultural motifs tell powerful stories through simple geometric shapes and bold lines.
Native American designs feature strong symmetrical patterns that often represent natural elements like mountains, rivers, and wildlife. These patterns typically incorporate triangles, zigzags, and arrow shapes—each carrying specific meaning within different tribes. According to Patterns of Culture by Ruth Benedict, these geometric forms served as a vital communication system among indigenous peoples.
African tribal art brings dynamic circular patterns and repeating lines that pulse with rhythm and movement. I’ve learned to appreciate how these designs often symbolize:
- Life cycles and seasonal changes
- Community connections and family bonds
- Spirit animals and protective symbols
- Natural phenomena like rain, sun, and wind
Polynesian wood burning patterns showcase flowing curves and intricate repetitions that mirror ocean waves and island life. Through specific burning techniques, these designs can capture the fluid grace of traditional tattoo art and maritime symbols.
Creating authentic cultural designs requires careful study and respect for their origins. I recommend starting with basic geometric shapes found in traditional pyrography patterns before advancing to more complex cultural motifs. The key lies in understanding that each line and symbol carries deep meaning within its original context.
These cultural patterns work exceptionally well for:
- Decorative boxes and containers
- Wall hangings and display pieces
- Personal items like jewelry boxes
- Ceremonial objects and gifts
The bold lines and strong contrasts in tribal designs make them ideal for beginners while still challenging experienced pyrographers. By practicing texture and depth techniques, you can bring authentic dimension to these timeless patterns.

Fantasy and Celestial Inspirations
Creating Cosmic Art Through Wood Burning
Celestial patterns offer a perfect starting point for adding mystical elements to your pyrography projects. I’ve found that incorporating various textures and depths can transform simple star patterns into breathtaking cosmic scenes. The key to creating stunning celestial designs lies in layering different burning techniques. Stars can be brought to life through precise stippling – tiny dots burned at varying intensities to create depth and dimension.
Here are my favorite celestial elements to incorporate:
- Crescent moons with detailed surface textures
- Flowing constellation patterns connected by thin lines
- Planet designs with rings and surface details
- Nebula effects using gradient shading
- Shooting stars with trailing light effects
Bringing Fantasy Elements to Life
Fantasy designs let your creativity soar beyond traditional boundaries. I’ve discovered that realistic wood burning techniques can make dragons appear to leap off the wood surface. By combining different pressure levels and tip temperatures, scales gain texture while wings catch imaginary light. Mythical creatures gain personality through careful attention to facial features and body positioning.
Metallic accents can elevate your fantasy pieces to new heights. I like to add small touches of gold or silver leaf to highlight specific areas – a dragon’s eye, a unicorn’s horn, or the windows of a distant castle. These subtle additions catch light and create movement within the piece.
Understanding symbolic elements helps create deeper meaning in fantasy scenes. Each creature or celestial body can represent different aspects of mythology and storytelling. While imagination drives these designs, I recommend keeping reference images handy for accurate proportions and details. This ensures your magical creatures maintain believable anatomy even in fantastic poses.
For intricate fantasy scenes, I start with lighter outlines before committing to deeper burns. This approach allows for adjustments while building up the complexity of magical landscapes, ensuring each element flows naturally into the next. The result is a piece that tells a story while showcasing your pyrography skills.

Sources:
Woodworker’s Journal
American Pet Products Association
Patterns of Culture by Ruth Benedict